Track Changes is one of the best tools for editing Word documents and collaborating with others, but using it can get complicated and messy. If you’re new to this feature on Microsoft Word or can’t stand the red markings and strange settings, don’t give up on Track Changes yet.
Once you understand how the different components work, the feature is easier to use. You can customize the feature to come up with a tidier system when revising a document or reviewing someone else’s edits. Here are some ideas.
1. Show Revisions in Balloons
Track Changes isn't just an on-off toggle. Once you learn the basics of using MS Word’s Track Changes, you can explore its features and customize your user experience even more.
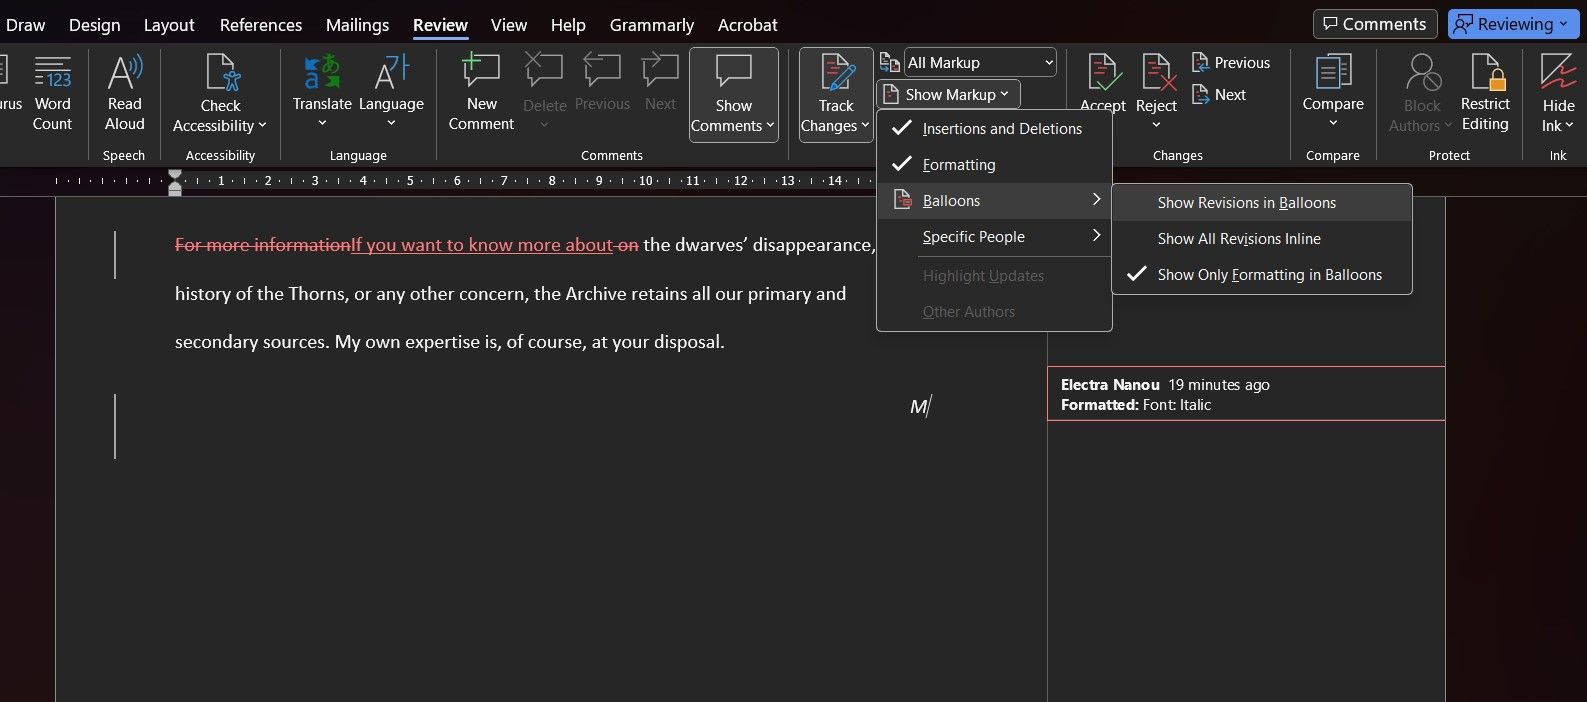
One of the main components you can change is the markup display. When you go to Review > Show Markup > Balloons, you have three options:
- Show Revisions in Balloons
- Show All Revisions Inline
- Show Only Formatting in Balloons
Track Changes uses inline revisions by default, meaning scratching out deleted words and inserting your edits in the body of the text itself. A few such revisions are manageable, but a whole book of them can be an eyesore. Also, this setting doesn’t highlight formatting—trying to find these edits is a hassle.
Using balloons for formatting only is a step up from inline revisions. Deletions and insertions still appear in the main body, but any format changes are listed in balloons in a panel to the right of the text.
If inline editing isn't your preference at all, switch to revisions in balloons. You can then delete, insert, and format all you want, and a list of your changes will appear in the right-hand panel. There’s still red, but your edits are much tidier and easy to manage.
2. Use No or Simple Markup to Avoid Distractions
Depending on your editing style, you might prefer to read through a document first before tweaking it to get a sense of its flow, readability, and potential gaps. Filling the text with markings from the get-go can be counterproductive.
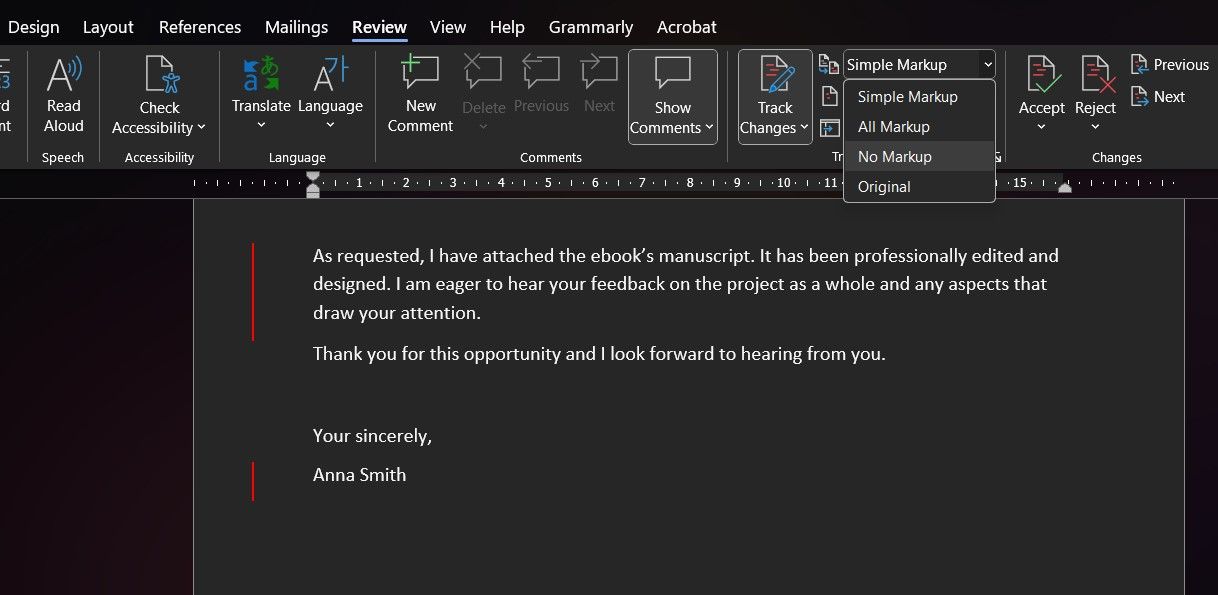
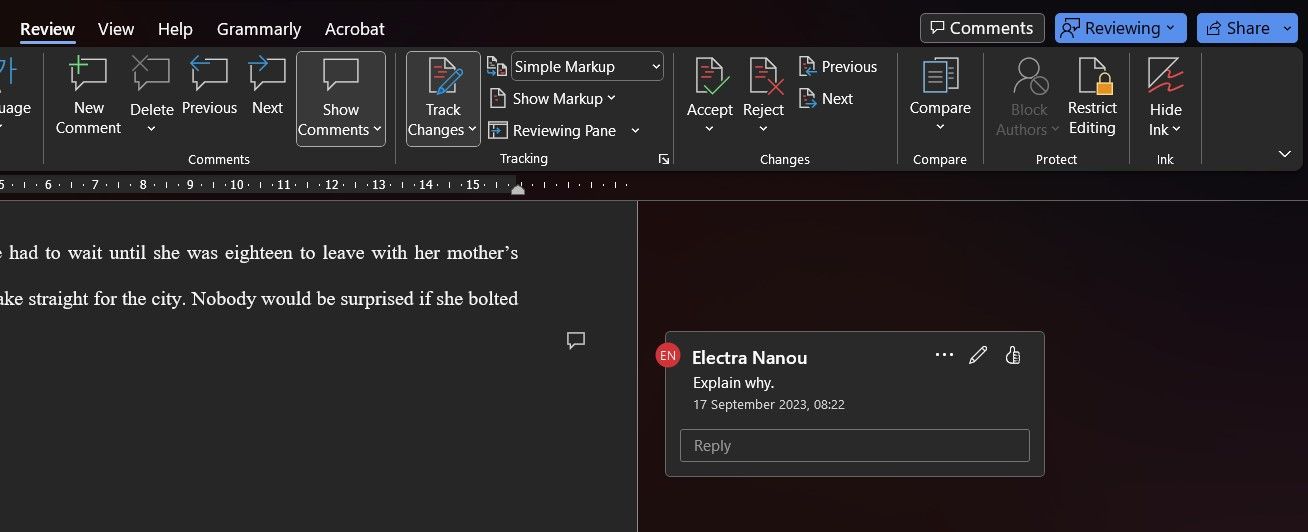
Track Changes offers two solutions in the Display for Review dropdown menu. Simple Markup hides balloons and inline revisions and only displays vertical red lines to show where changes have been made. Click any of these lines to quickly reveal edits. Click again to hide them.
No Markup removes the vertical lines, too. You can read and edit in peace until you choose otherwise. Working with either of these settings ensures a clear document with minimal distractions. If you’re working with a team, establish the best ways to collaborate in real-time on Word, and set down Track Changes rules so that everyone can work comfortably.
3. Use All Markup or Original Sparingly
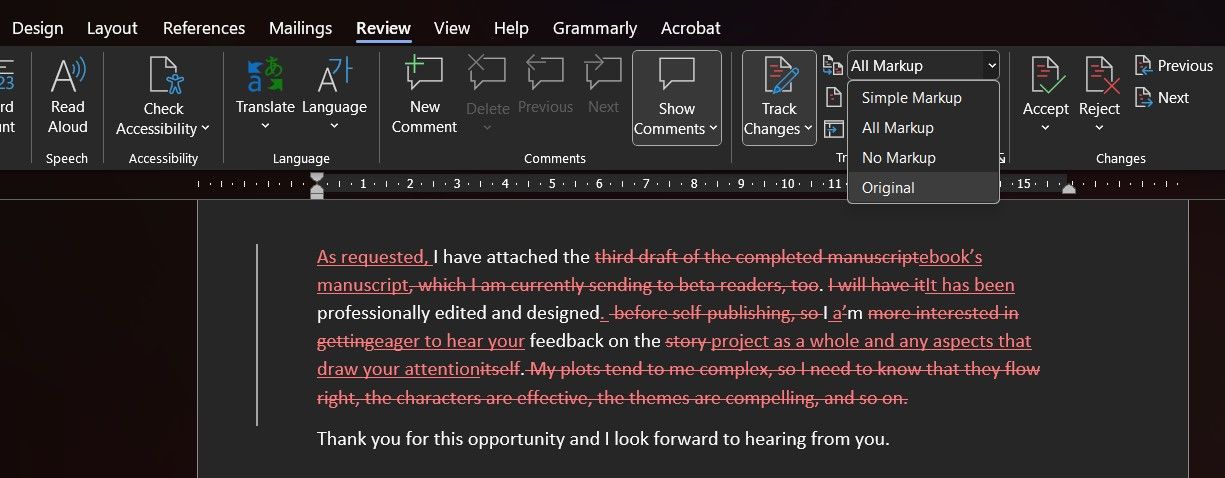
You don't have to display a Word document's full markup unless you specifically want to review a certain revision or integrate the changes.
Looking at the original text is even less necessary. You can look at the original text to briefly compare the two versions, for example, in terms of style or length, but that’s about it. So, you don’t have to activate either of these settings until you actually need them. This can help minimize your frustration with Track Changes.
4. Personalize the Colors and Markings
When multiple users work on a Word document and make changes, the Track Changes feature highlights their edits in different colors. The most jarring problem with Track Changes is often the default red color of its markings, especially when it dominates texts with lots of revisions.
The good news is that you can change this color. In fact, you can color code every document you work on.
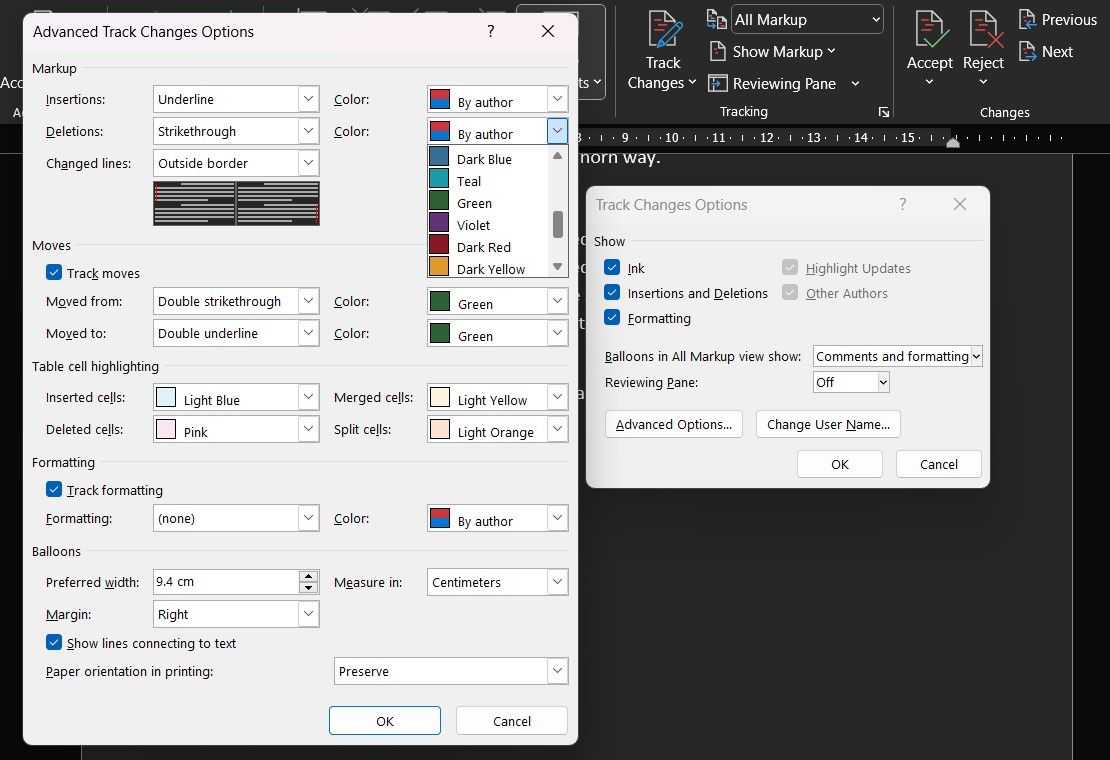
In the Tracking section, click the Change Tracking Options arrow. You will see some basic settings that you can modify, but to access more options, click Advanced Options. This will open a window offering more ways to make Track Changes your own.
You can choose better colors for insertions, deletions, formatting, and more. You can even change how each function is marked, ranging from bold to double strikethrough and symbols. Additionally, you can even adjust the appearance of balloons. Take inspiration from productivity apps with effective color coding or just choose colors that are easy on the eyes when using Track Changes.
5. Be Strategic and Consistent With Your Comments
Leaving comments is the next best way to give feedback on Microsoft Word besides Track Changes. However, overusing comments can make the editing and reading experience just as overwhelming.
What makes using comments alongside Track Changes easier is to decide beforehand how you’re going to use each feature. When it comes to comments, you can reserve them for questions to the author or ideas for improving the text—things you can't say through Track Changes without adding more red.
Additionally, it's best to highlight only the words that relate to your comments, not whole paragraphs. You could even place your comments at the start or end of chapters only.
6. Toggle How Comments Should Appear
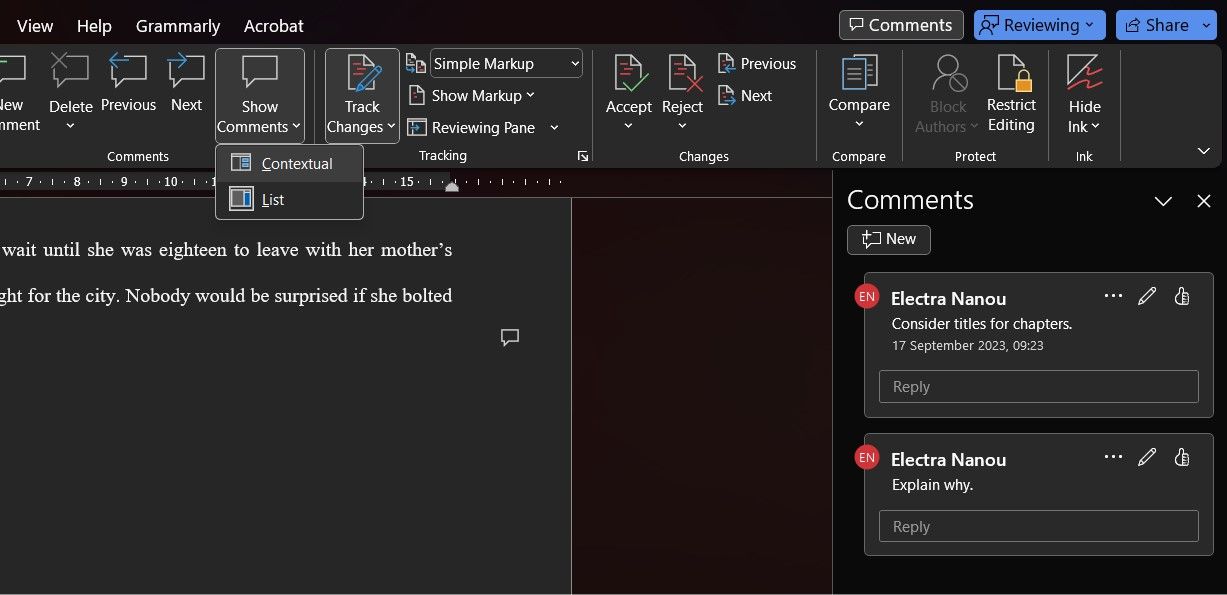
If you're struggling with a document that's overloaded with notes and comments, try exploring the options available in the Show Comments dropdown menu. This feature can help you to organize comments in a way that makes sense to you, whether you're reading or editing the text.
Alternatively, if the document you’re revising is small, but you have a lot to say, consider going to a blank page at the start or end of the document and listing the feedback you would’ve put in comments there. You could do this for individual chapters, too. The comments tool is more practical, but you're free to use it as and when you want it.
Don’t hesitate to get creative with the features at your disposal, like adding Microsoft Word’s line numbers to the text and then referencing specific lines in your feedback. Take the time to learn everything this word processing software has to offer, and adapt each Track Changes job accordingly.
7. Accept or Reject Groups of Revisions
As a writer reviewing an editor's revisions, it's important to carefully consider most changes, even when making your own edits.
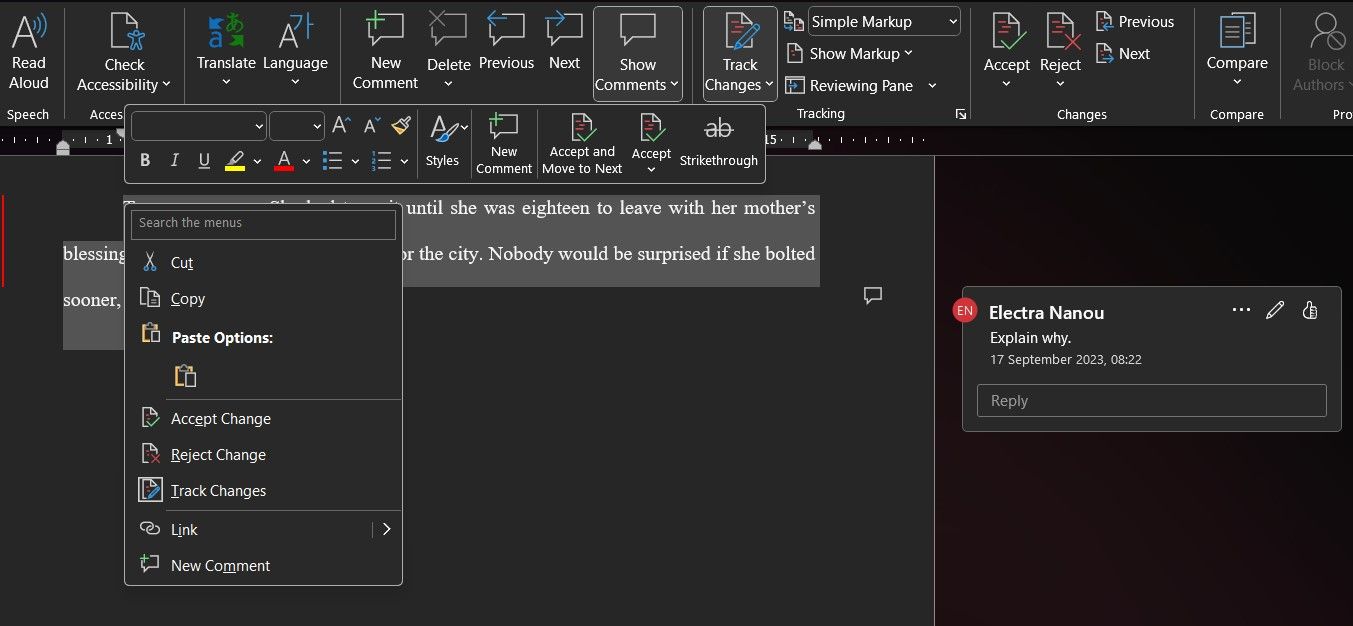
However, when it comes to minor corrections such as formatting or spelling corrections, there’s a faster way to integrate the changes or get rid of them. Just select the whole paragraph, right-click it, and go for either Accept Change or Reject Change. Your choice will affect all the revisions in that paragraph.
You can go further still and integrate the whole document’s revisions. To do this, after right-clicking the highlighted paragraph, select the downward arrow under Accept in the toolbar and then Accept All Changes. Right below that you have the option to automatically stop Track Changes, too.
8. Adjust Your Reviewing Pane
As previously mentioned, you can utilize anything that will improve your user experience with Track Changes, including productivity add-ins for Microsoft Word. However, even simply rearranging the layout of your digital workspace can benefit your workflow.
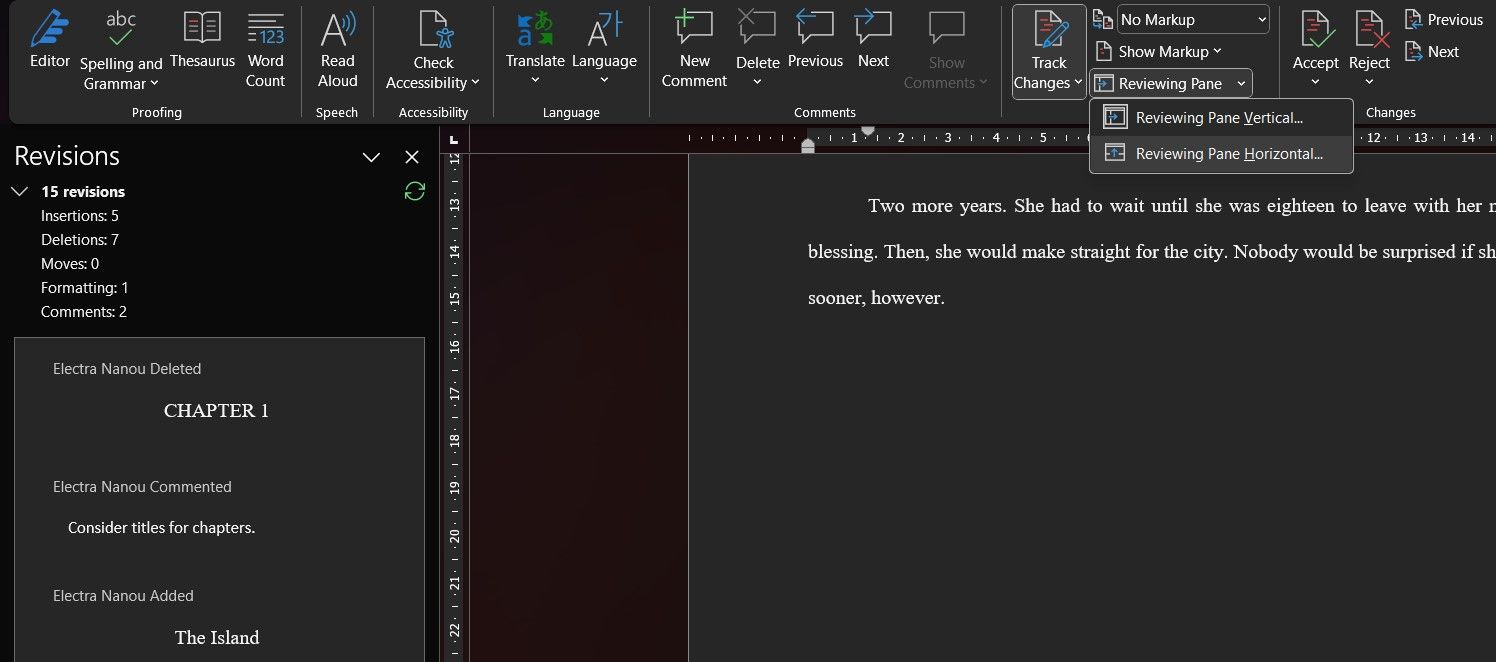
The reviewing pane on Track Changes is another way to see all revisions without them cluttering your screen. You can edit a document with no markup and let the pane generate a simple list of changes. By clicking the arrow next to Reviewing Pane, you can switch it from a vertical to a horizontal position and back again.
Make Track Changes Work for You
It may seem complex at first glance, but Microsoft’s Track Changes program is actually very simple and useful once you learn the ins and outs. Whether you’re making or receiving edits, set your Track Changes preferences before you start working to make things easier. Organize how markings, comments, and your reviewing pane should look in and around your text.
Using Track Changes on Microsoft Word is easier once you create a layout and color scheme that motivates you instead of overstimulating you.


