Perspective changes your viewpoint. It's often used in photography to make flat images interesting and give them a three-dimensional touch. Photoshop has a special tool called Perspective Warp that allows you to shift the angles of objects, straighten them if necessary, or warp them to create depth.
This article will show you how to use the Perspective Warp tool in Photoshop.
What Is Perspective Warp?
Our eyes see images differently in the real world than the camera lens. The focal length of a camera (especially a wide-angle lens) can distort objects in a frame and make them appear smaller or larger depending on their distance from the camera. The near objects can appear larger, while the farther ones appear smaller, irrespective of their actual size. This phenomenon is called perspective distortion.
Perspective warp can manipulate these distortions in artistic ways. In Photoshop, you can drag the corners of an object in the frame and change the angles. This "warping" can sometimes make an image look more natural. In others, you can create artificial depth by distorting the image deliberately.
In short, Photoshop's Perspective Warp tool allows you to manipulate the viewpoint of an image and how you are looking at it.
How to Use Perspective Warp to Change the Angle of an Image
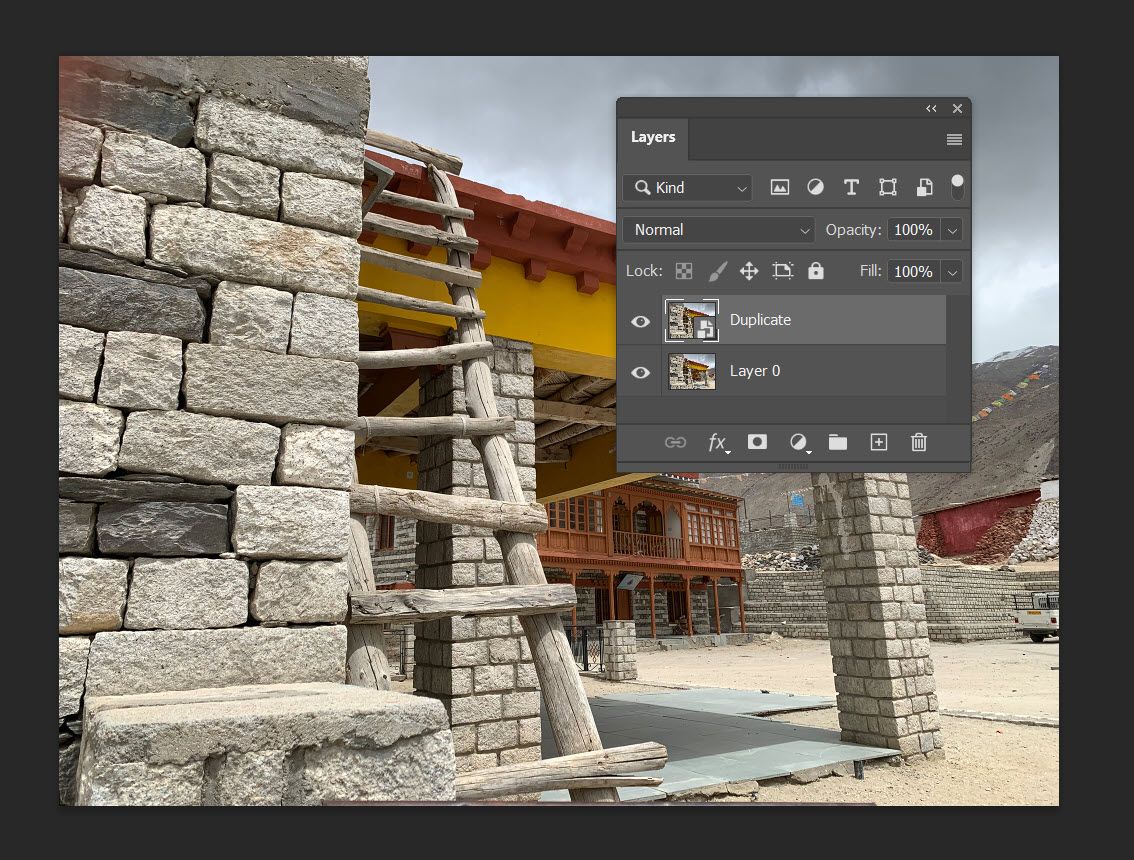
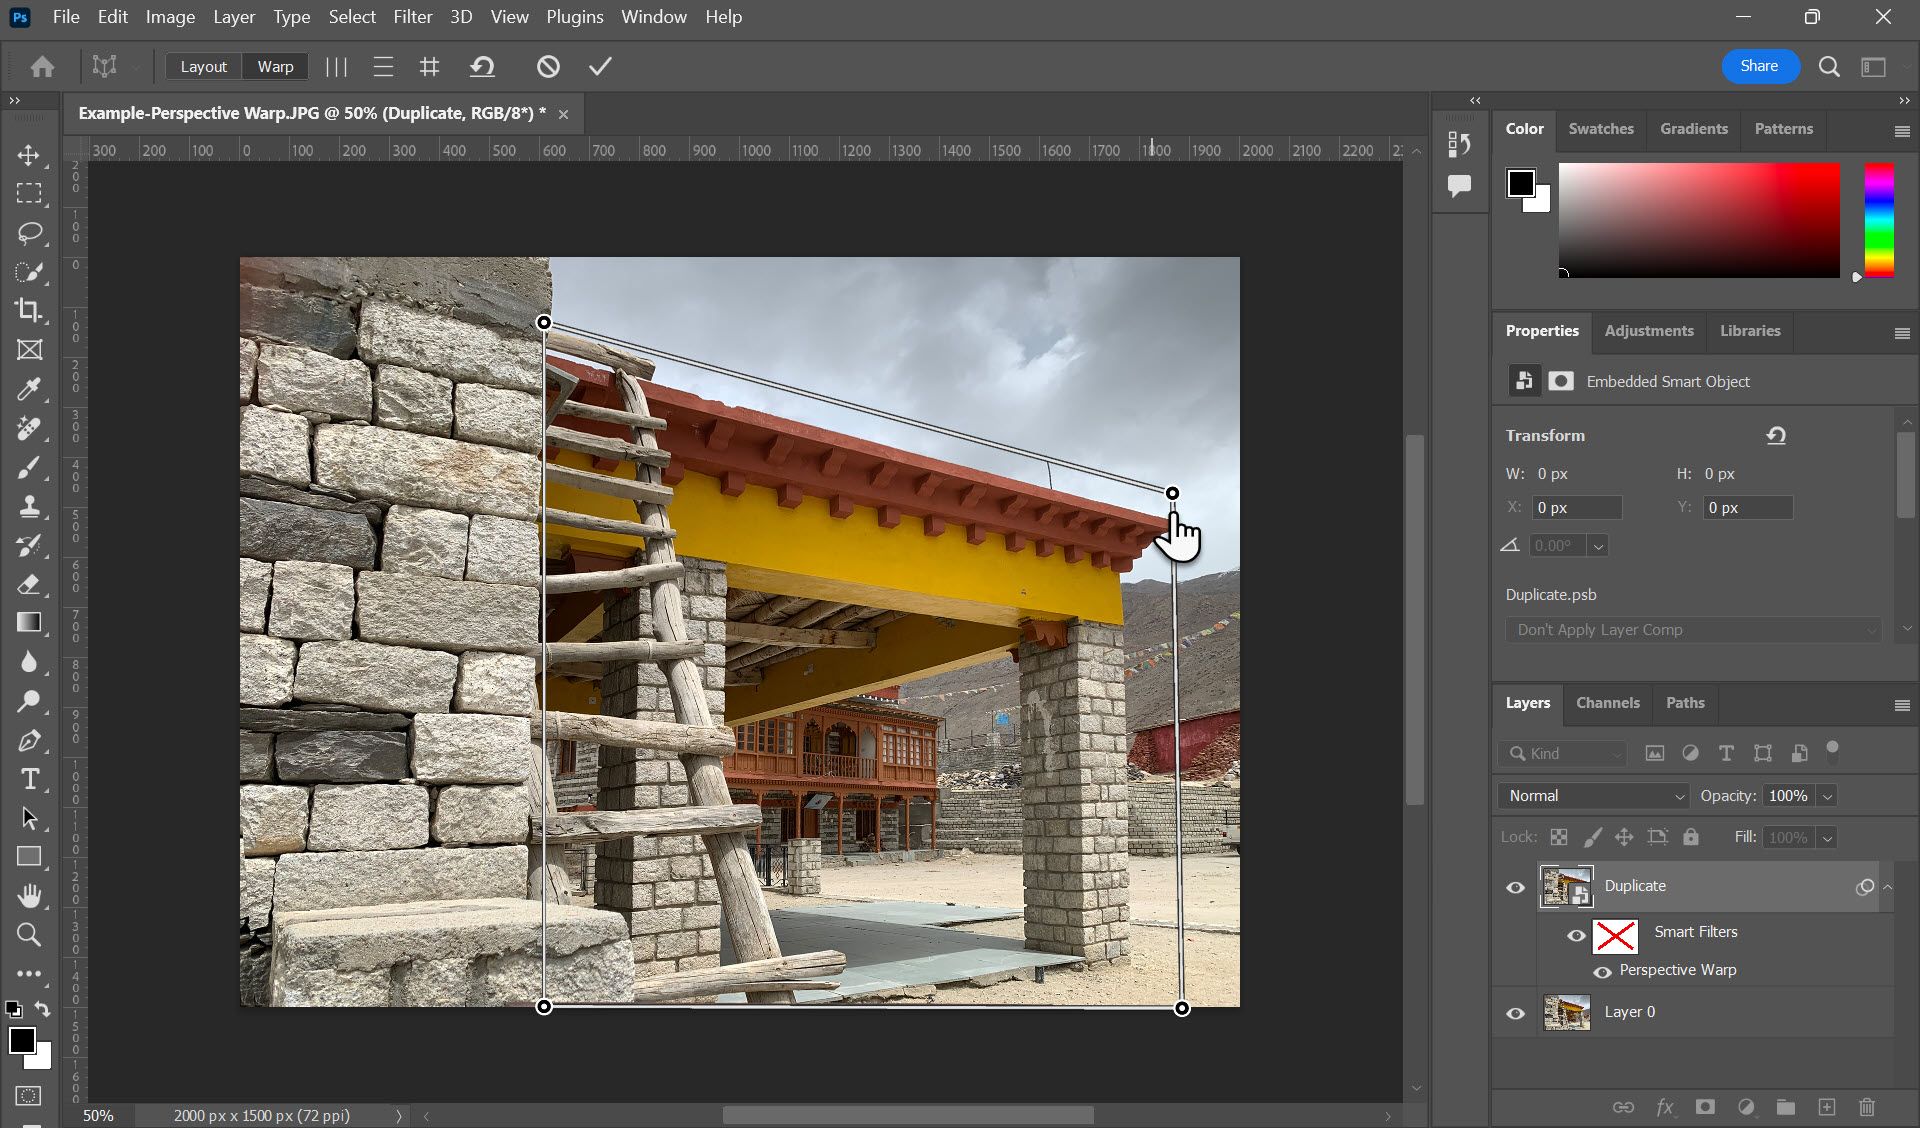
Let's walk through the Perspective Warp feature with an initial image (below). Look at the stone pillar of the building on the right and then use the steps below to straighten the image and visually align the objects.
Step 1: Open and prepare the image
Open the image you want to edit in Photoshop. Select the layer you want to adjust. You should create a copy of the layer so that any edits do not affect the original layer. Select Layer > Duplicate Layer from the menu bar or drag the layer to the Layers icon (+) on the Layers palette. Now, convert the image to a Smart Object for non-destructive editing.
Tip: A duplicate layer also helps you see the before and after state of your photo.
Step 2: Select Perspective Warp
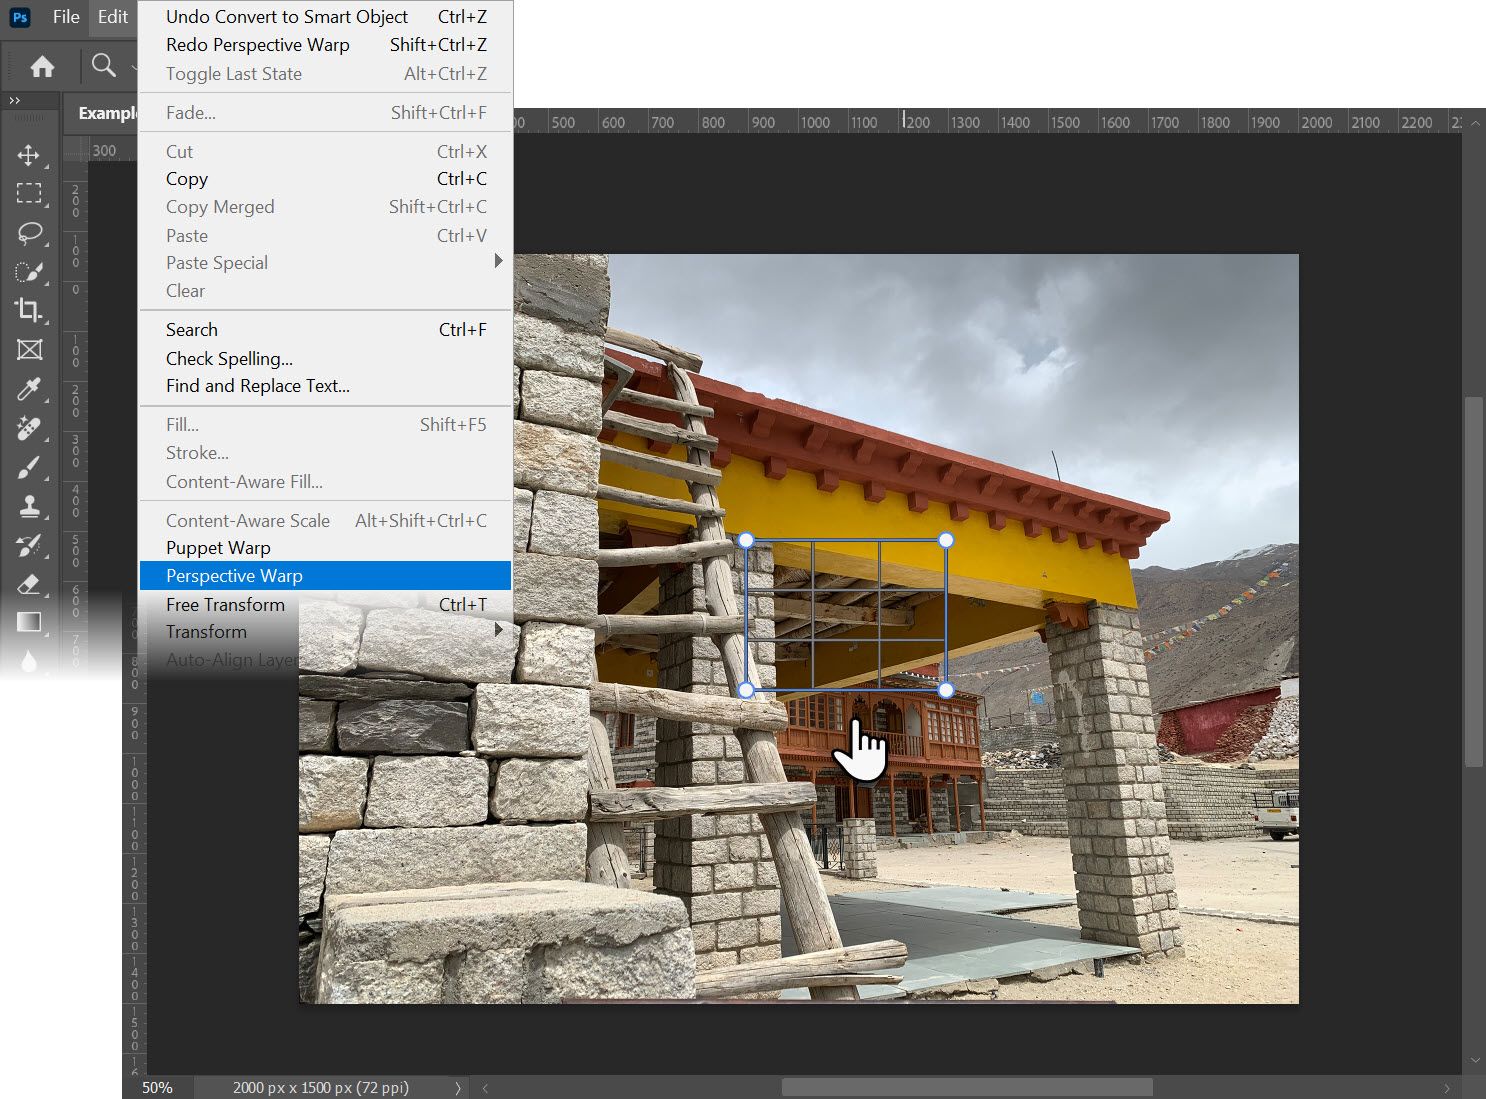
Go to the menu and select Edit > Perspective Warp, and click once on the canvas. Photoshop shows you how the feature works with an alert message and places a rectangular grid (also called a Quad) on the canvas, which won't fit your object yet. Once you drag and position it, the perspective grid will help you manipulate the angles of an object.
Align the quad on the object you want to distort with the help of the corner pins and the outside borders. Nudge them till the grid covers the object exactly how you want it. You can even go outside the canvas to cover the object with the grid.
Tip: Select any pin and use the arrow keys to finetune their placement.
Step 3: Apply the Perspective Warp
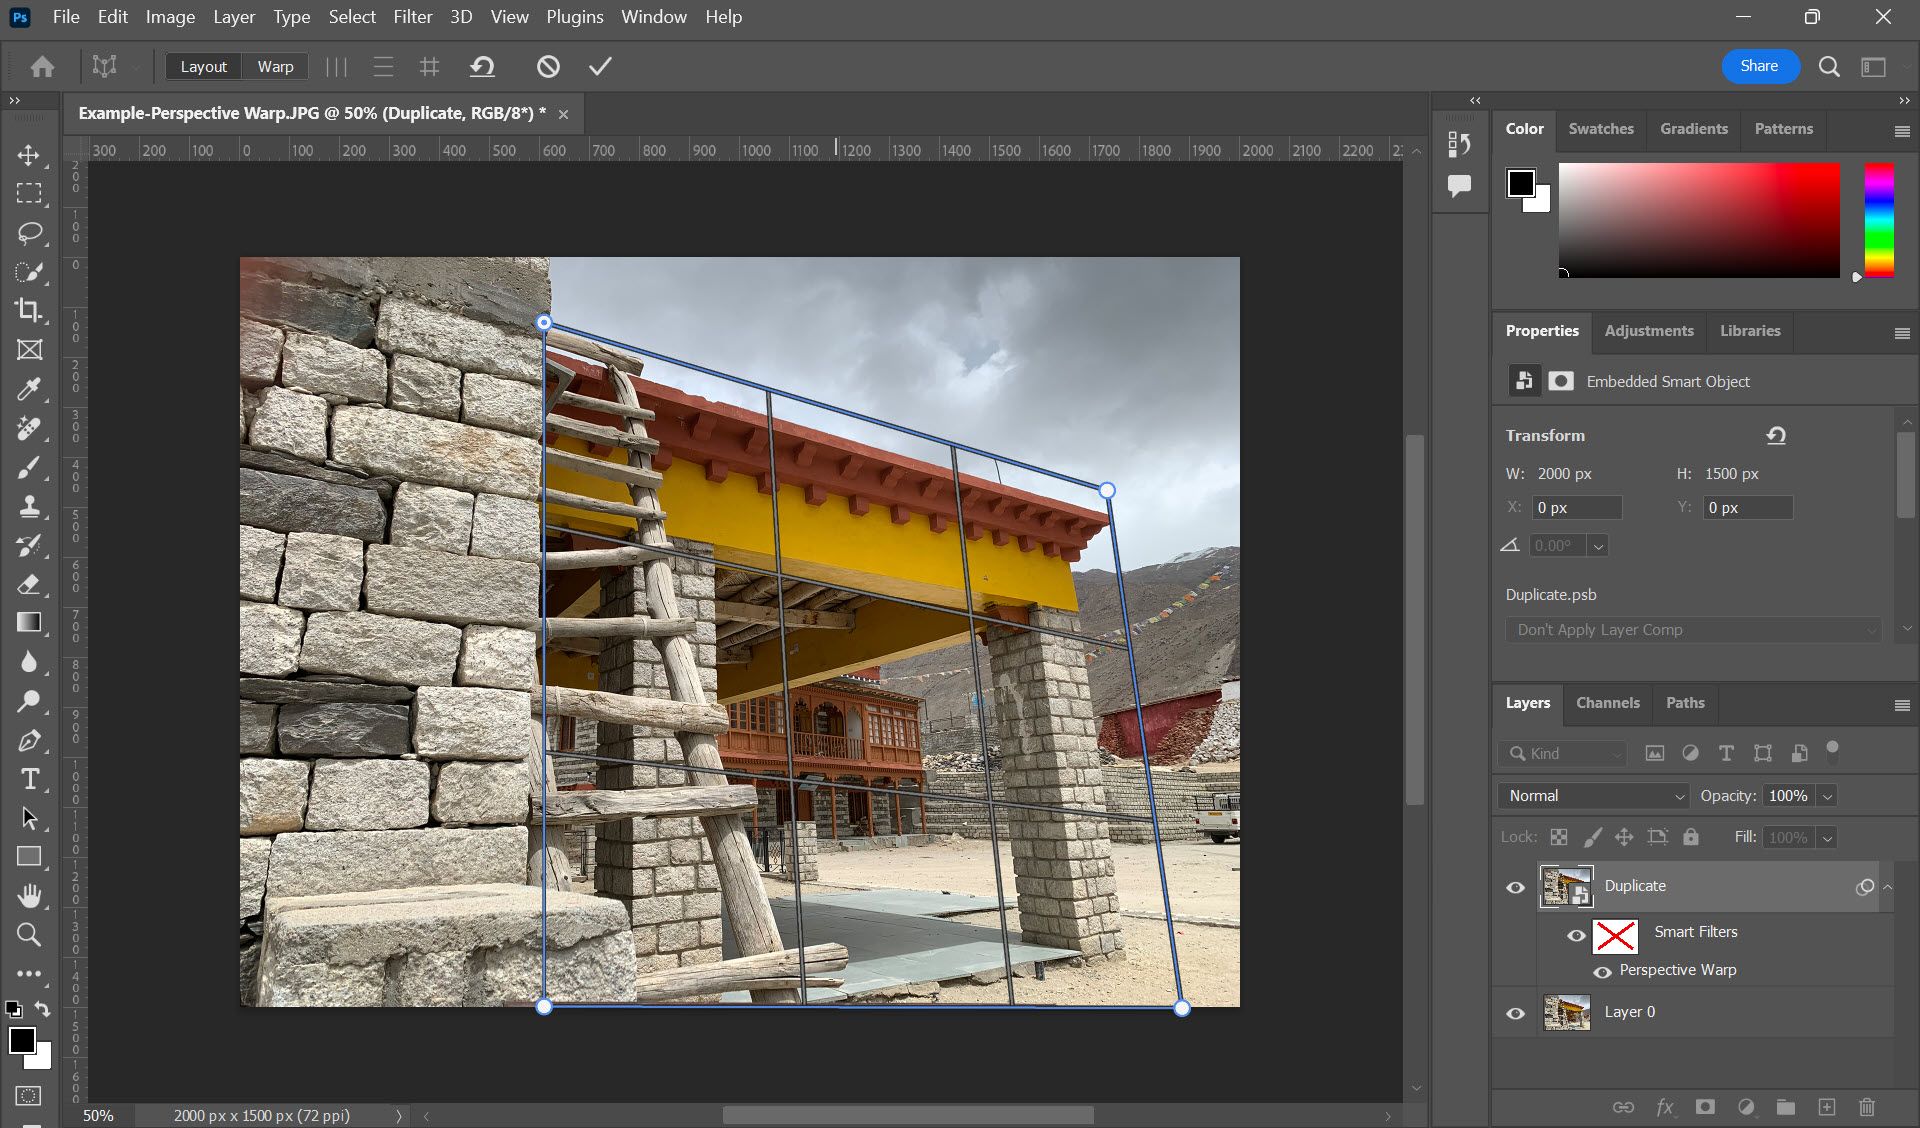
Click the Warp button to switch from Layout to Warp once you have precisely aligned the grid over your object. Alternatively, use the keyboard shortcut W.
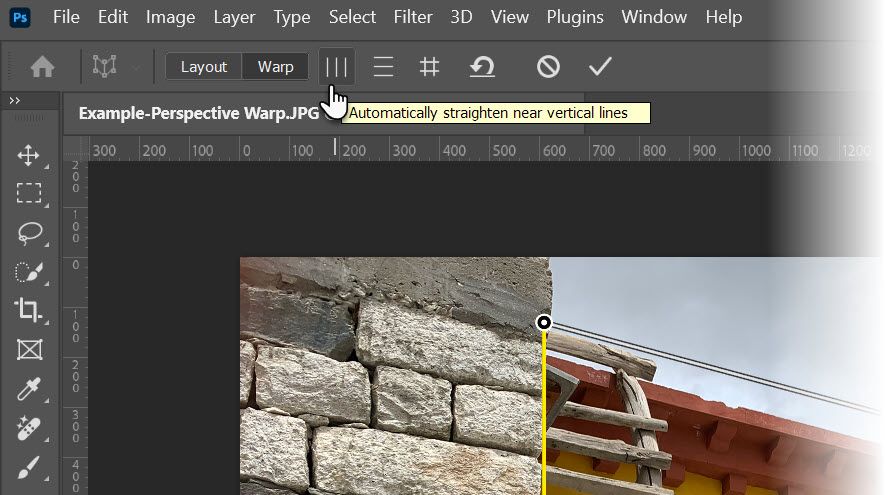
Perspective Warp offers three automatic leveling options to help you align the object along the vertical or horizontal planes. Experiment and see if they work for your image. Select Remove warp (the anti-clockwise arrow) if they don't, and warp it manually with the pins instead.
Adjust the perspective you want by nudging the independent pins on the grid.
Tip: You can lock one or more warp edges by pressing Shift and selecting the line. The line will turn yellow and will stay in place exactly horizontally or vertically while you move the other corners.
Press Enter to apply the changes. The result gives you a distortion-free image from another angle, as shown below.
Step 4: Finishing Touches for a Perfect Image
Perspective warp can create vacant areas around the corners of the image. Applying the warp to only one part of the image can cause distortion as the other part remains un-warped.
Apply finishing touches like cropping the image or using Photoshop's generative fill to cover the gaps if necessary.
Tips and Tricks for Using Perspective Warp in Photoshop
Here are a few tips to use the Perspective Warp tool in Photoshop.
- Use the lines within the perspective grid to align them with objects like windows and doors in the image. Move and zoom into the image if necessary.
- Take the help of the Ruler and Guides in Photoshop to align vertical or horizontal elements within the image precisely.
- You can draw multiple grids on the same image—for instance, to cover more than one side of a building or an object. You can also keep them separate to adjust different parts of an image or join them. The grids get thicker and snap to one another when you bring them close.
- The Transform Warp tool allows you to warp an image in multiple ways, but it's more challenging to get right. Use Perspective Warp to straighten, align, or change the perspective of objects with straight lines and flat surfaces.
- Use subtly. Often, less can be more to create the right effect.
A Few Use Cases of Perspective Warp
Aside from correcting photos for perspective distortion, there are many ways to experiment with perspective warps creatively.
Composite images: Use the tool when you combine two or more objects in one photo to match the overall perspective of the frame. Example: A car going down a street.
Change Focal Lengths: Drag and warp corners of a landscape photo to make it appear like a wide-angle shot. Alternatively, make tilt-shift photos when you don't have a tilt-shift lens.
Mockup Images: Inserting typography or a logo on a 3D product mockup? Use the Perspective Warp tool to align them and add to the 3D effect.
Beautiful Collages: Warp each image seamlessly into others and create eye-catching collages.
Add Depth to Flat Photos: Get familiar with vanishing points and use them to apply a perspective warp to flat photos. Photoshop also has a Vanishing Point filter for perfect perspective edits.
Think Visually Before You Warp
To imagine the utility of perspective, think of yourself as a photographer. After taking the first photograph, you walk a few steps to the side and take another shot. Both pictures are from two different viewpoints or two perspectives. Photoshop's Perspective Warp allows you to do this within the software. It uses complex algorithms to decide what a photographer would have seen from different vantage spots.

