The base 64GB version of the Steam Deck might be cheap, but game load times are longer and it can't fit modern games. Although running games off a microSD card is possible, the tiny flash storage devices are significantly slower than SSDs while costing nearly as much.
It’s smarter to purchase the base Steam Deck variant and upgrade the slow eMMC storage with a faster SSD. The repair-friendly nature of the Steam Deck makes this quite convenient too. Read on to find out how to install an SSD on your Steam Deck.
Which SSD Should I Buy?
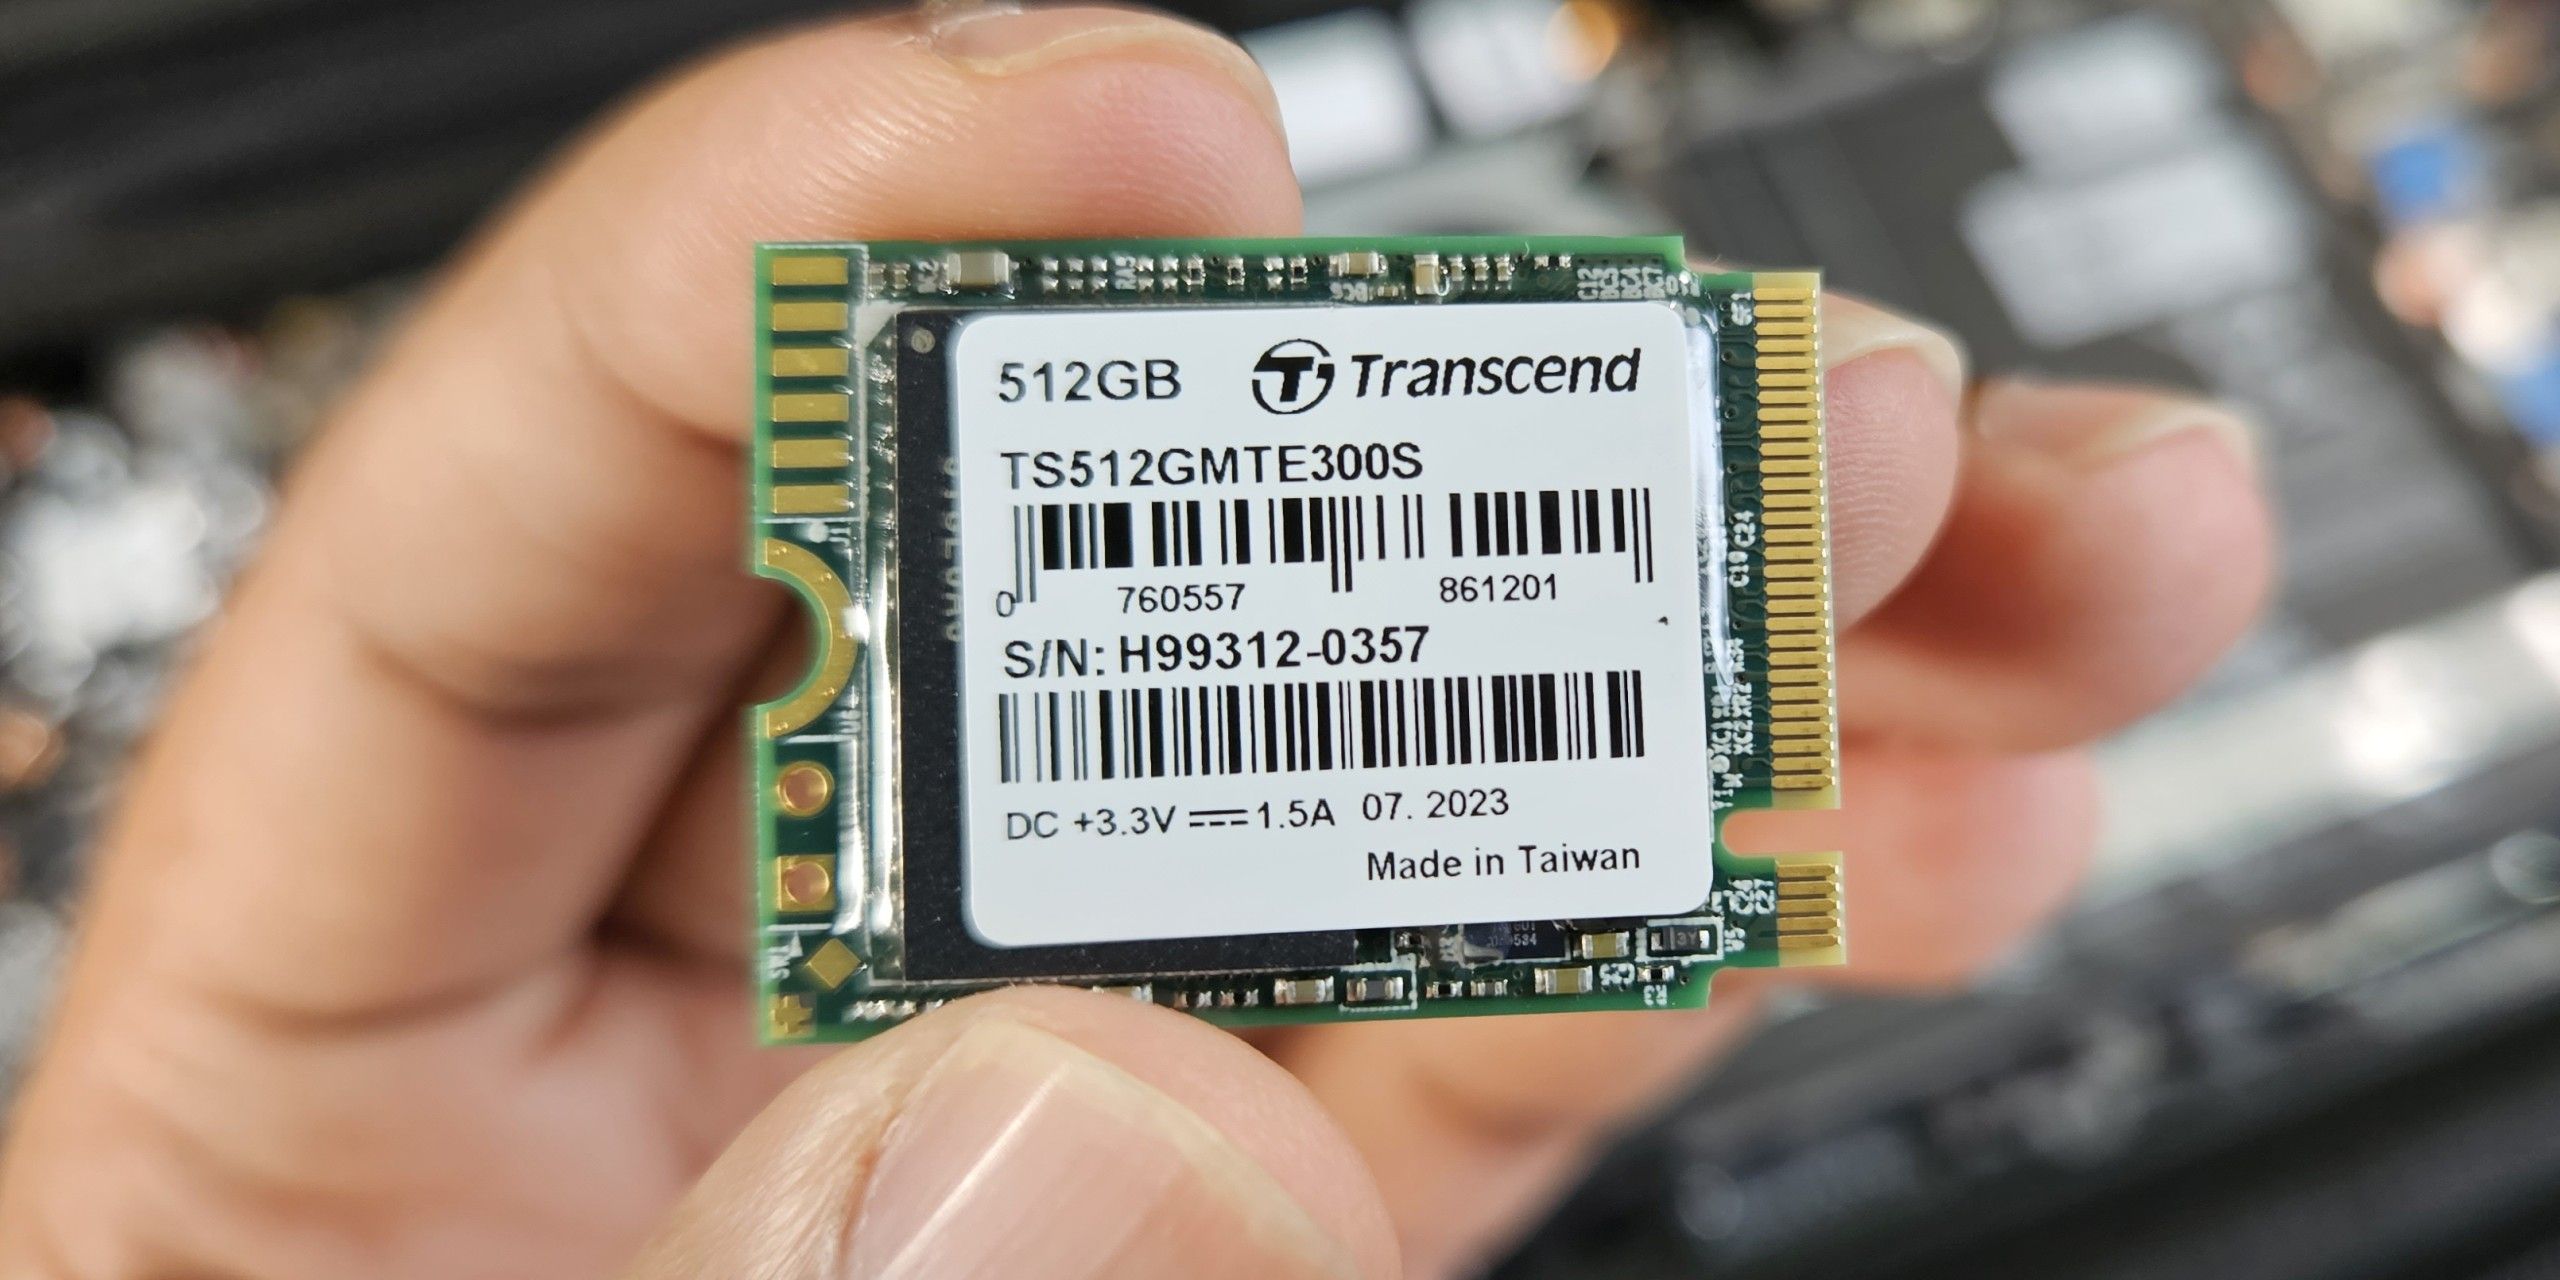
The 2230 M.2 slot on the Steam Deck mainboard supports the PCIe Gen3 x4 NVMe interface, but newer Steam Deck variants now ship with Gen3 x2 NVMe SSDs. The downgraded drives are capable of using only half of the available PCIe lanes, but this nevertheless has no practical bearing on performance and load times.
In other words, you can buy any name-brand PCIe Gen3 NVMe SSD as long as it conforms to the 2230 form factor. Traditional desktop NVMe SSDs are in the longer 2280 form factor, and therefore aren’t compatible with the Steam Deck. See our buyer’s guide to the best SSDs for Steam Deck.
What Tools Do I Need?
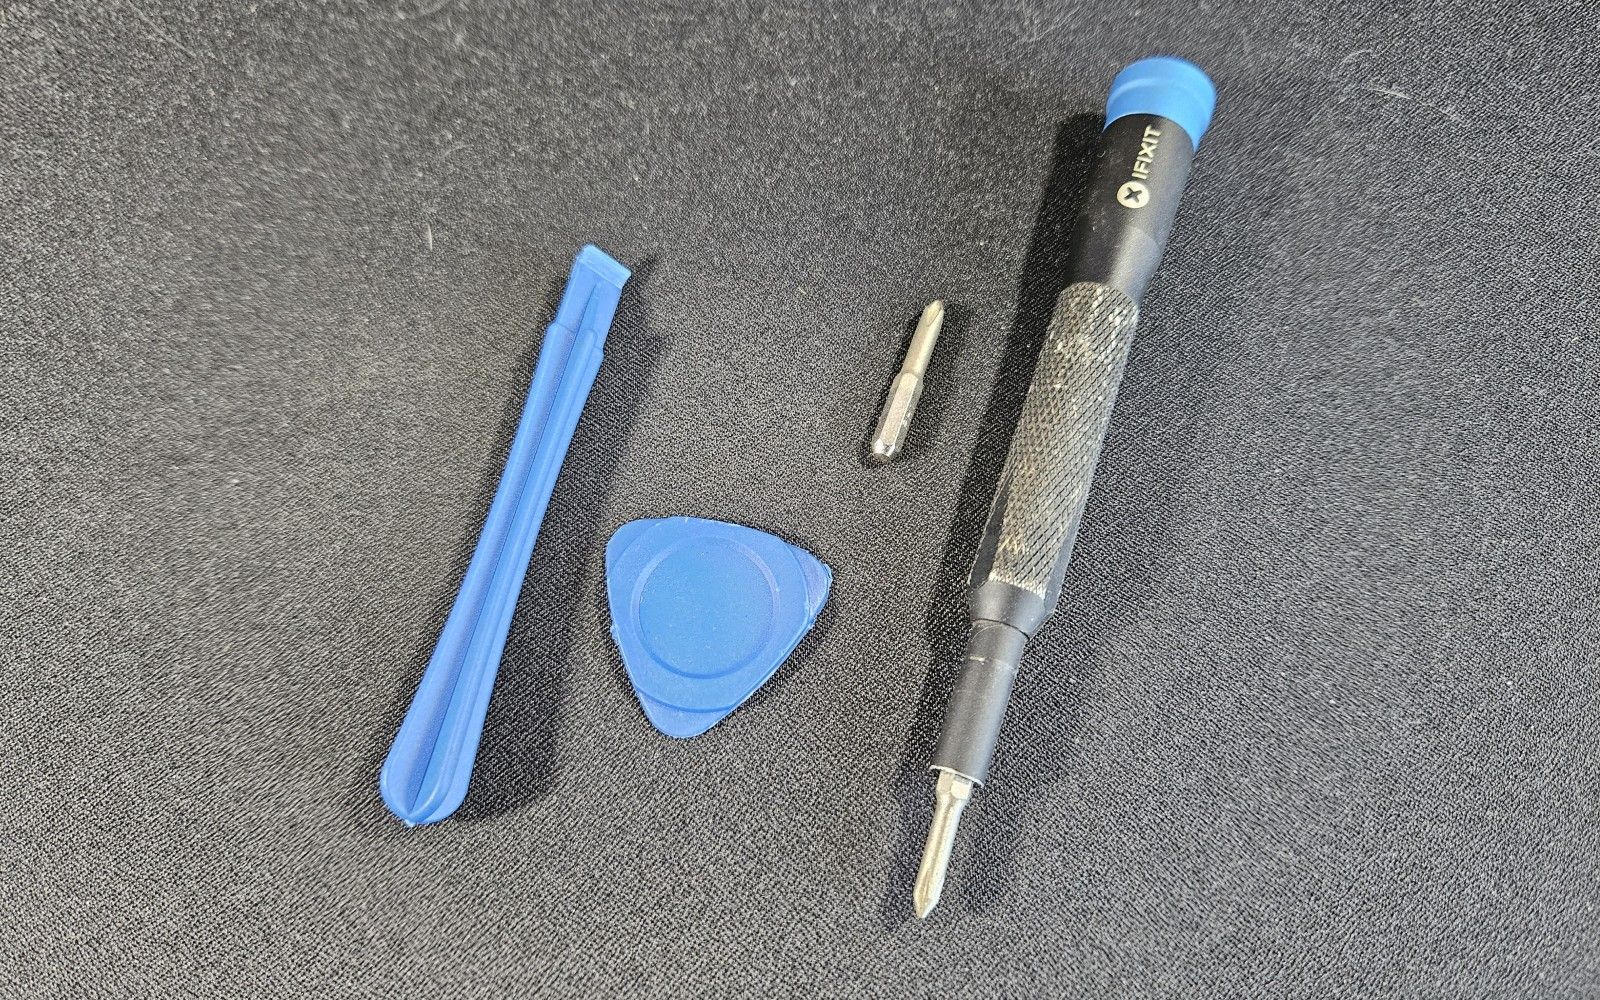
Apart from the brand new 2230 M.2 NVMe SSD, you only need two Phillips screwdrivers in the #0 and #1 tip sizes. Safely opening the chassis also requires a plastic pry tool. However, an old credit card will also serve the same purpose. Having a few of those at hand makes the job easier. Magnetic trays to hold screws aren’t mandatory, but they are good to have around.
Step 1: Enable Battery Storage Mode
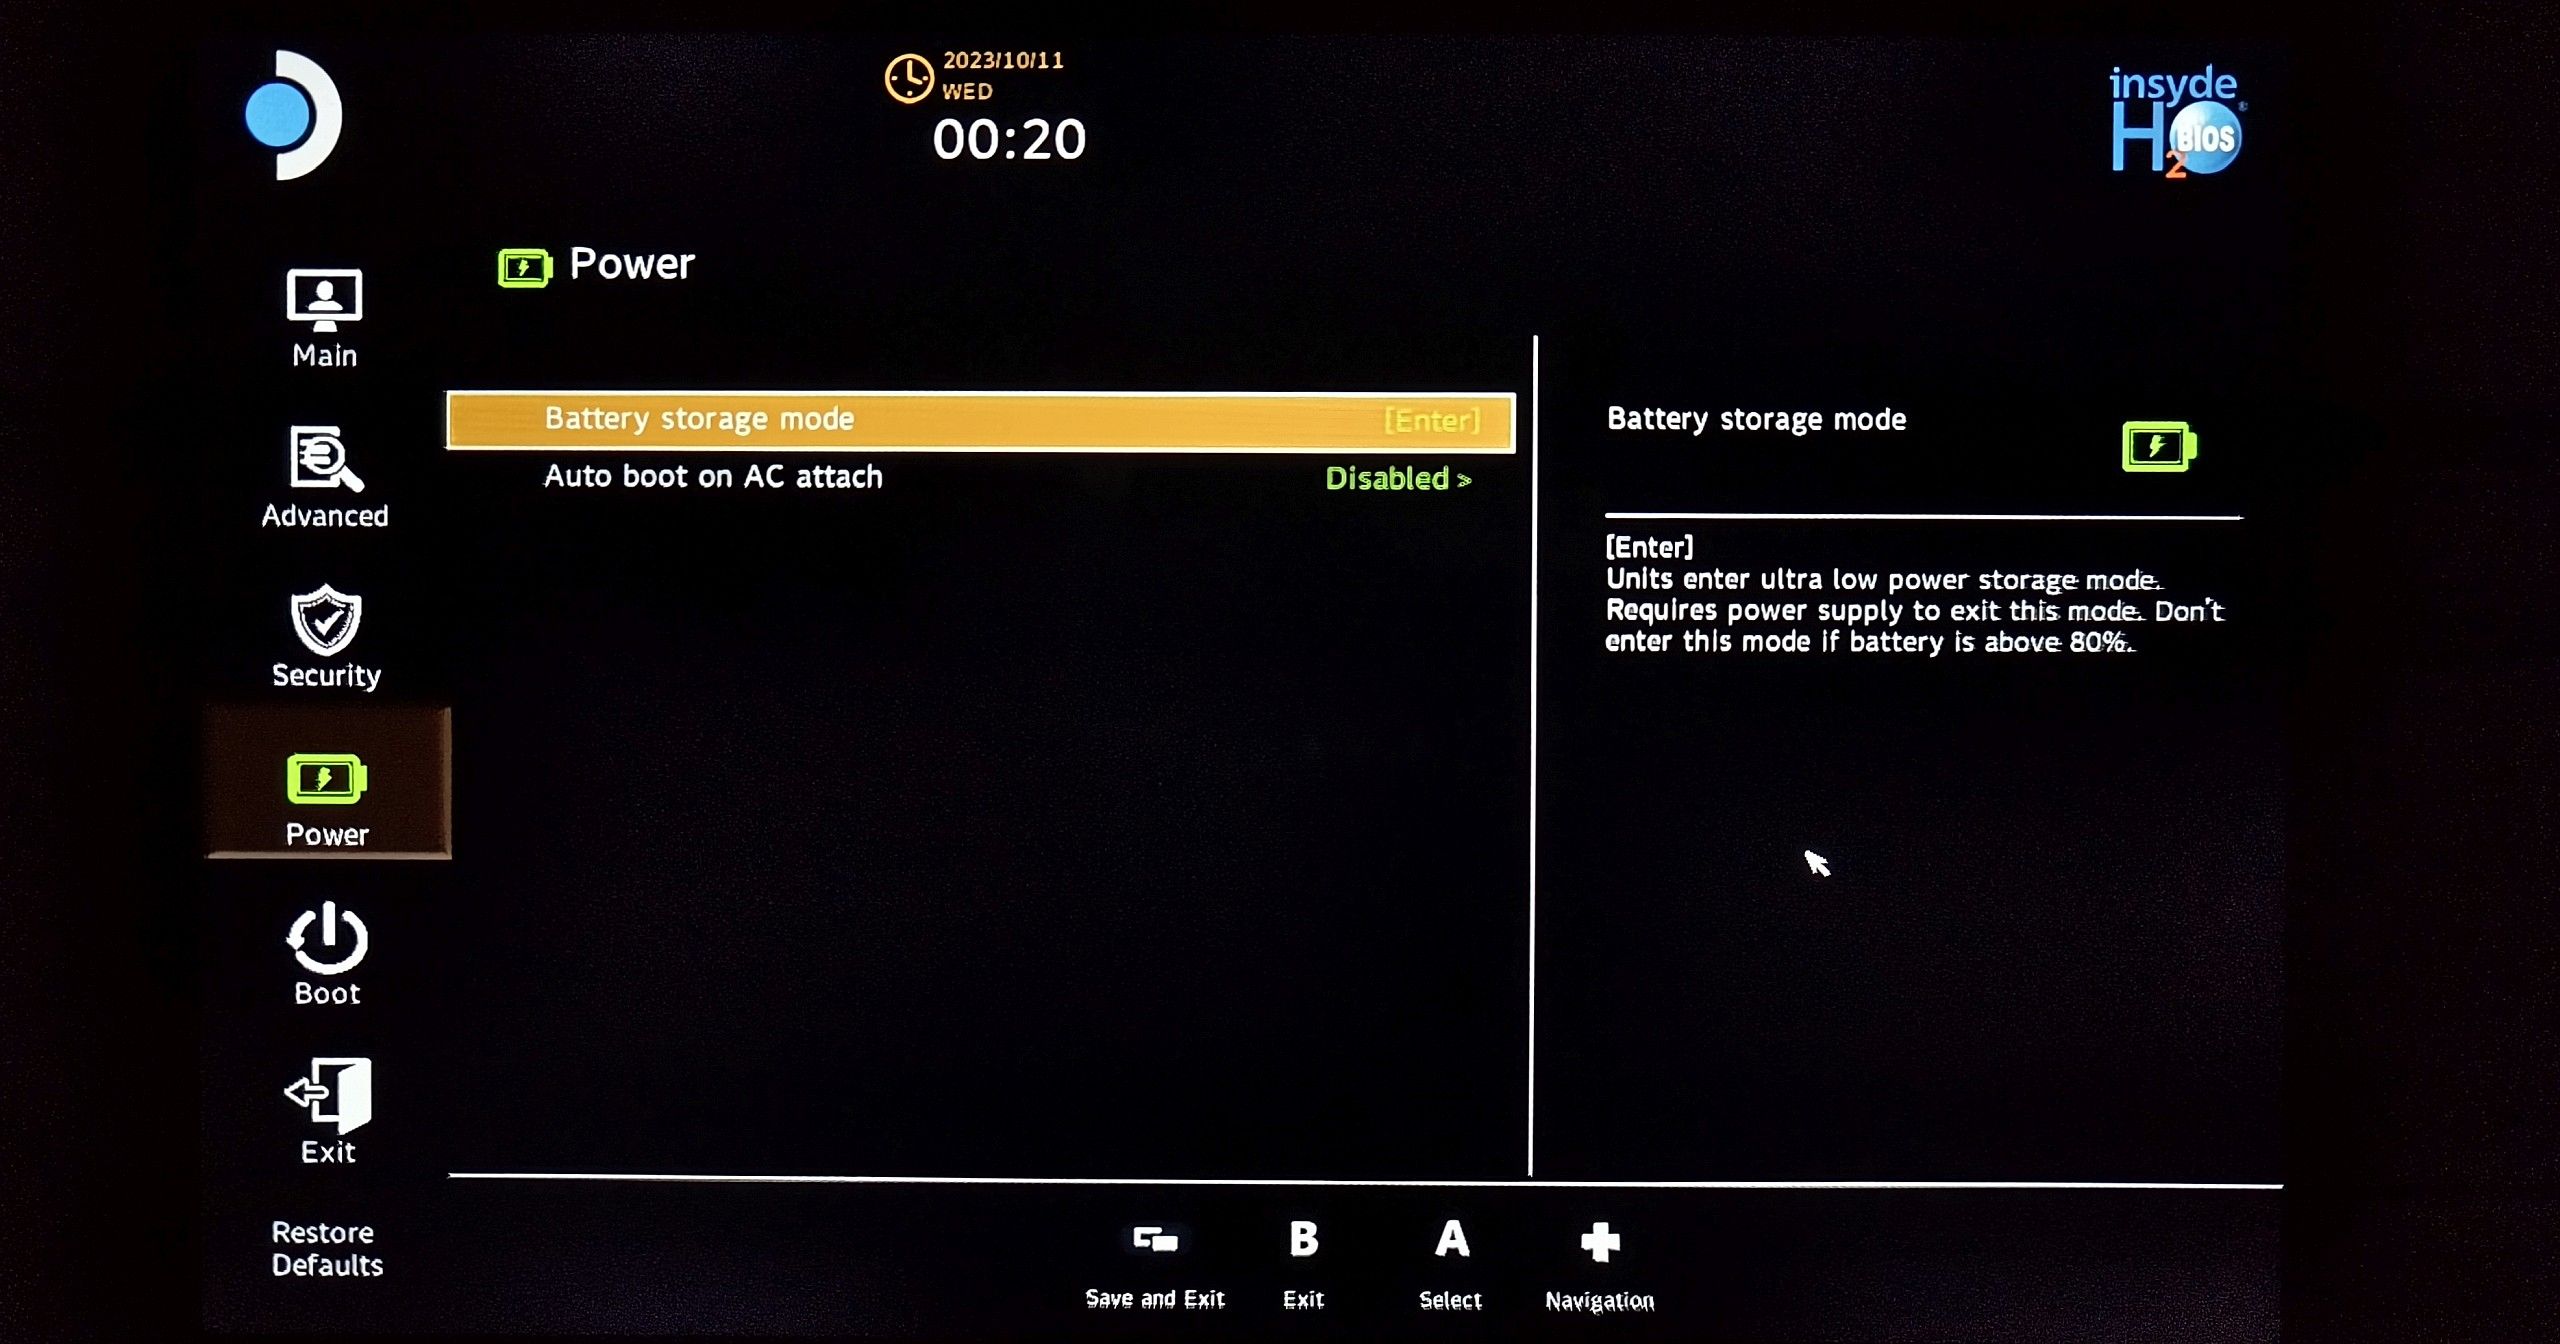
Exposing the mainboard during SSD replacement substantially increases the risk of shorting out the battery. This is a potential fire hazard, which can be mitigated by discharging the lithium-polymer battery until it is at 25 percent capacity or lower. Valve also recommends putting the Steam Deck in battery storage mode. This prevents accidental button presses from inadvertently booting up the device during repair.
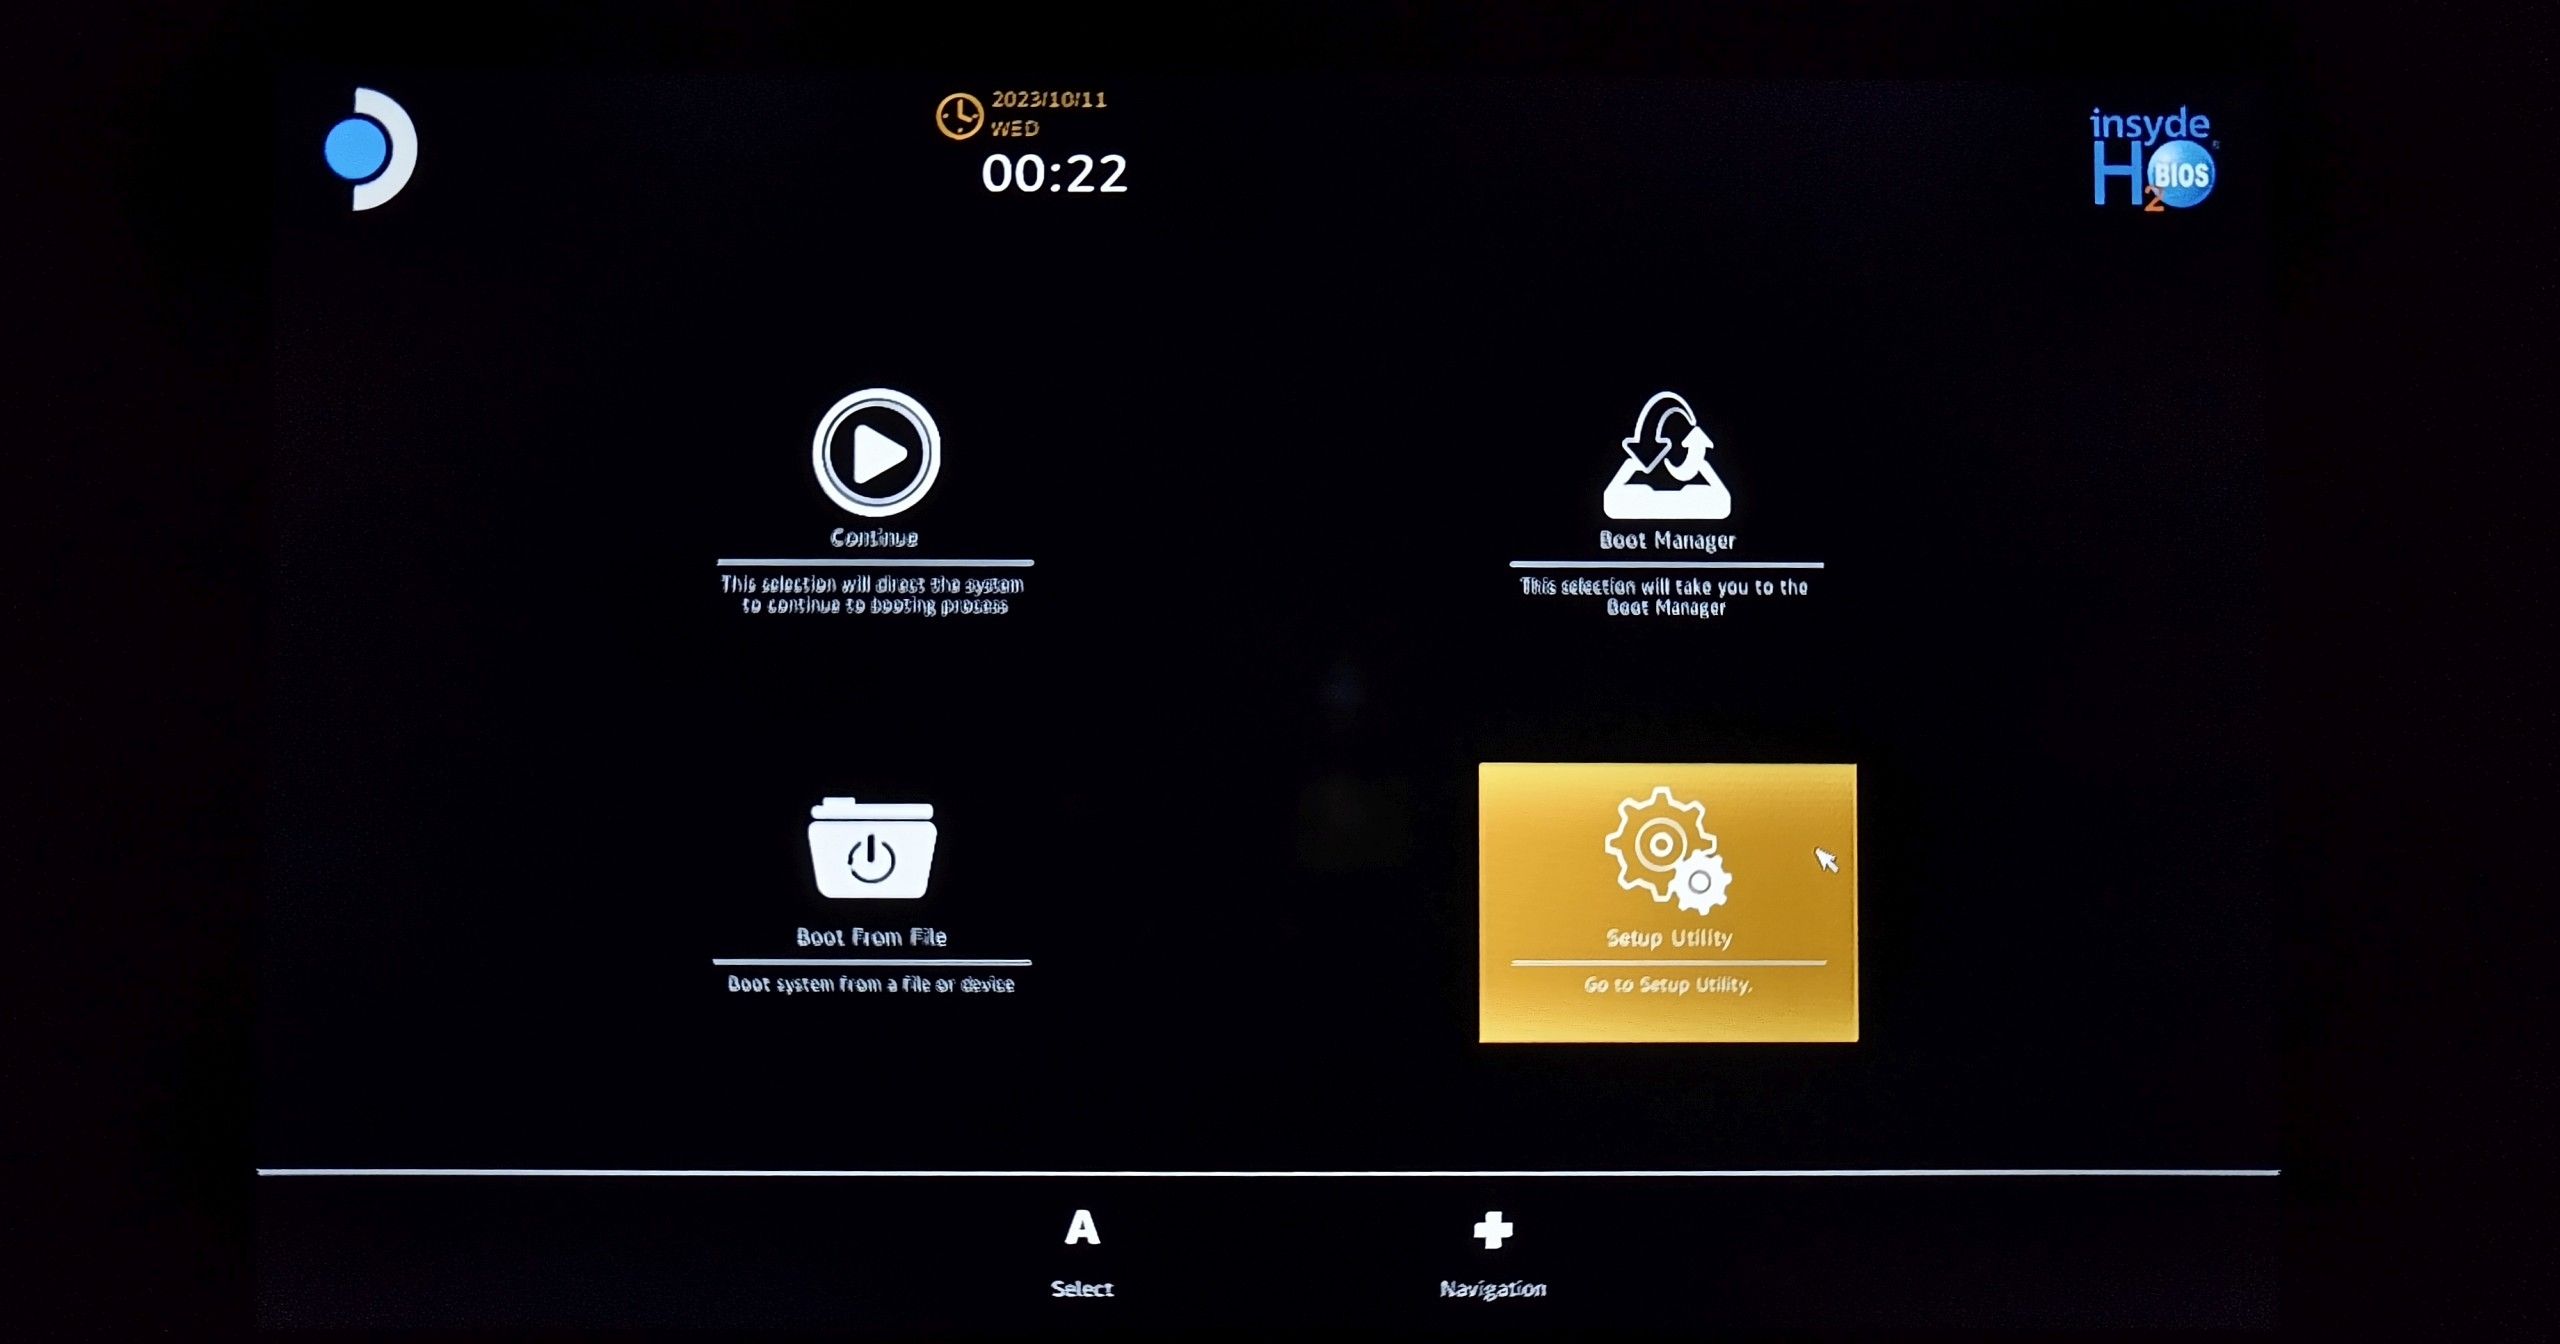
Entering the mode requires the Steam Deck to be powered down. Switch it back on by simultaneously holding down the volume up (+) and power buttons for two seconds (until you hear a beep) and letting them go at the same time. This will take you to the BIOS. The battery storage mode can be enabled from the Power menu within the Setup Utility denoted by the gear icon.
Your Steam Deck is now ready for disassembly. Don’t forget to empty the microSD slot. Failure to do so is likely to permanently damage the microSD card during disassembly.
Step 2: Remove Screws From the Back Cover
Lay the Steam Deck display-side down on the top half of the stock carrying case. The case’s molded cavity secures the device snugly and prevents damage to the thumbsticks during the procedure.
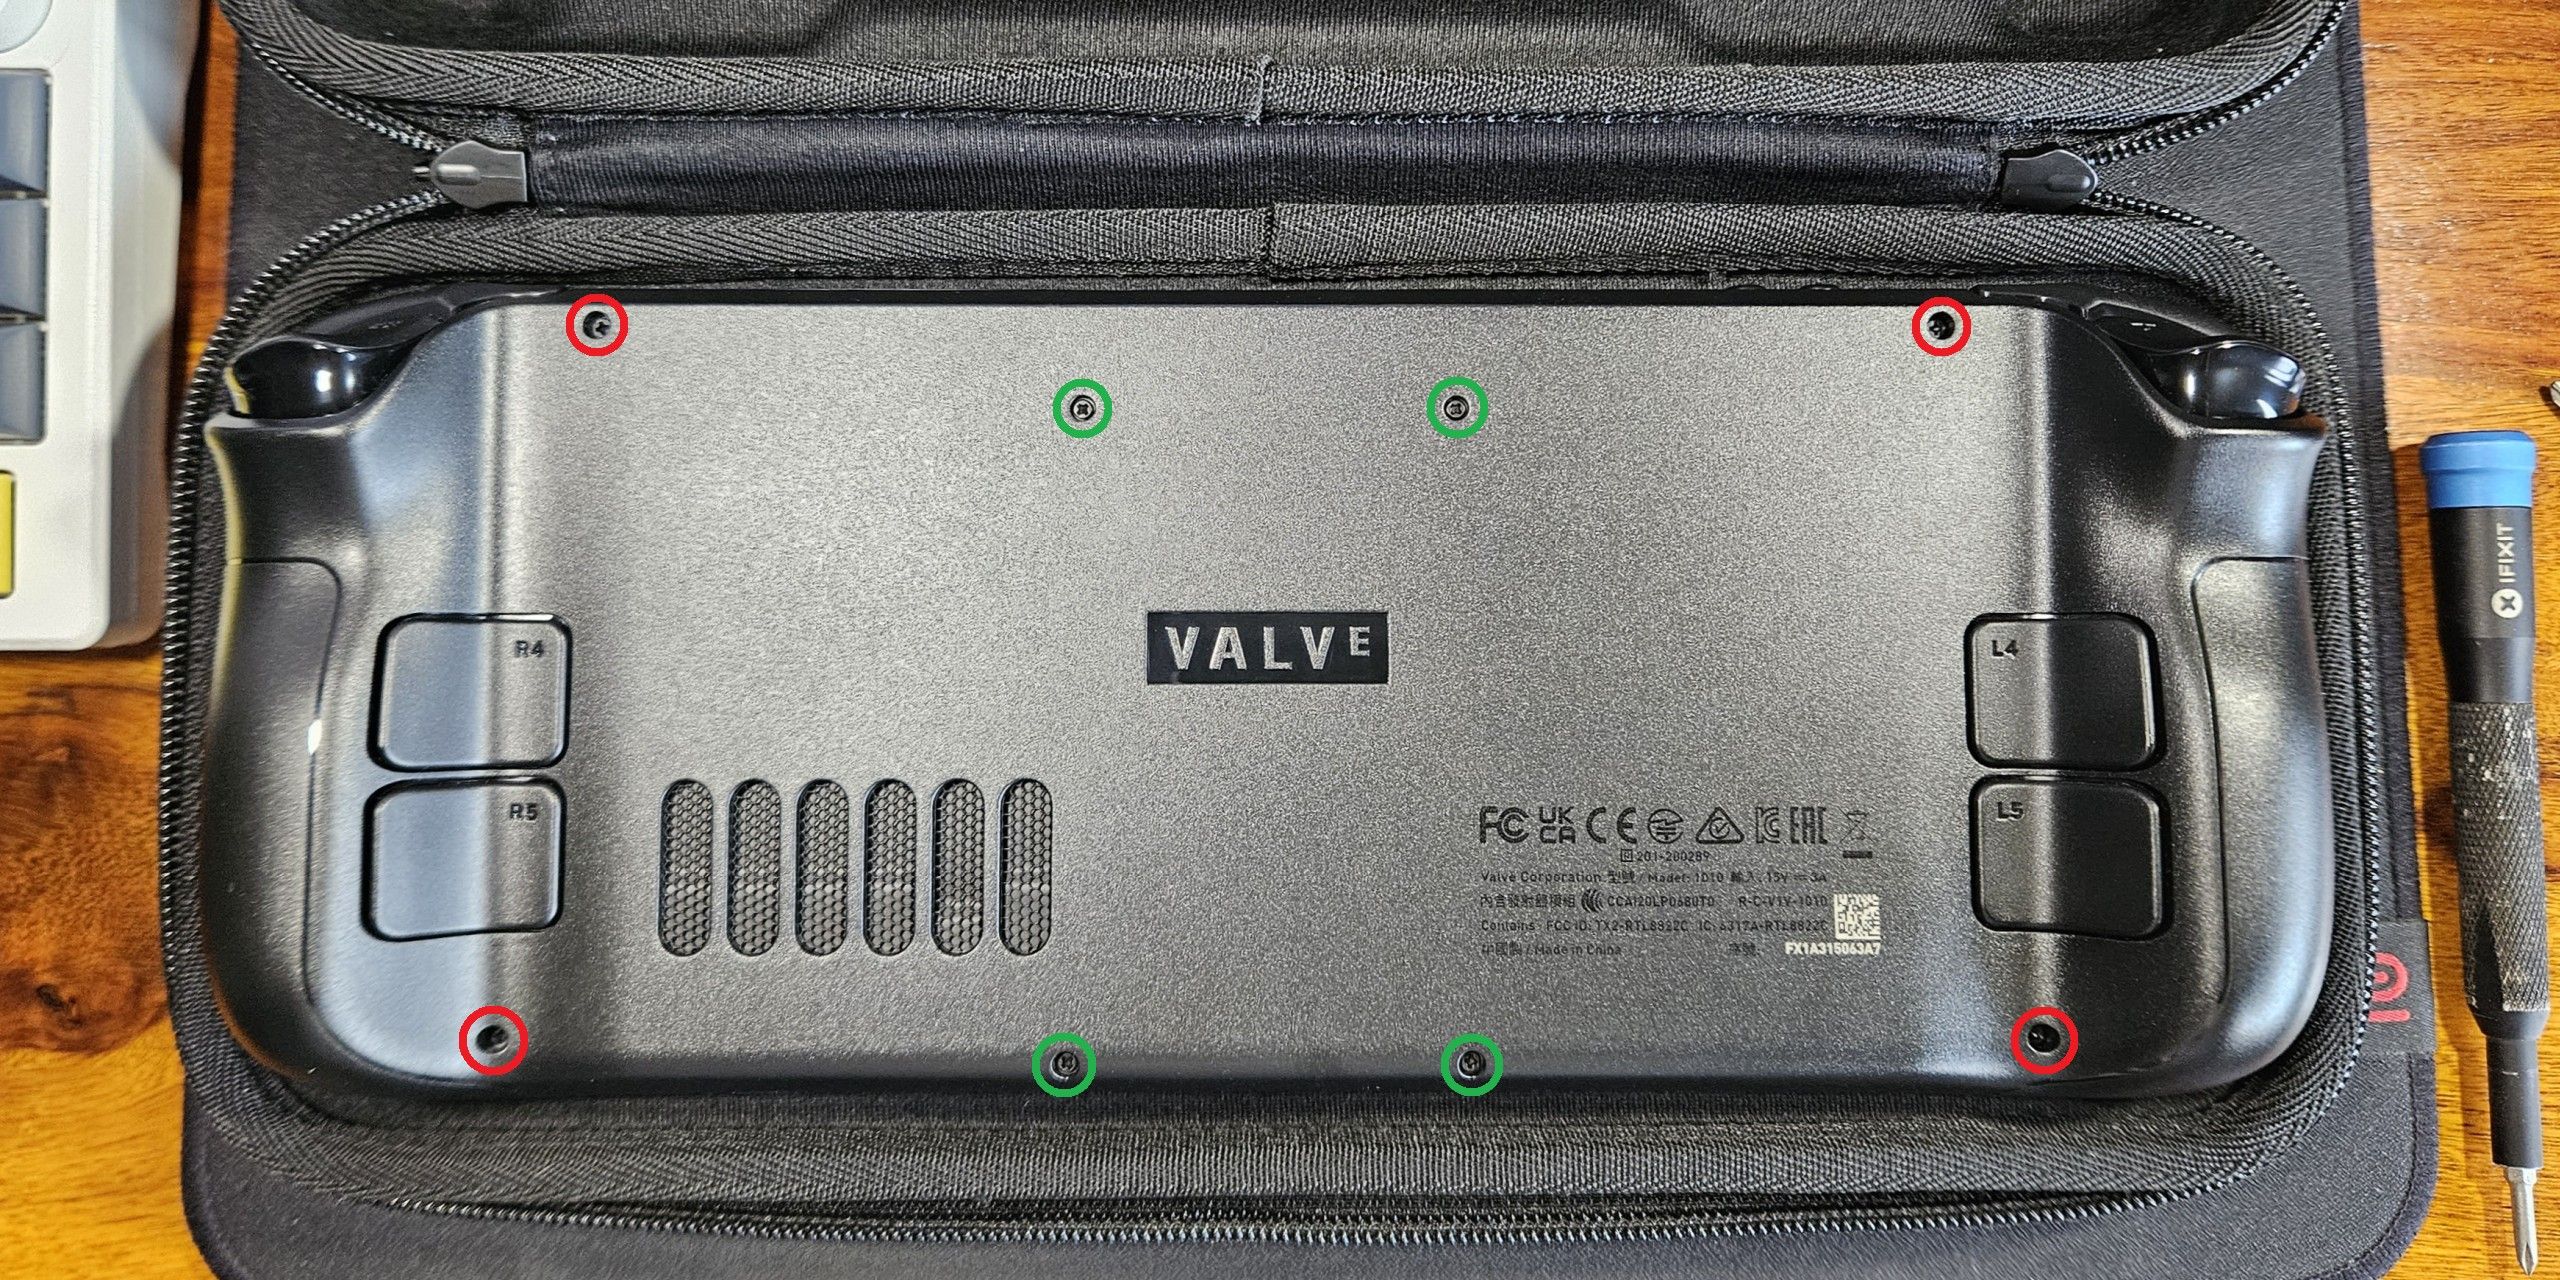
Use a Phillips #0 screwdriver to unscrew four machine screws (circled in green) near the middle of the chassis. You’ll need a larger Phillips #1 screwdriver to remove another set of four self-tapping screws highlighted in red.
The longer self-tapping screws have coarse threads compared to the shorter machine screws. Be sure to replace these screws in their original location, because forcing a fastener into a mismatched screw boss will destroy it.
Step 3: Gently Pry the Back Cover Apart
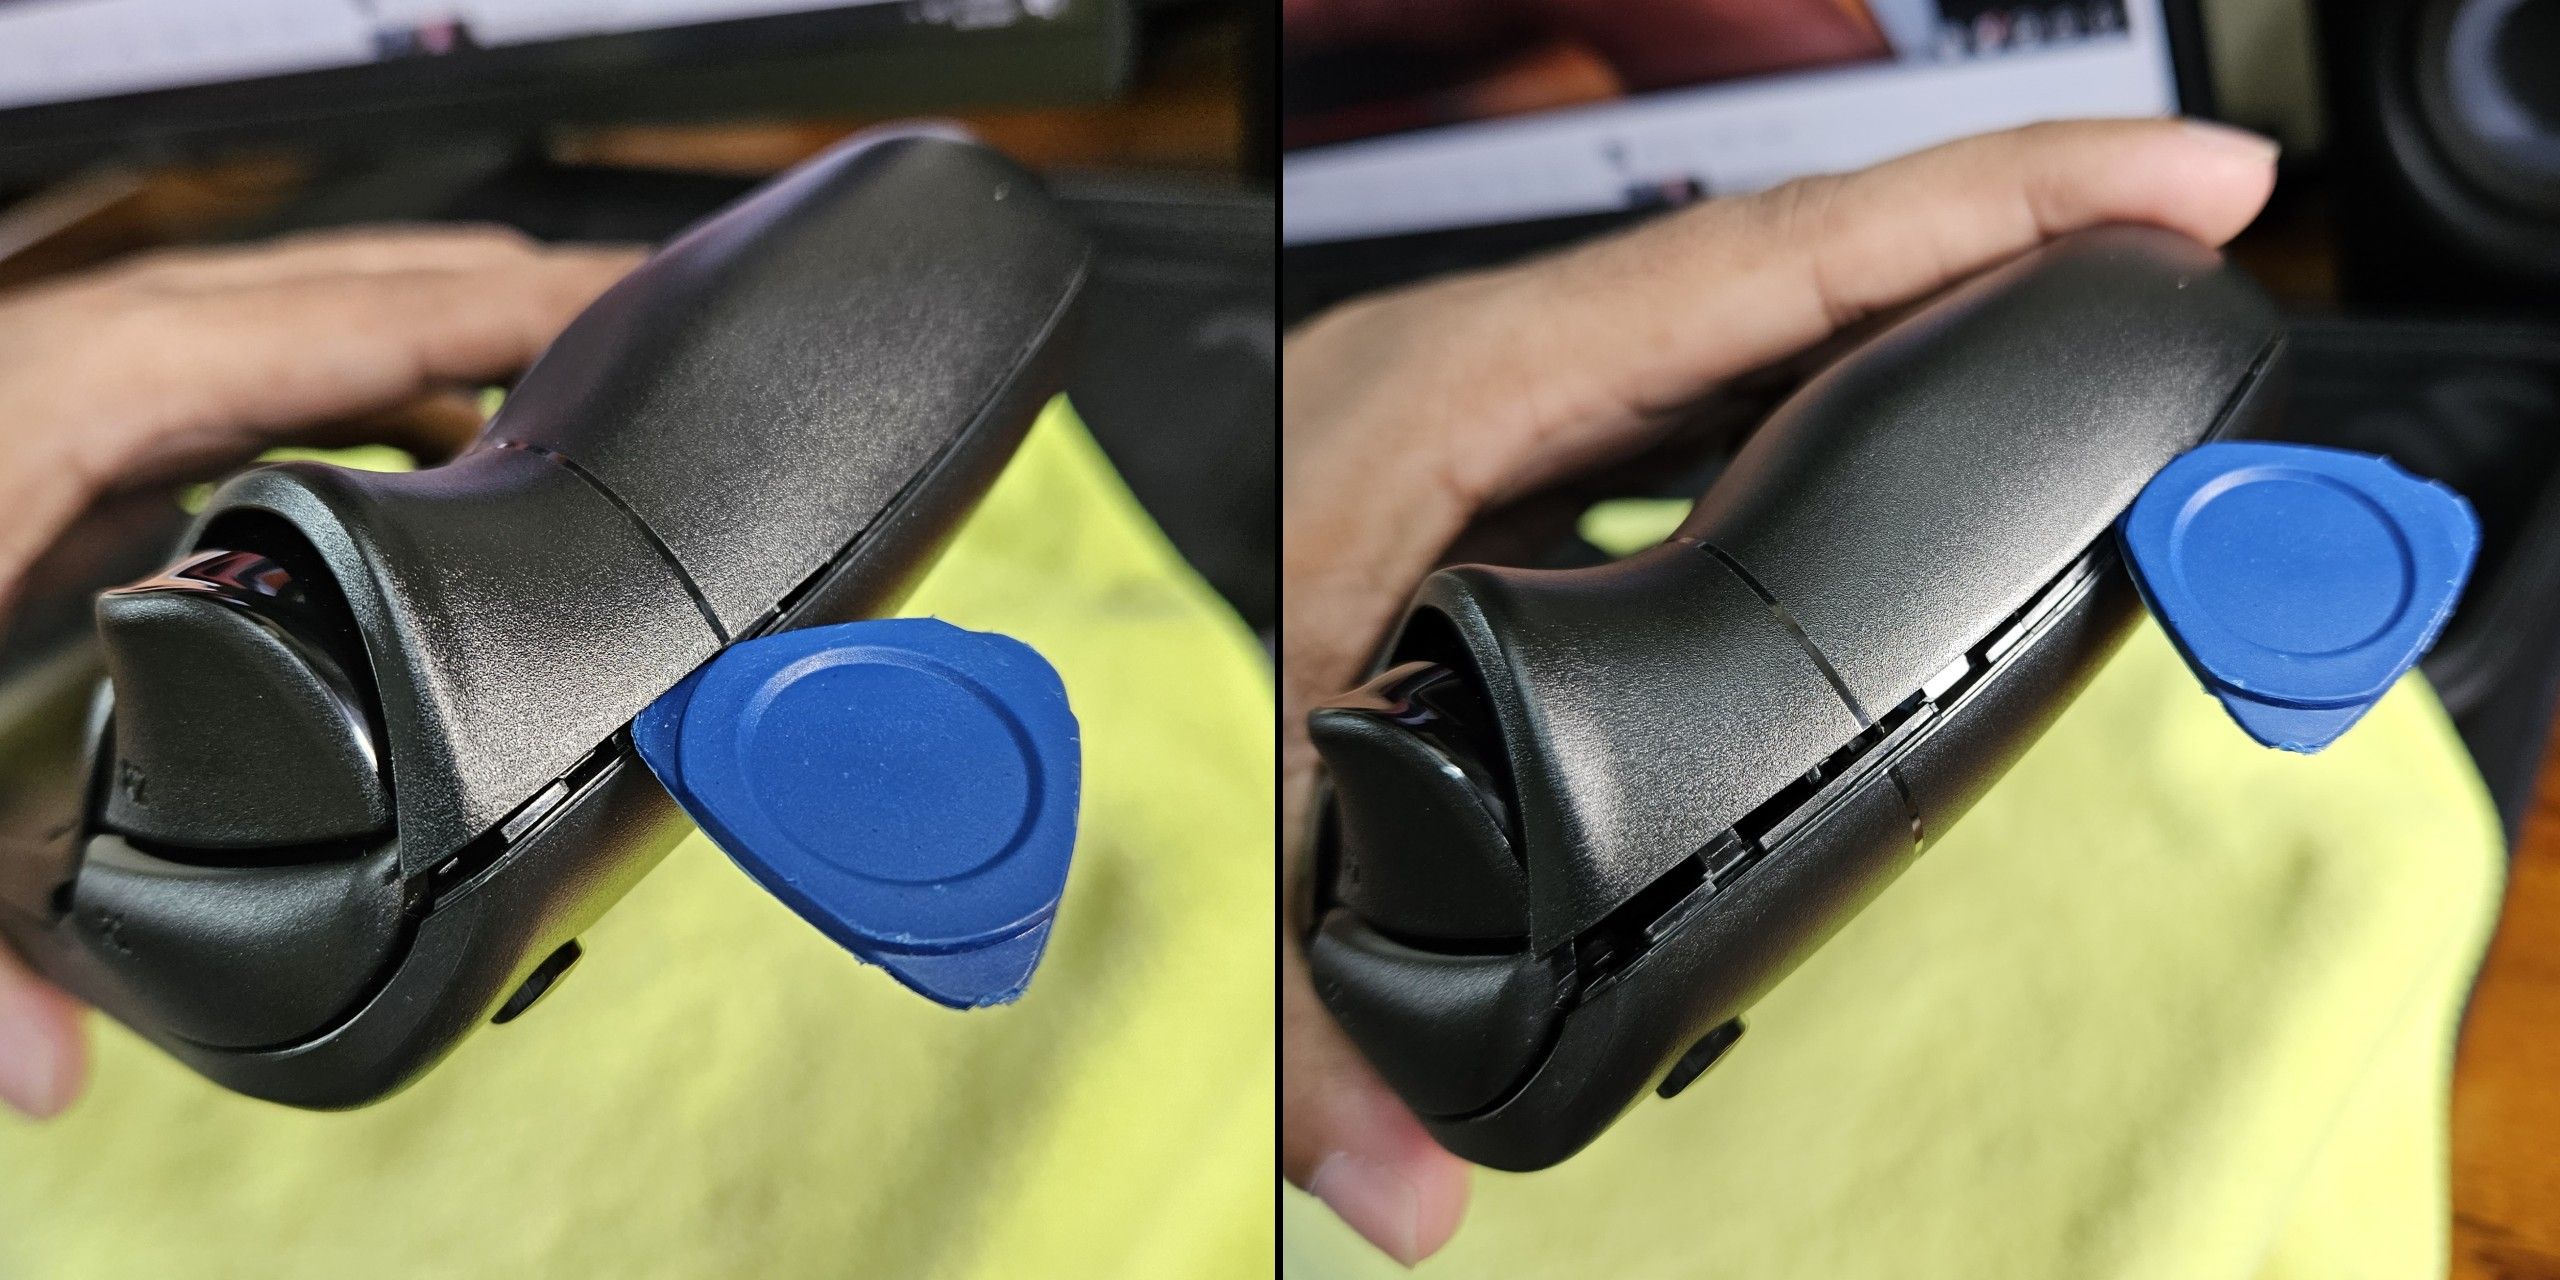
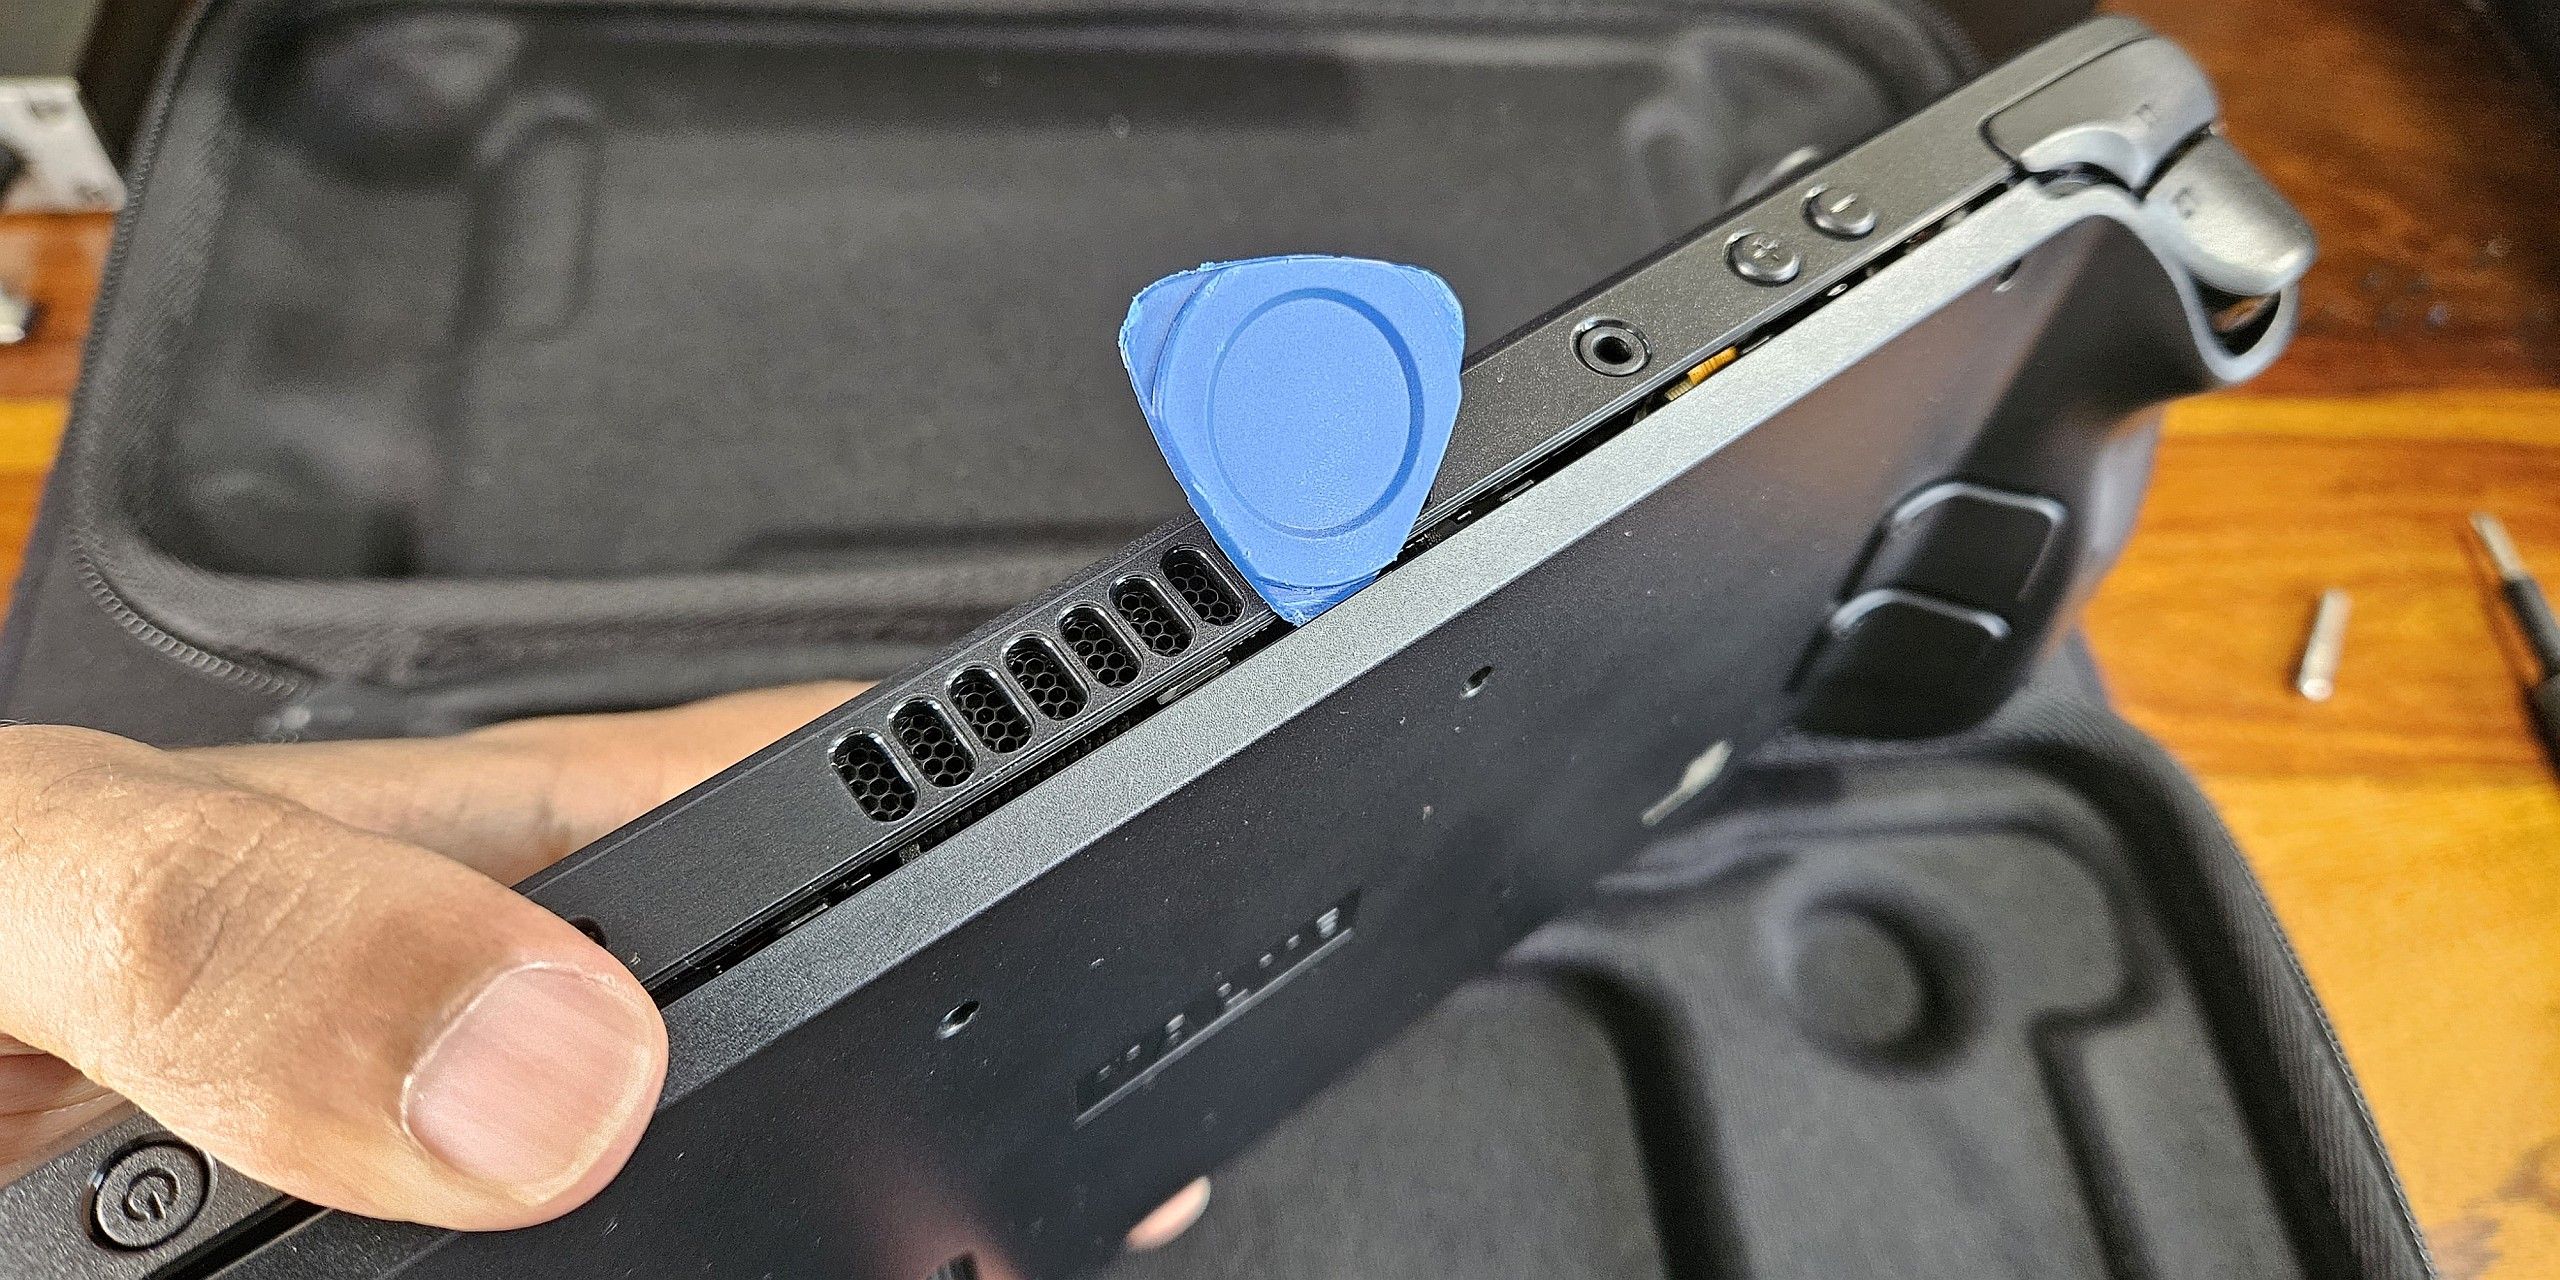
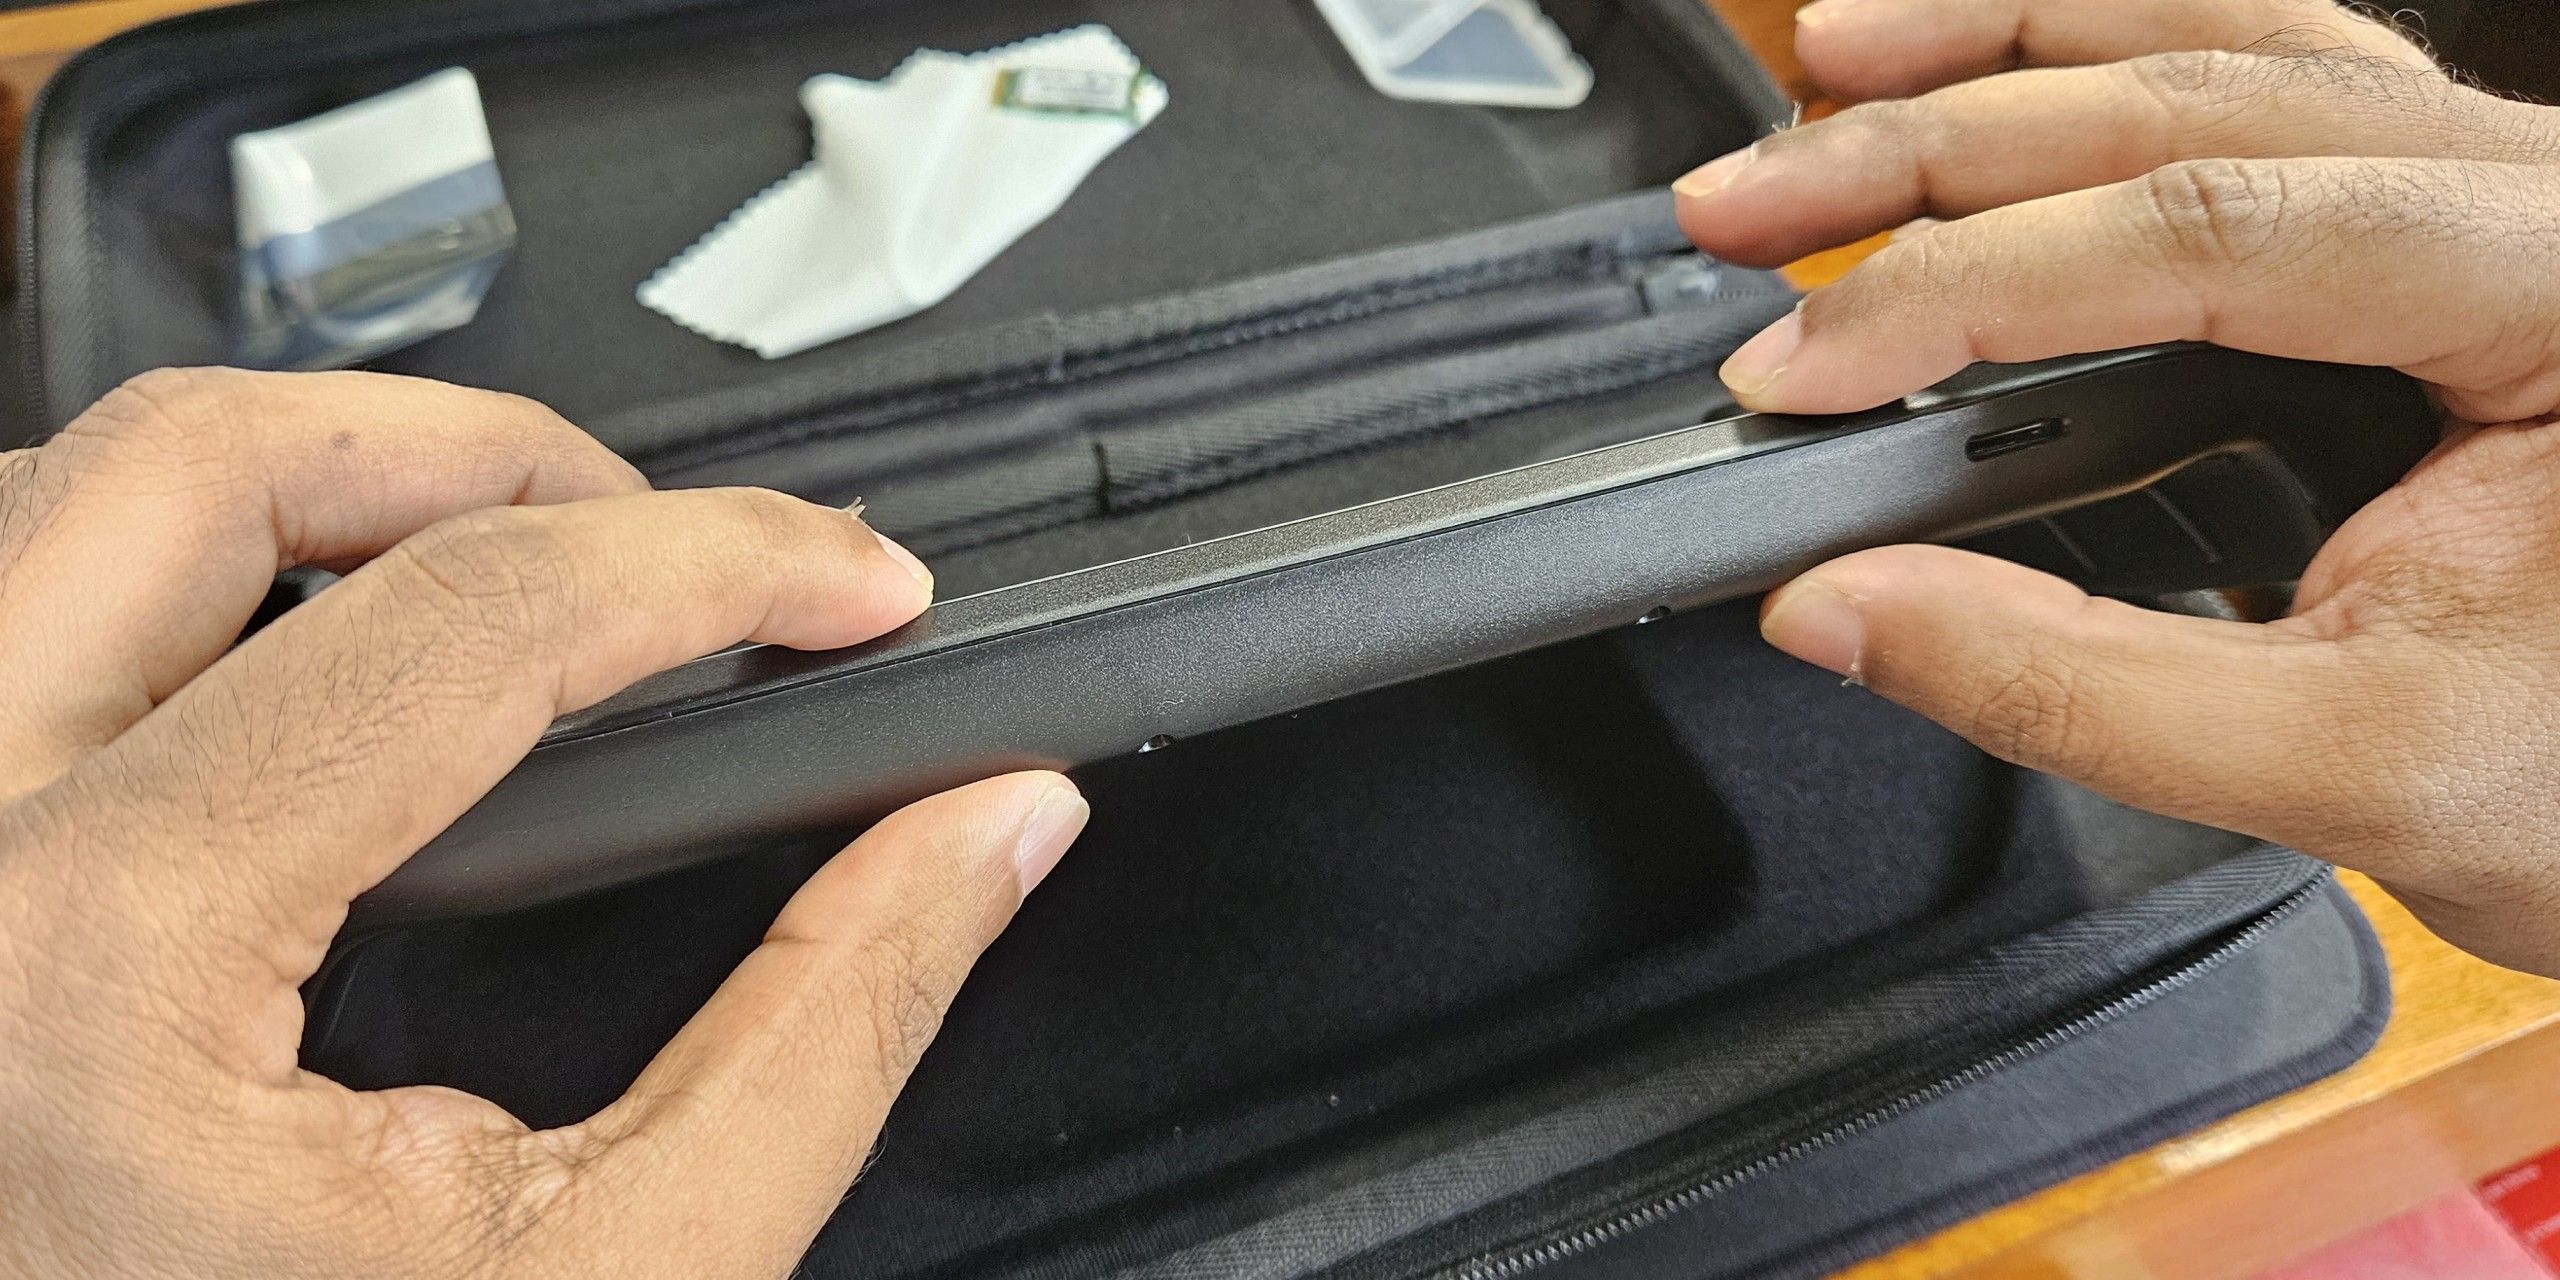
The back cover is free of fasteners, but it is still secured by plastic retention tabs. A plastic pry tool such as a spudger or guitar pick is mandatory for non-destructive removal. Avoid using a flat-head screwdriver or any other metal pry tool, because doing so will break the retention tabs and damage the chassis.
Separating the front and back sections of the chassis involves prying them apart at the seam. The opening right next to the L1 or R1 bumpers is the best place to begin. Insert your pry tool into the gap and gently lift the lip of the back cover to release it from the male retention tabs sticking out of the front cover.
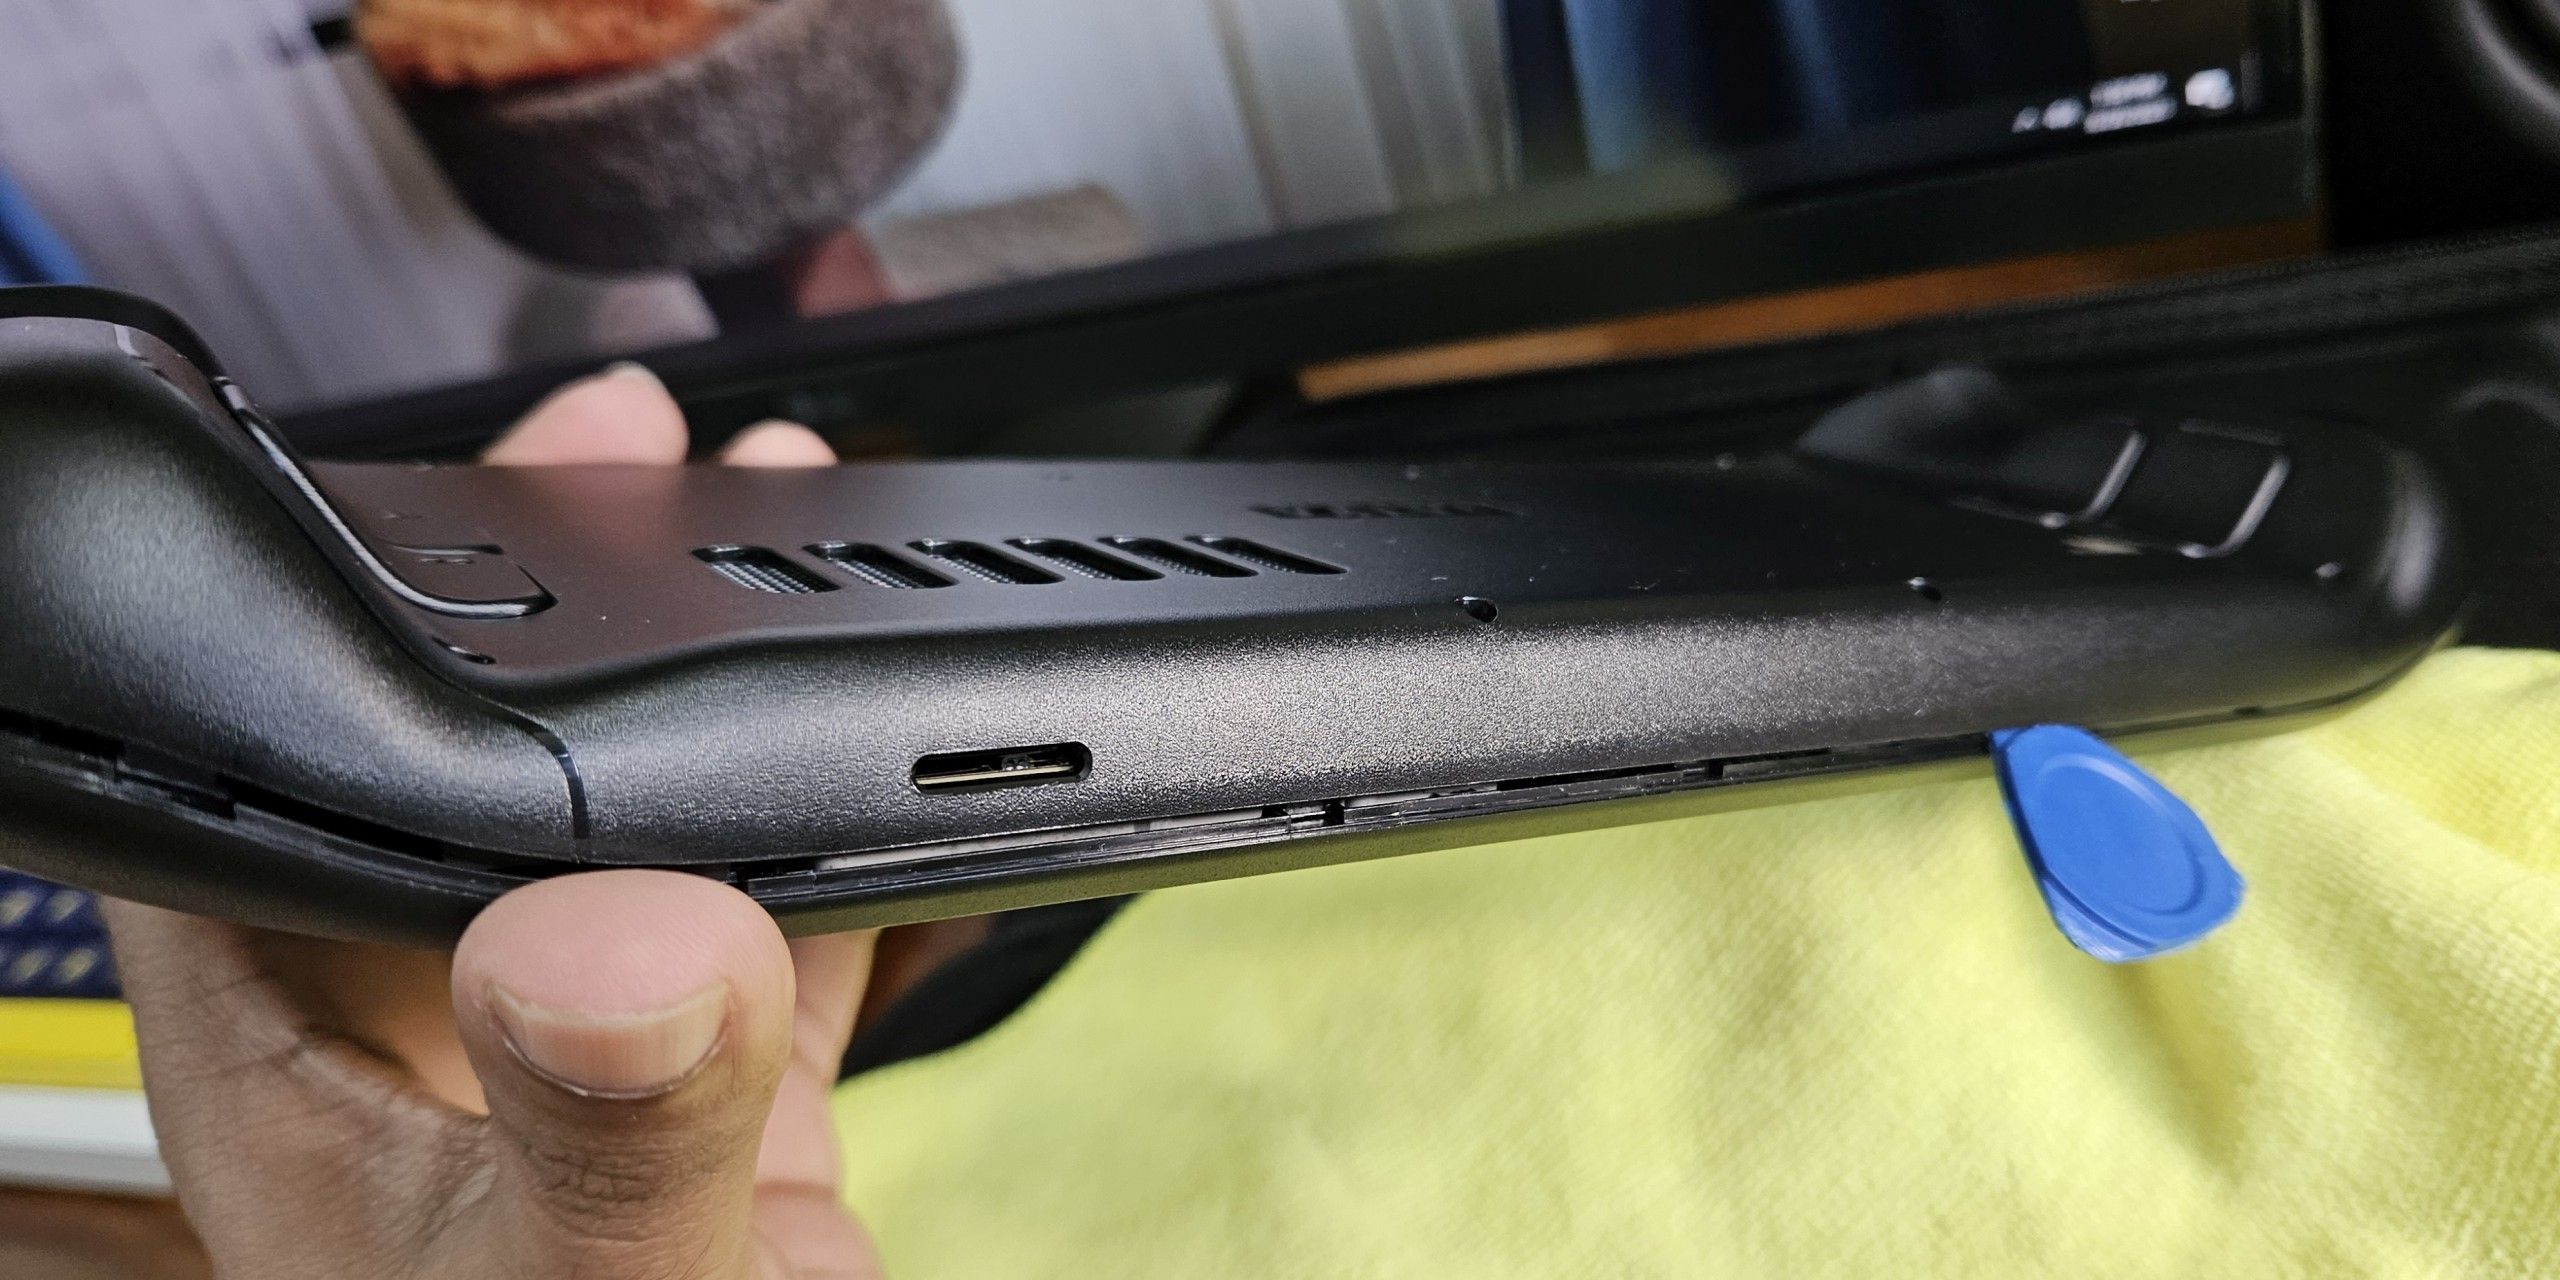
Once the first retention tab is released, sliding the pry tool further along the seam should cause the remaining ones to pop out with relative ease. Having a few spare guitar picks to wedge into the opened seam prevents it from snapping shut as you move the pry tool further along the chassis seam.
When you reach the bumper on the opposite side, repeat the process on the top edge of the chassis.
Step 4: Remove the Back Cover
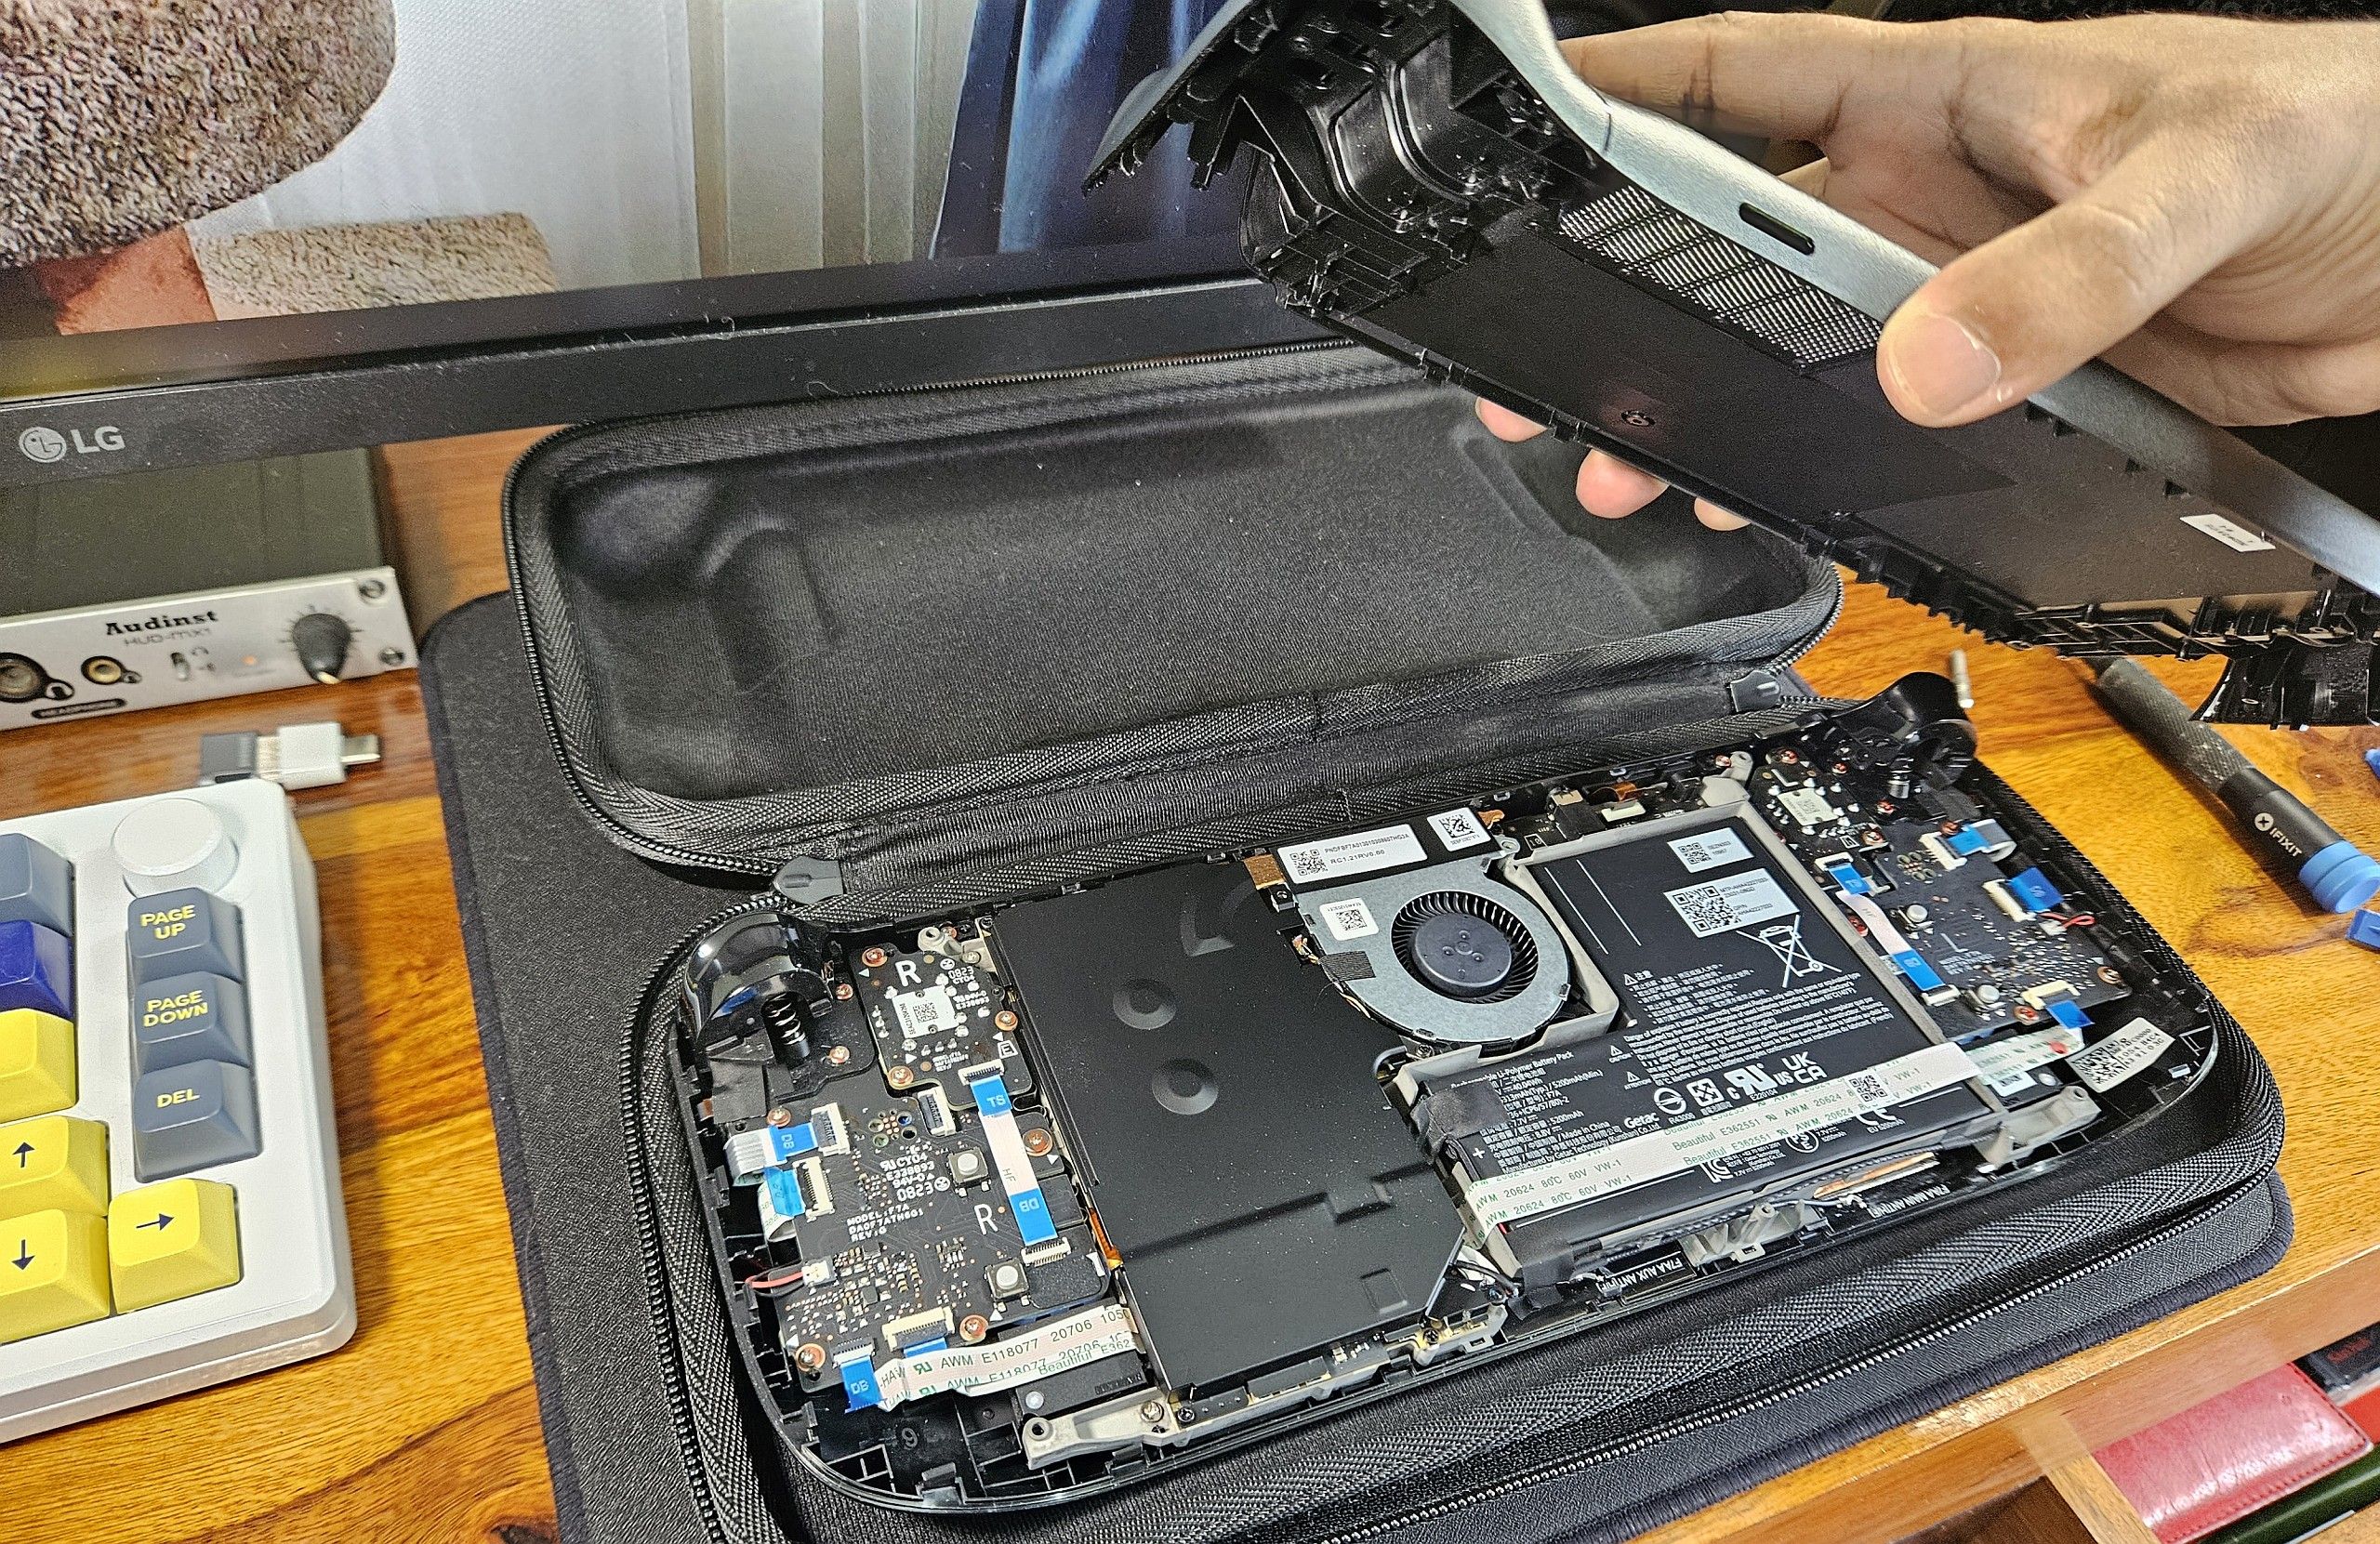
The back cover should come off the chassis without any resistance. If it doesn’t separate easily, you may have missed a few retention tabs. Sliding the pry tool along the seams should pop it free.
Step 5: Remove the Mainboard Shield
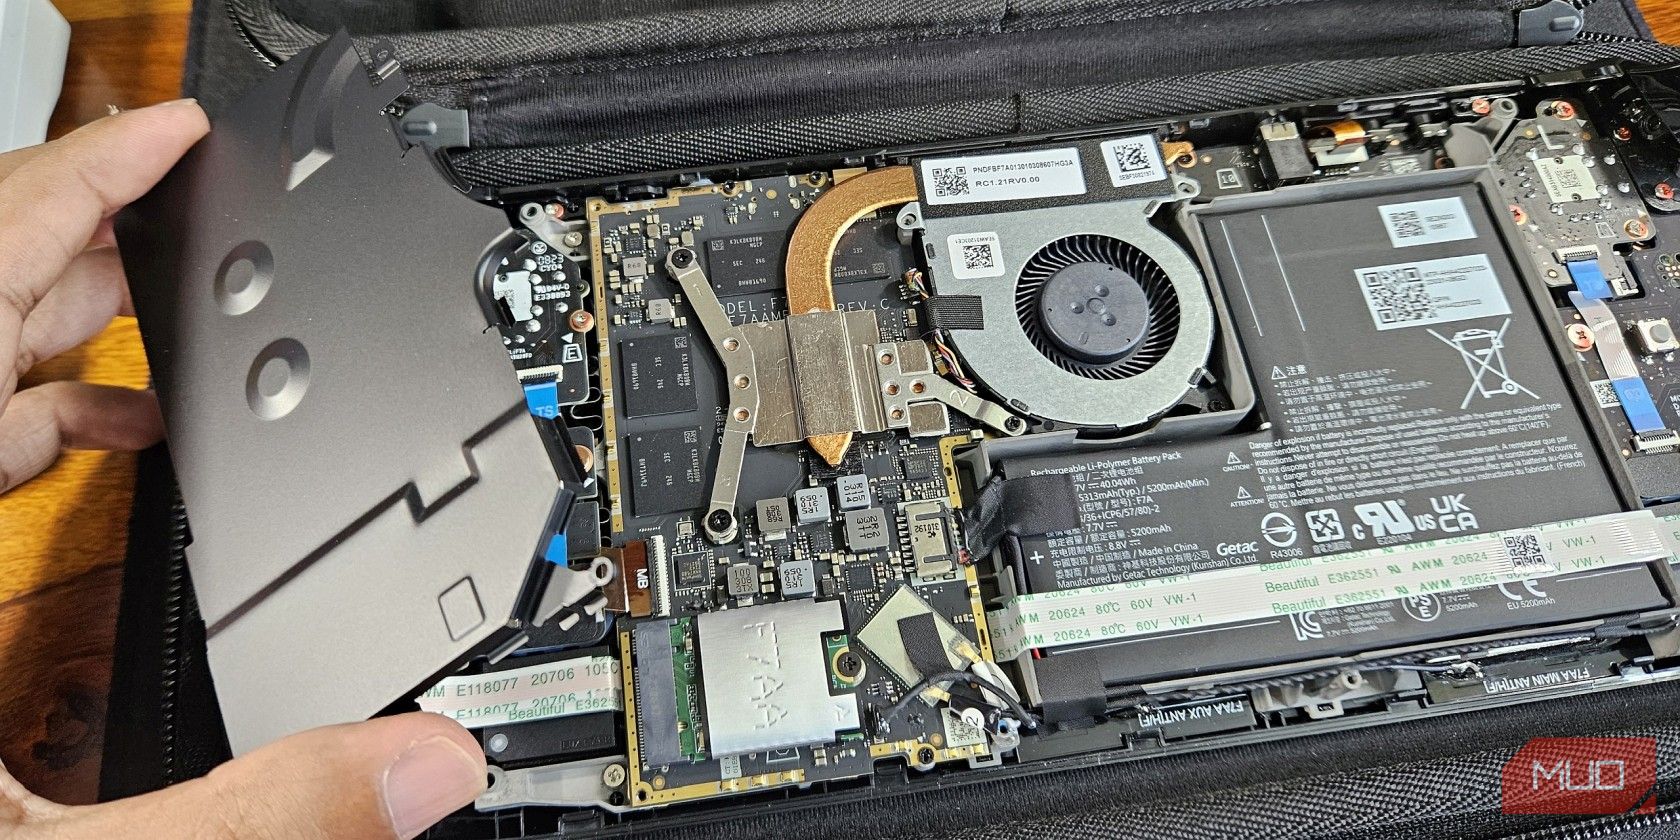
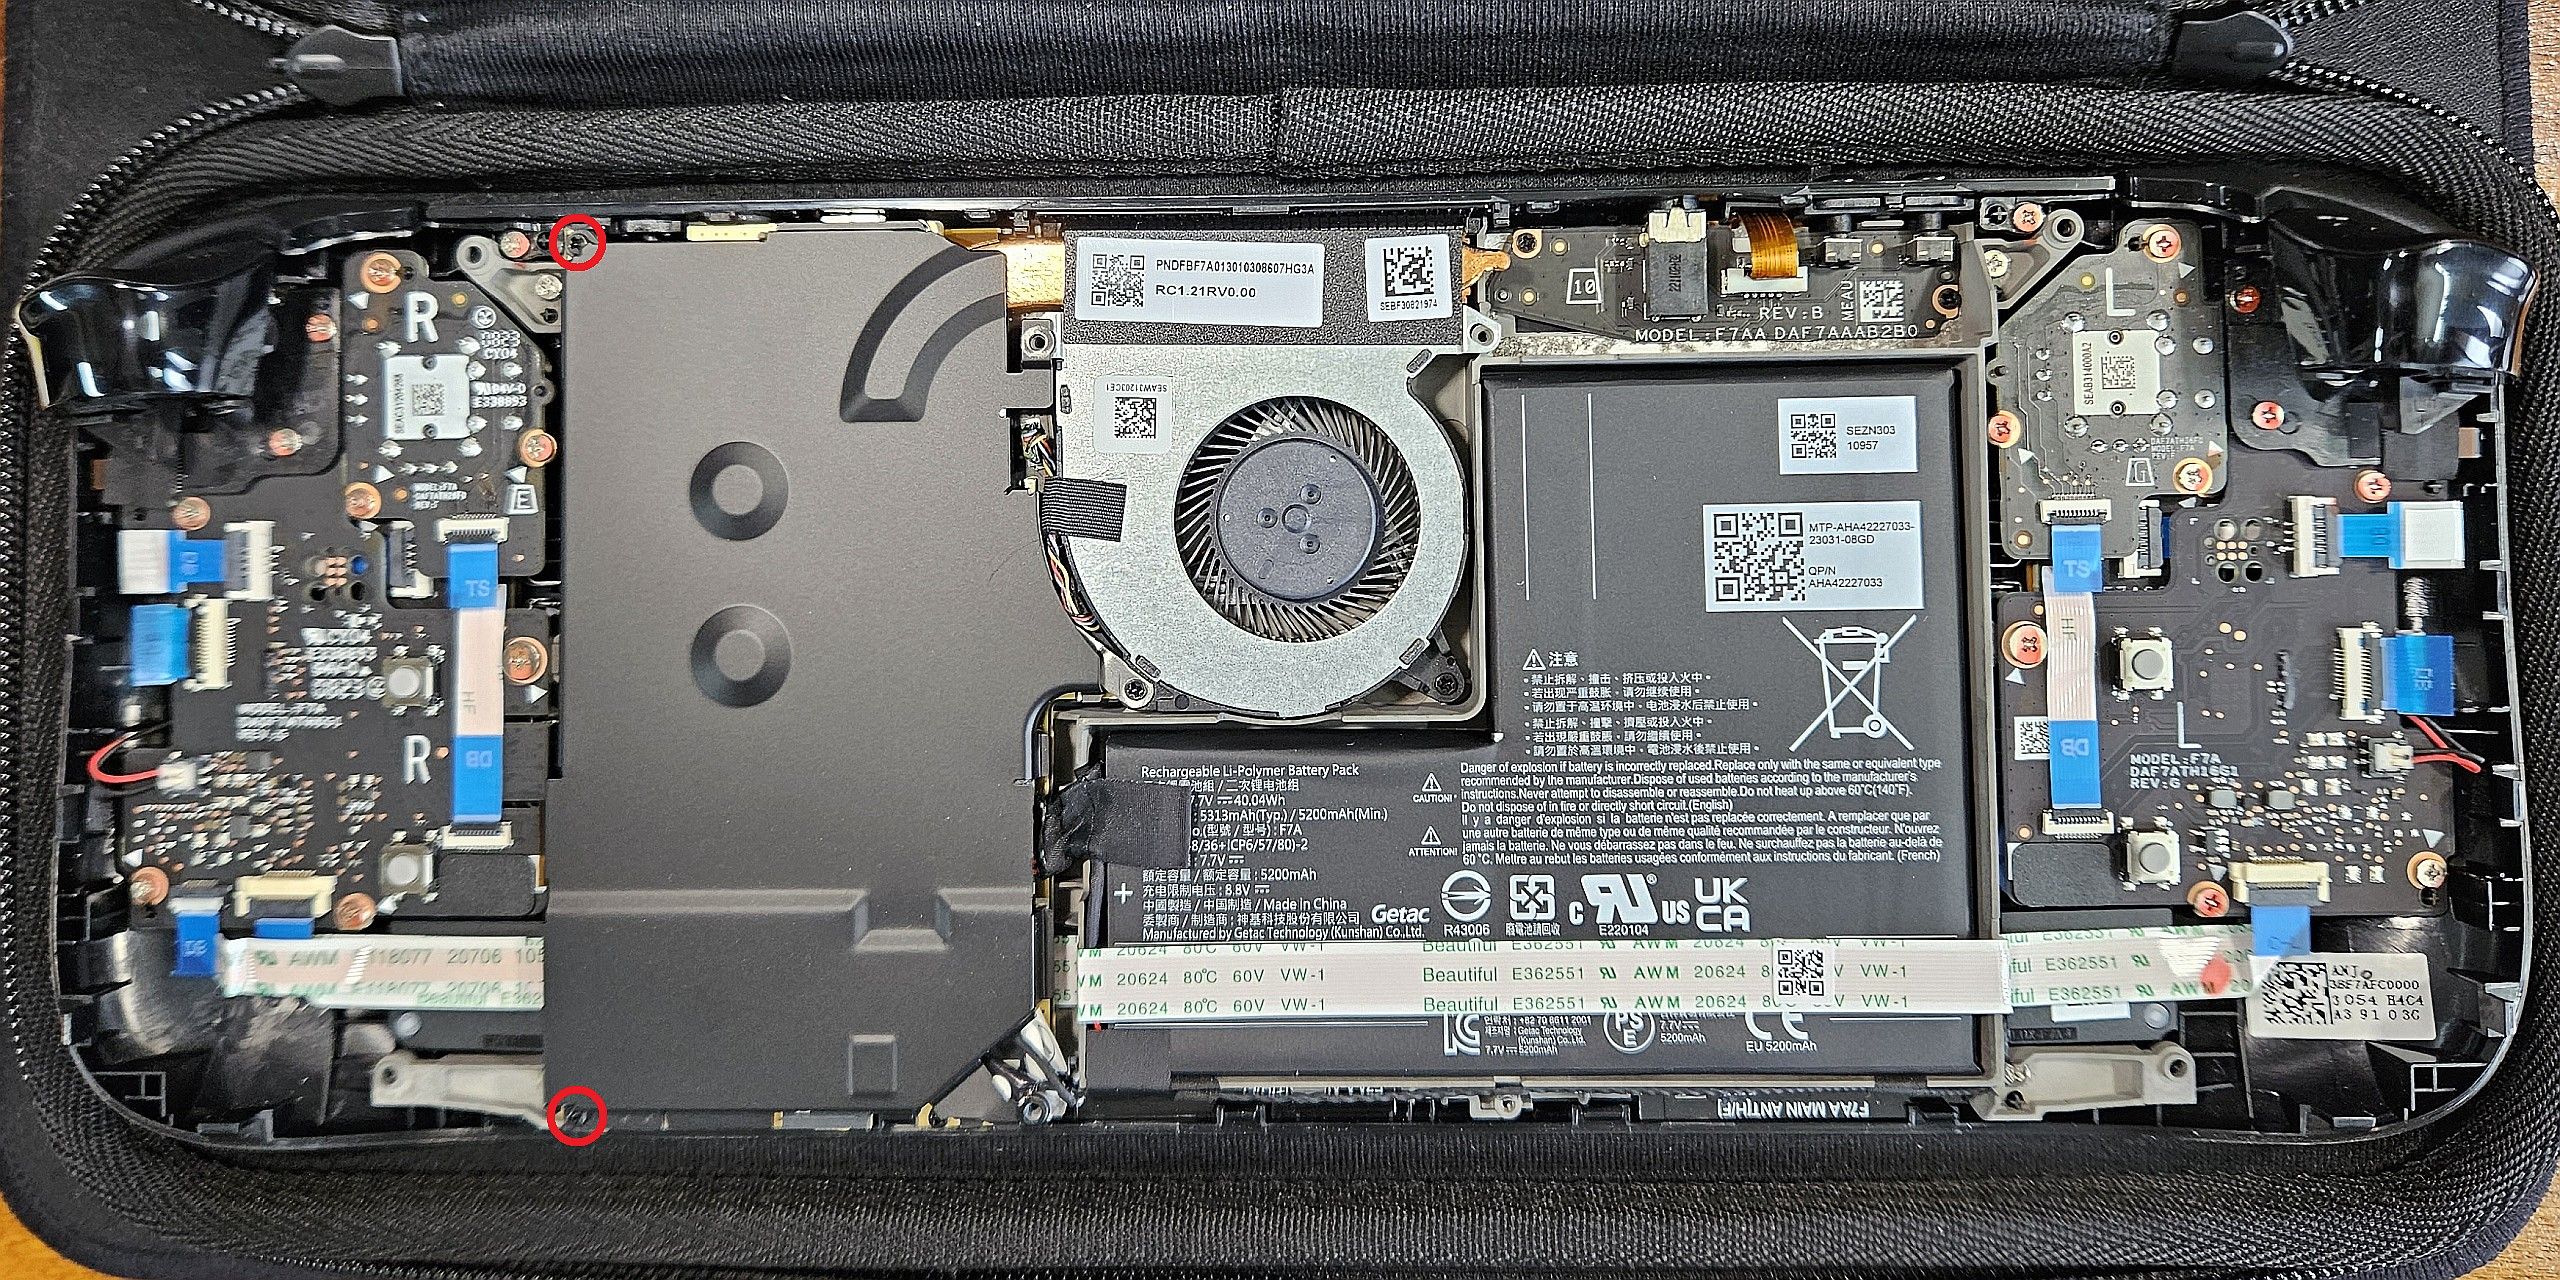
The Steam Deck we are taking apart here is the 2023 revision sporting a black mainboard shield. It is secured with fewer screws than the original silver shield, and it doesn’t require the removal of adhesive foil either.
Use the Phillips #0 screwdriver to unscrew the two machine screws marked in red. It is safe to remove the shield. Carefully lift it off the mainboard, while ensuring that it doesn’t make contact with the exposed components.
Step 6: Disconnect the Battery Cable
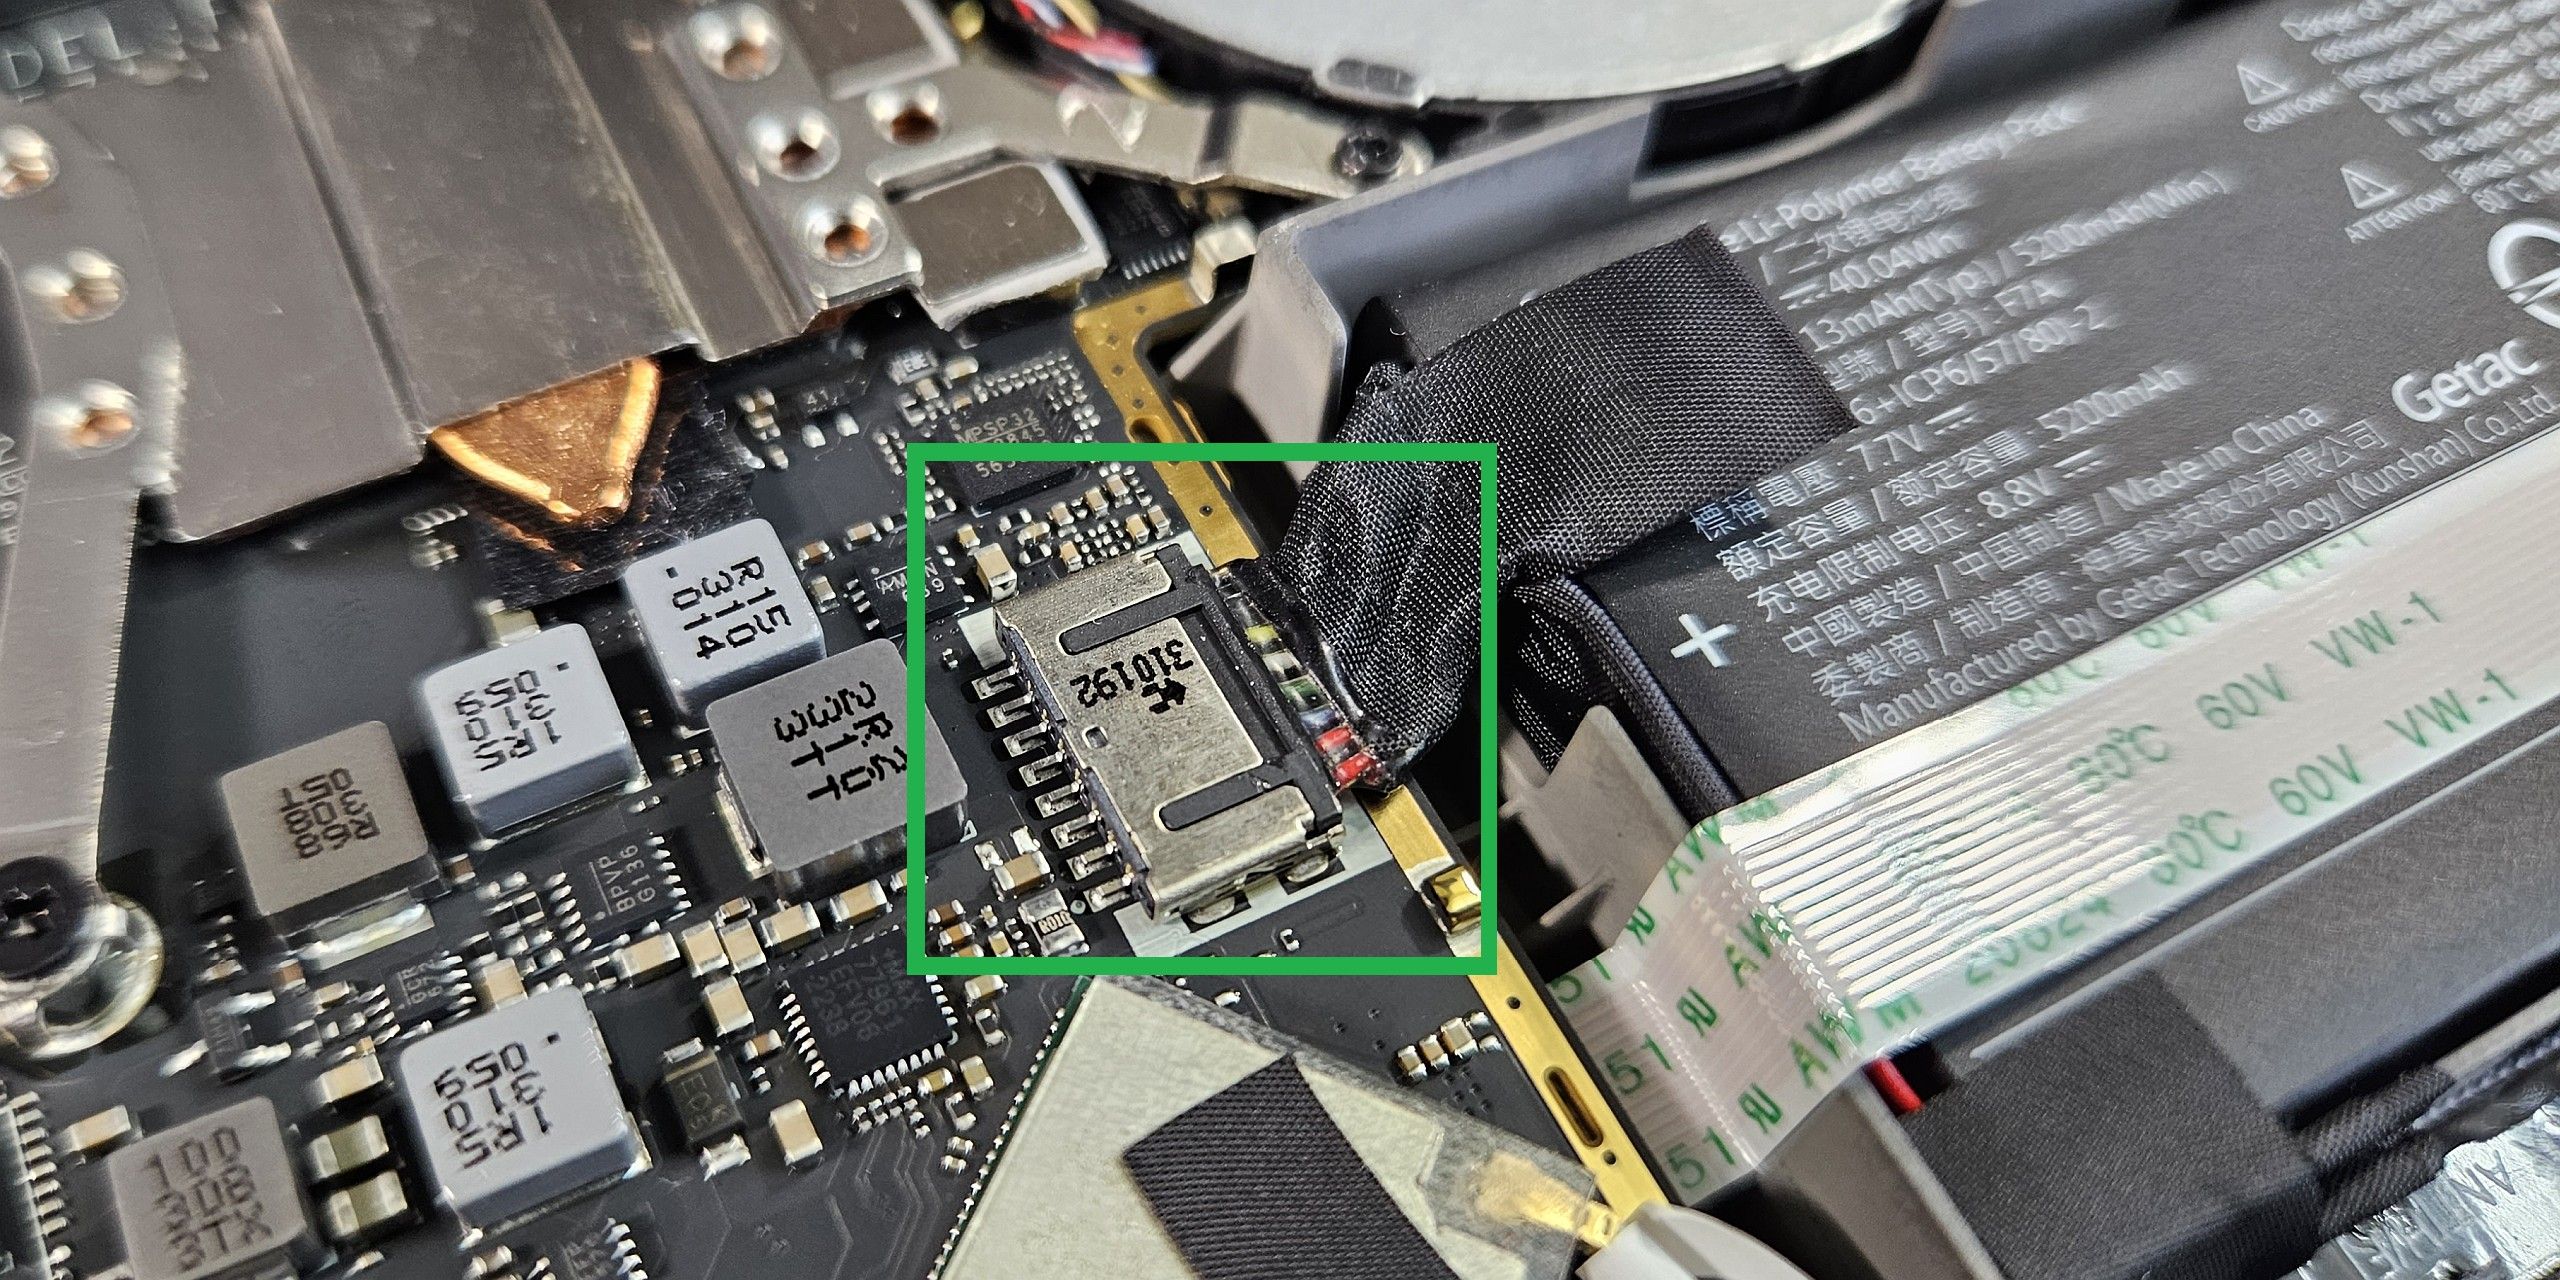
The absence of the mainboard shield exposes several bare leads and PCB components that still have current flowing through them via the battery. Dropping a screw onto any of these energized components, or otherwise shorting them with the screwdriver, may cause electrical damage to your Steam Deck.
This can be prevented by disconnecting the battery. Valve has provided a handy black pull tab to make this task easier. Pull the cable to the right-hand side (away from the mainboard) to disconnect the battery. If the pull tab doesn’t work, you can use your fingernail to pry the black connector out of the metal female housing on the mainboard.
Step 7: Remove the Old Drive
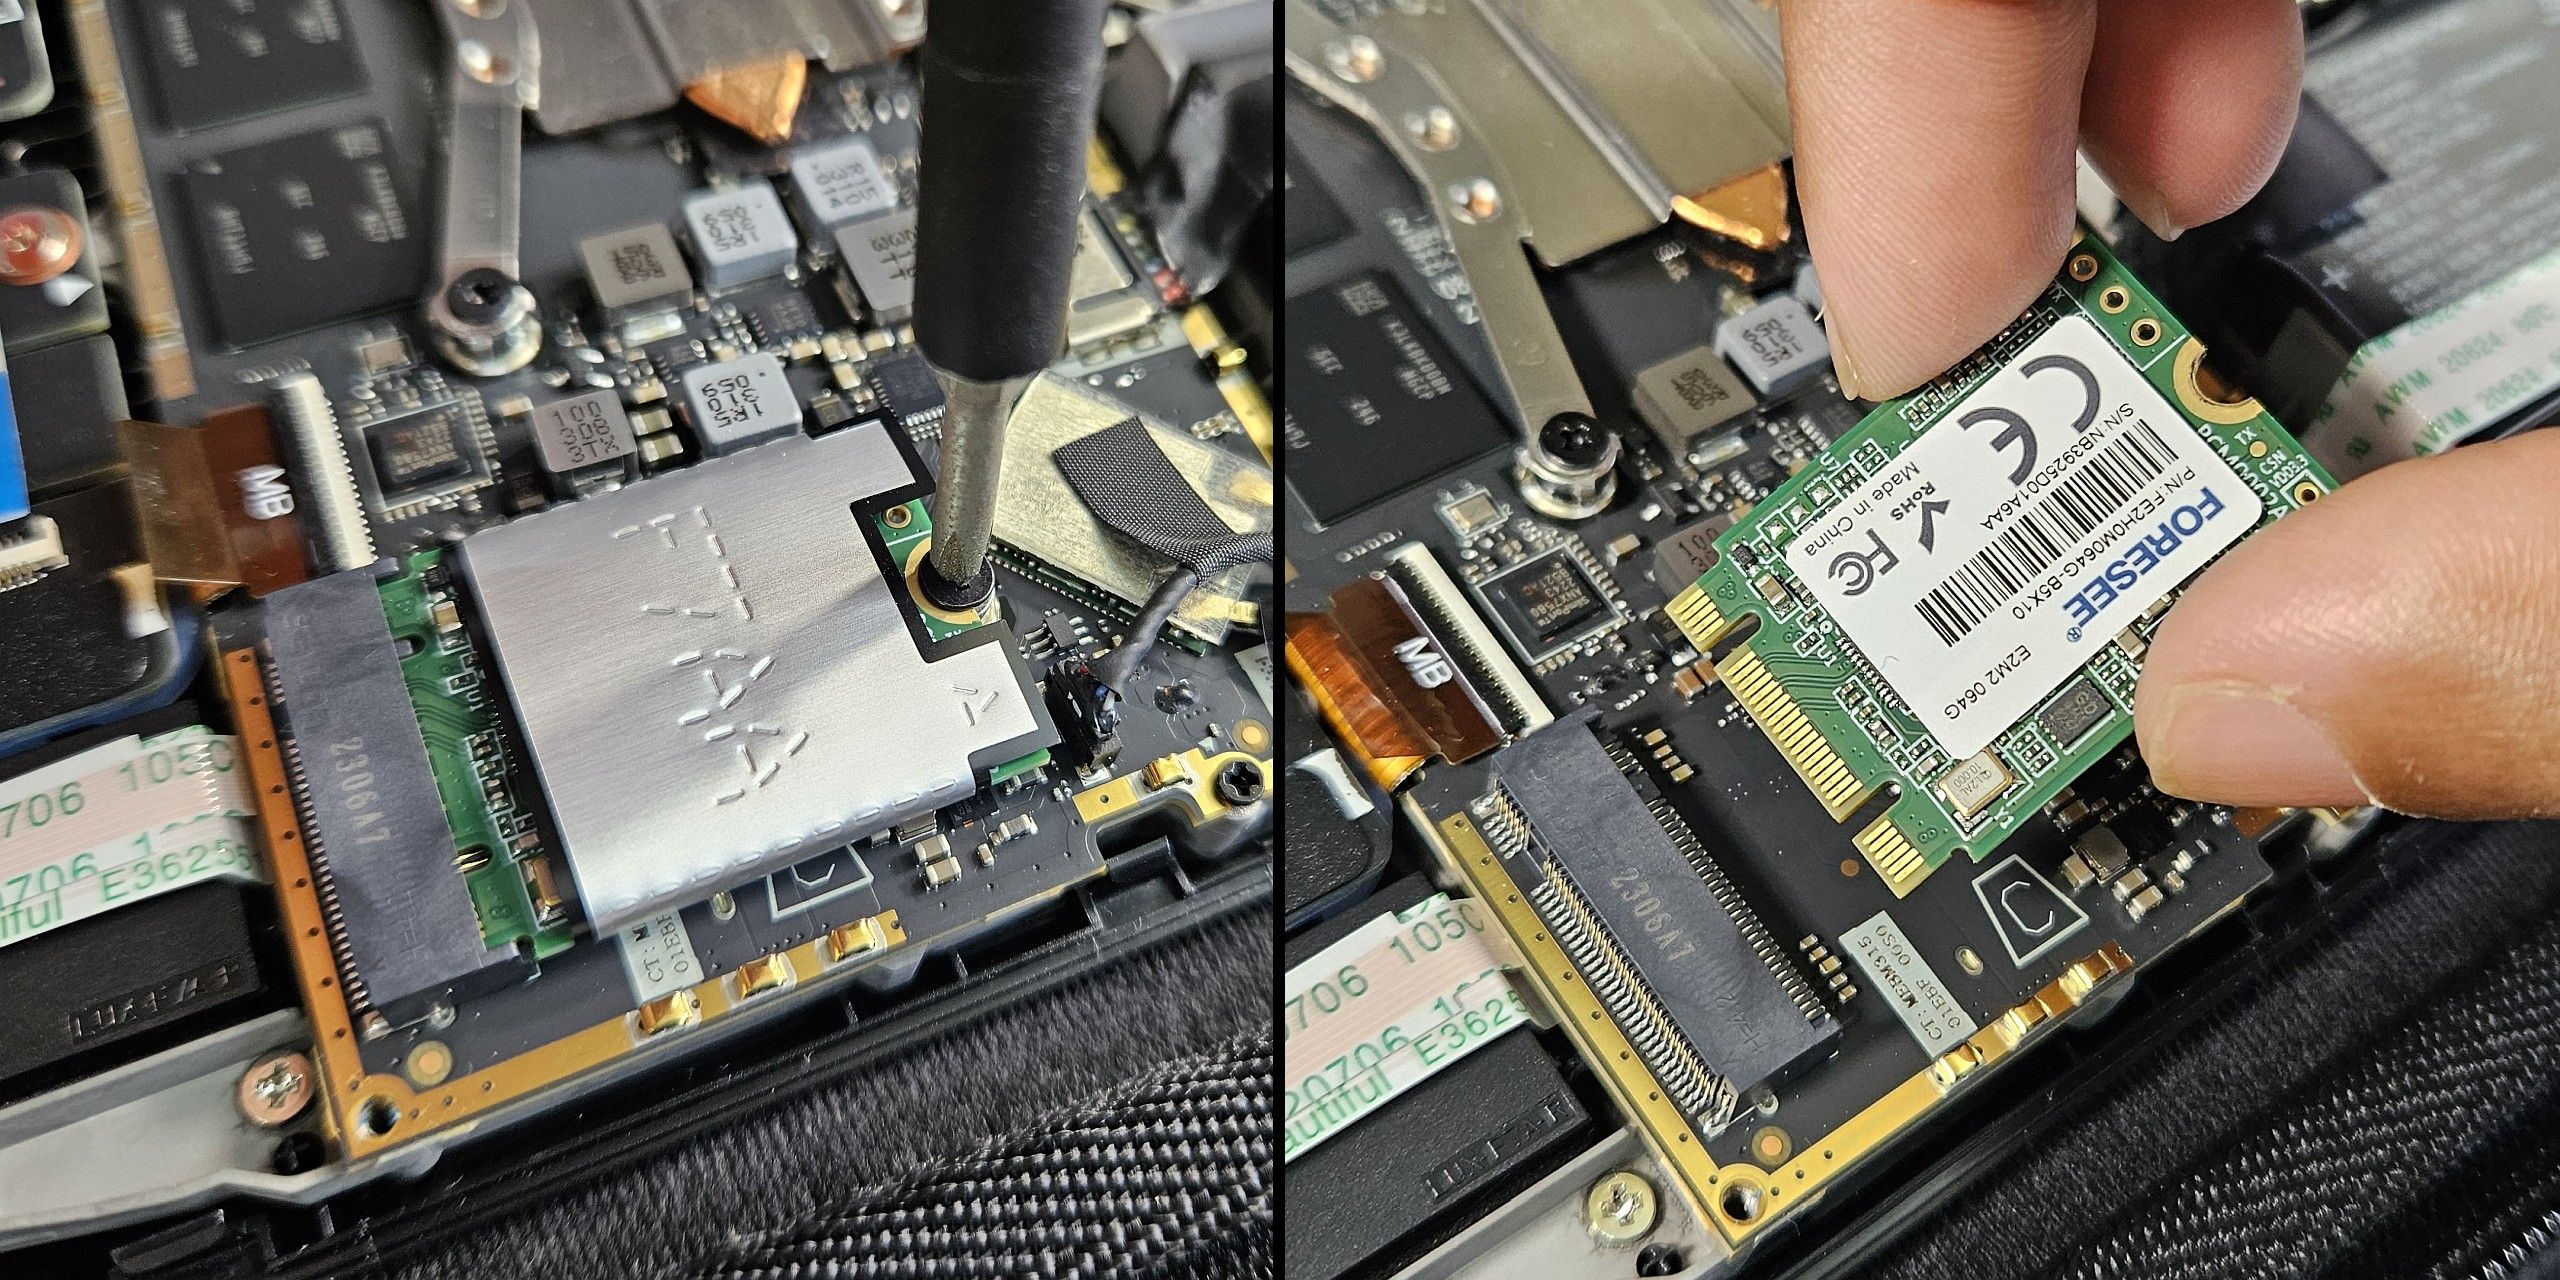
The M.2 storage device slot is located at the bottom of the mainboard to the left of the battery connector. Use a Phillips #0 screwdriver to unscrew the lone machine screw holding the existing SSD or eMMC storage.
The spring-loaded M.2 slot will cause the 2230 daughterboard to pop up at an angle automatically. Be careful, because this may send the highly conductive screw flying onto the exposed component leads on the mainboard.
Remove the existing storage device from the M.2 slot. Now is also a good time to retrieve the ESD shield. That’s the silver foil wrapped around the stock storage drive. It should slide off easily. Keep it safe because we will need it later.
Step 8: Install the SSD Upgrade
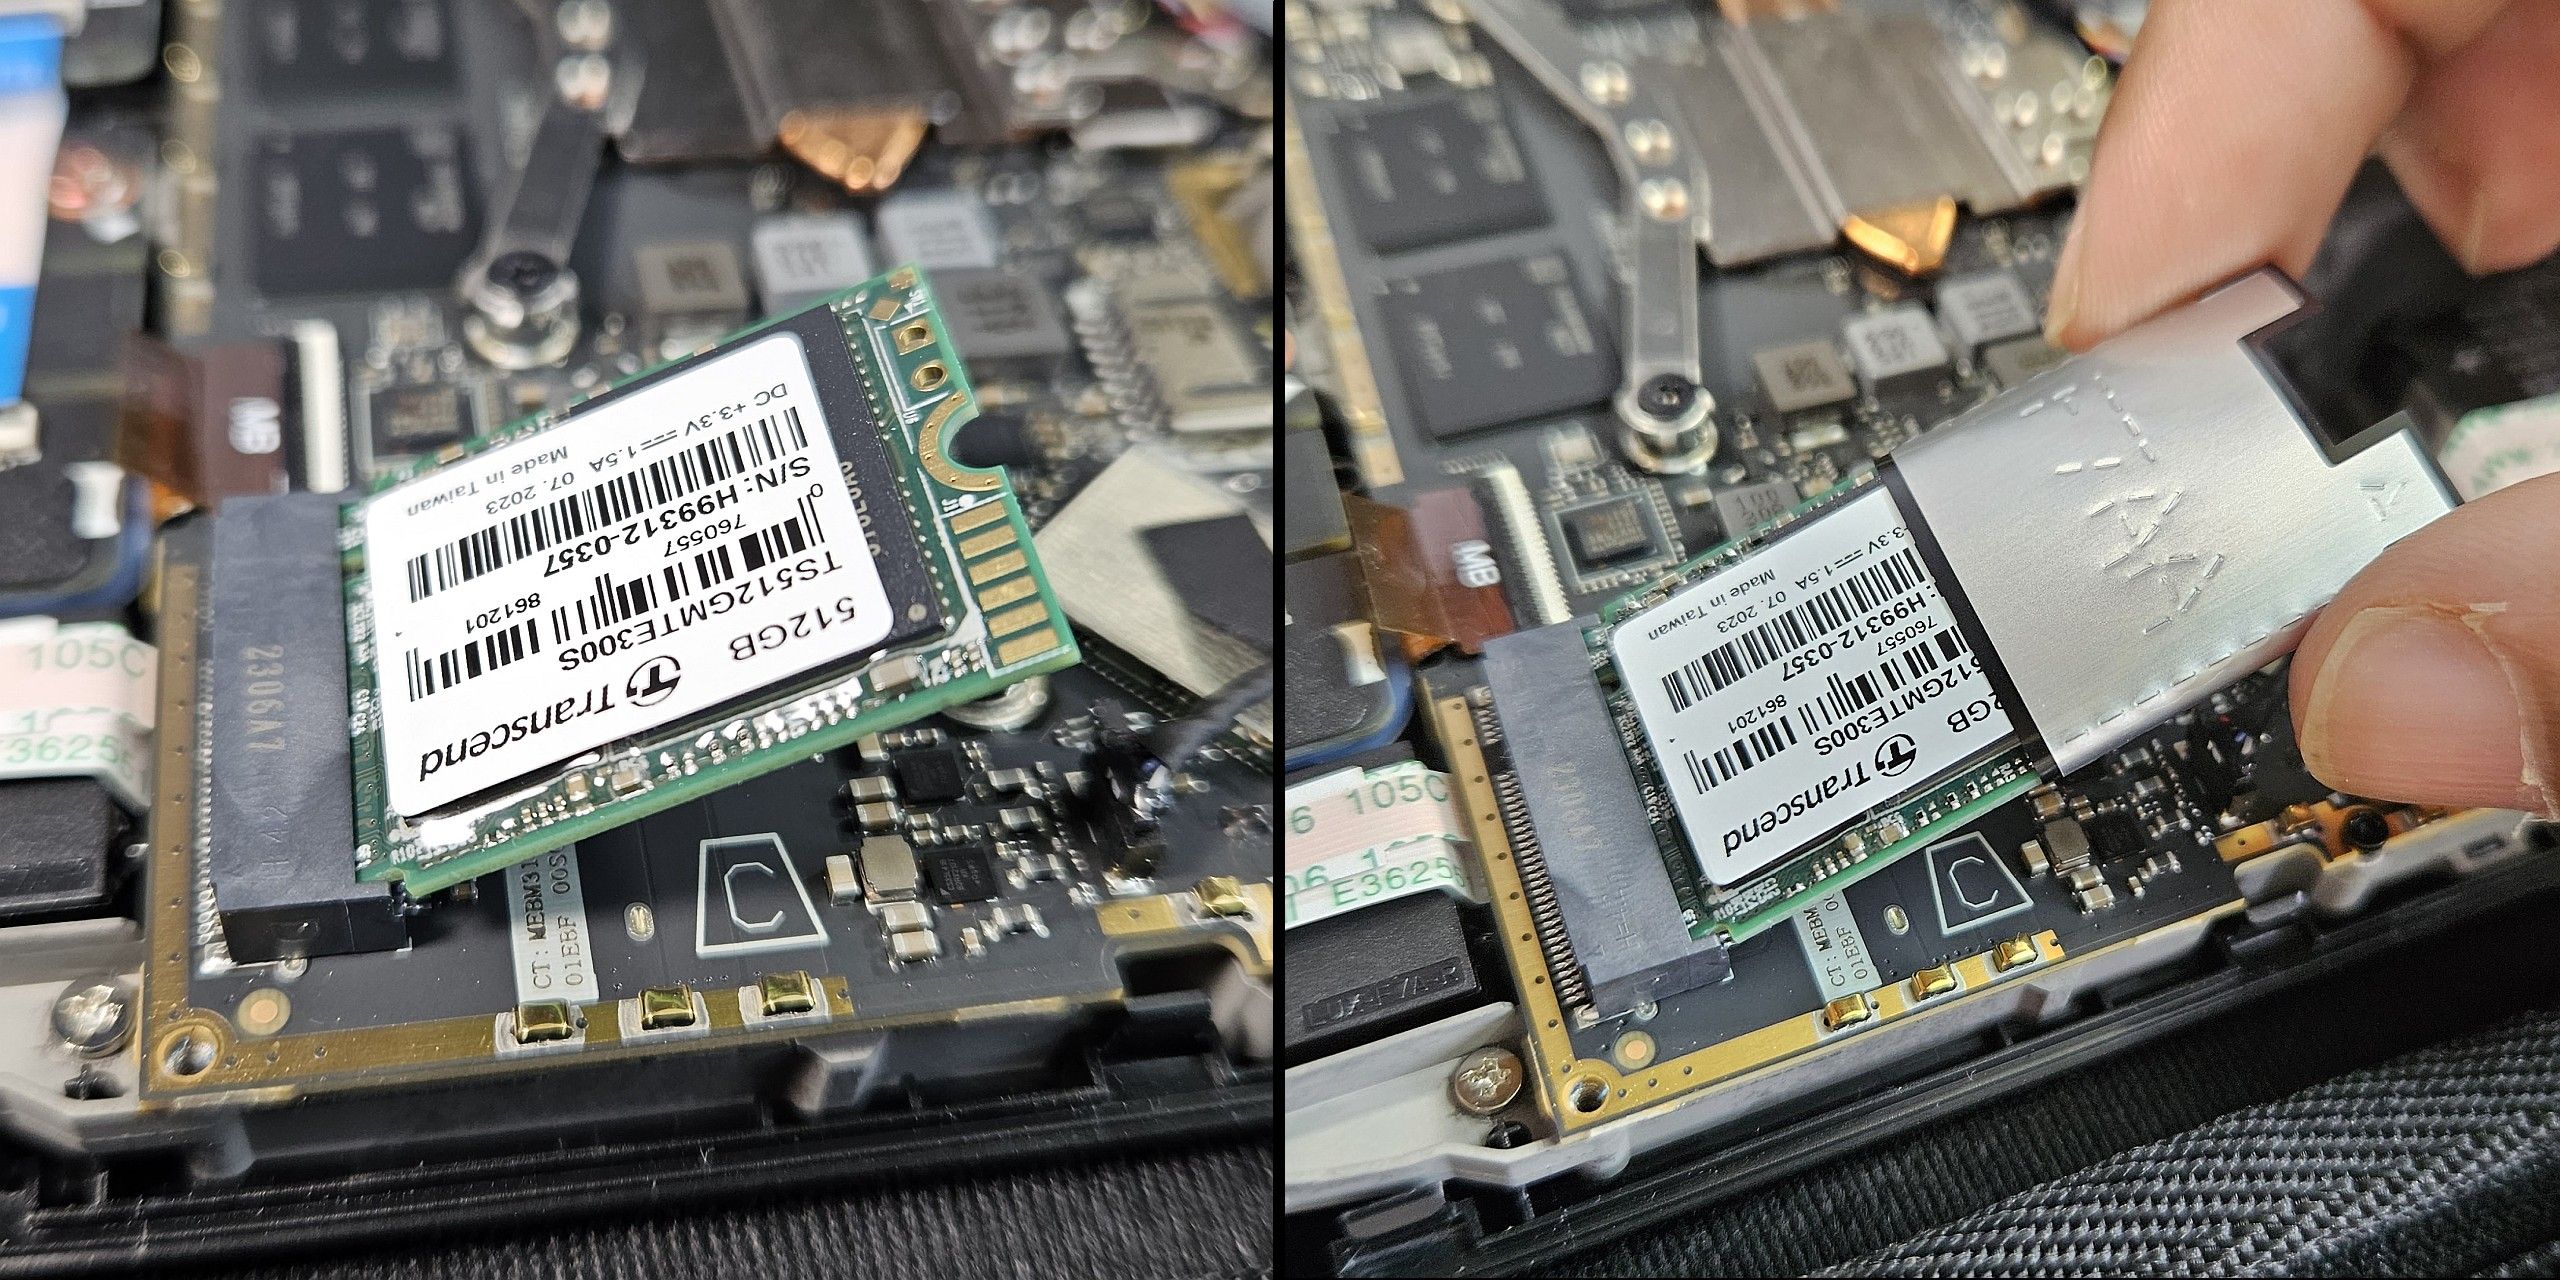
Installing the new SSD is the exact opposite of the removal process. Insert the replacement SSD at an angle into the M.2 slot on the mainboard.
Slide the ESD shield onto the replacement SSD to ensure optimal electromagnetic interference-free operation.
Push the SSD down and secure it with the machine screw.
Step 9: Reassembly Is the Opposite of Disassembly
Follow the steps in reverse to reassemble your Steam Deck. Just be sure to carefully align the back cover onto the chassis and gently press it onto the top half along the seams to snap the retention tabs into place.
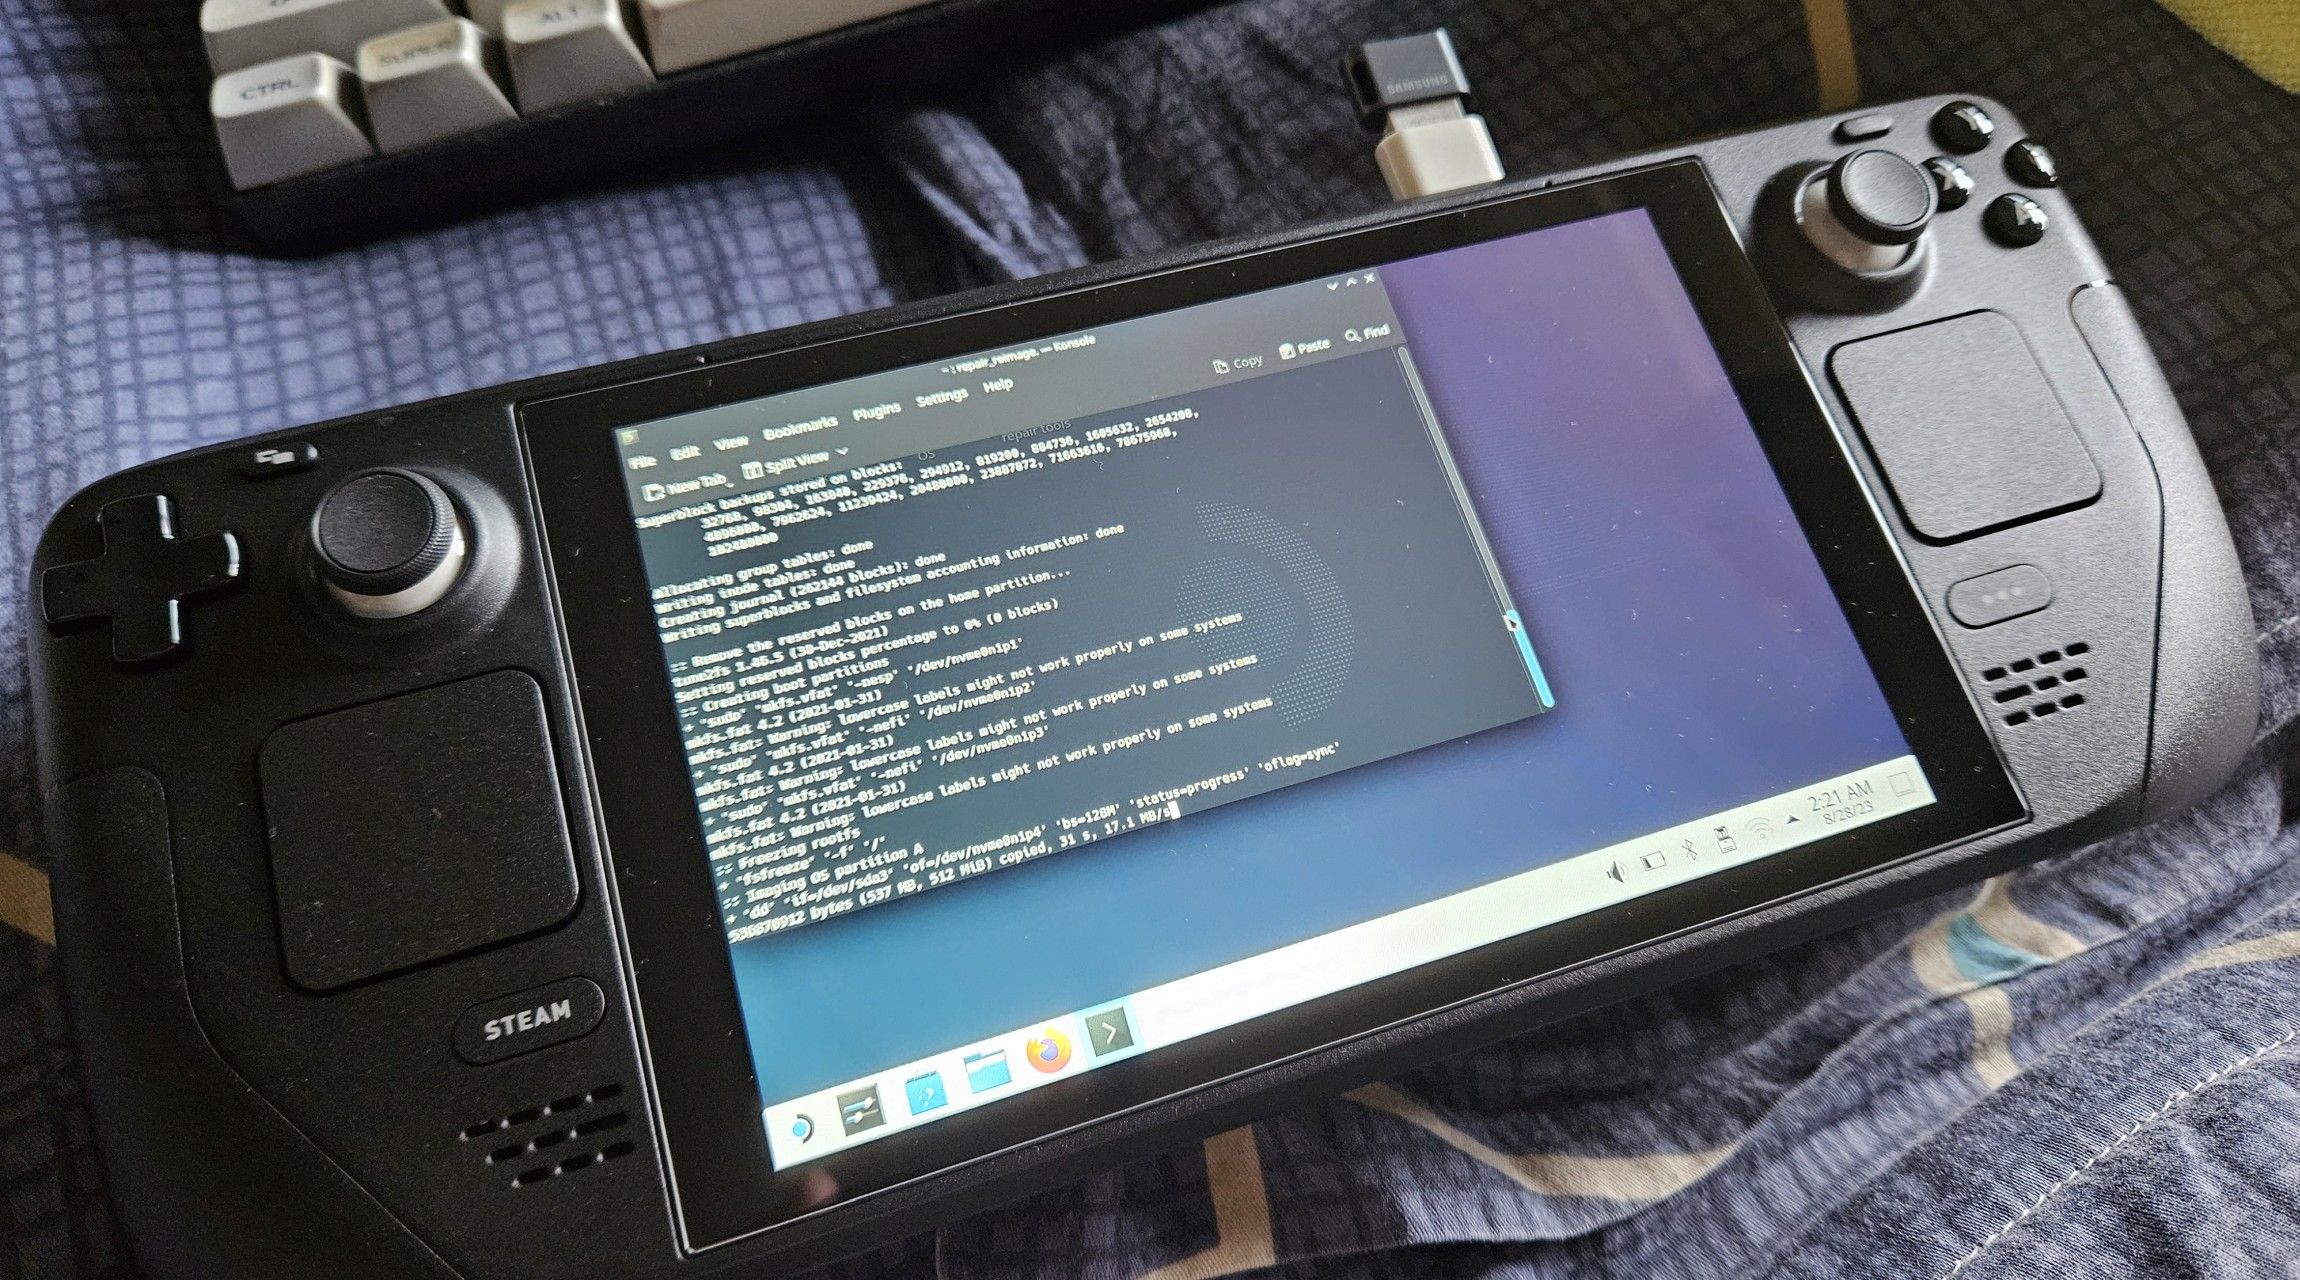
Your device isn’t capable of booting into SteamOS. Fortunately, our guide on re-imaging the Steam Deck makes it easy to get it up and running.
Enjoy Larger AAA Games and Faster Load Times
That’s it! You have successfully upgraded the Steam Deck storage. A larger and quicker SSD should not only load games faster, but modern AAA titles such as Returnal also perform better owing to the quicker transfer of streaming textures and assets between the storage and RAM.

