Creating a decentralized website is easier than most people would expect. In fact, the only difference between a decentralized website and a normal site is that it's hosted on a decentralized network. Almost everything else remains the same.
In this guide, we'll go through the process of creating and launching a decentralized website. You'll need a Web3 domain and some ETH in your wallet to go through the entire process.
1. Create Your Website Files
Start by preparing the necessary website files. Alternatively, you can download a free website template from template providers and use it to create your decentralized website. We'll download a template from Free CSS to develop our site.
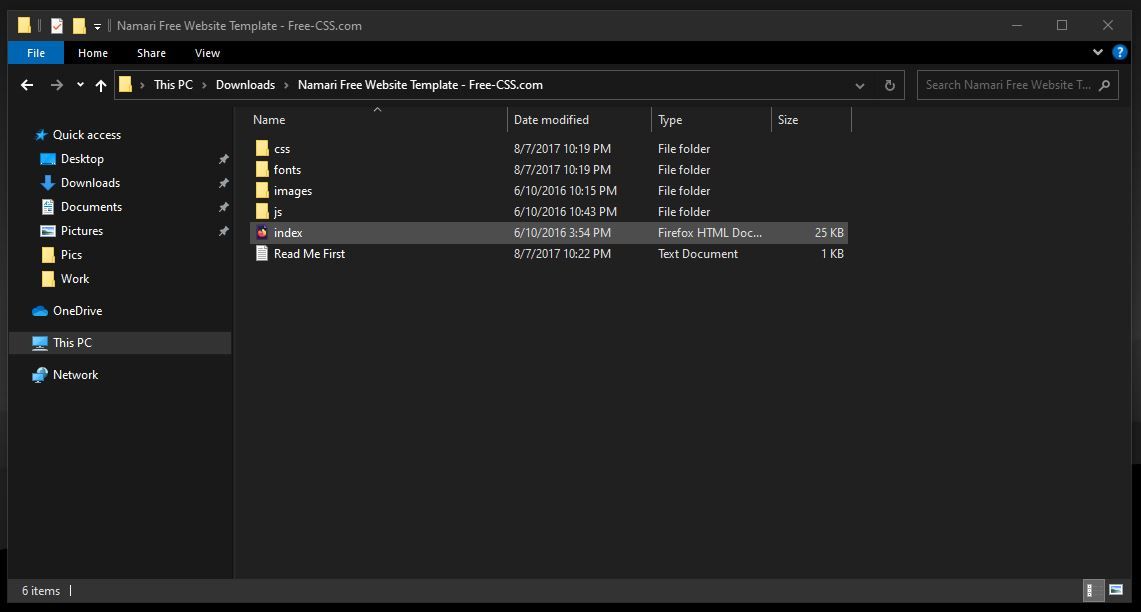
- Visit Free CSS, select a template, and download it. Then, extract the ZIP file into a folder containing each individual file, as shown below.
If you're building the site from scratch, ensure you have all your files in one folder.
2. Upload Your Website Files to IPFS
IPFS (Inter-Planetary File System), is the most popular decentralized file storage system made up of a globally distributed peer-to-peer network of computers that collaborate to host files.
For a start, you can host your website files on your independently run IPFS node–personal computer. The challenge with this route is that your computer has to be online for someone to access your decentralized website.
The other option is to use an IPFS hosting platform such as Piñata, Infura, or Fleek to host and distribute your files across the IPFS network, making it accessible to anyone. However, you'll need to pay for a subscription to use some of these services.
Uploading to Your IPFS Node
First, you need to run an independent IPFS node.
- Start by setting up IPFS on your PC. You can either download the PC client or use the Brave browser extension to set up your IPFS node.
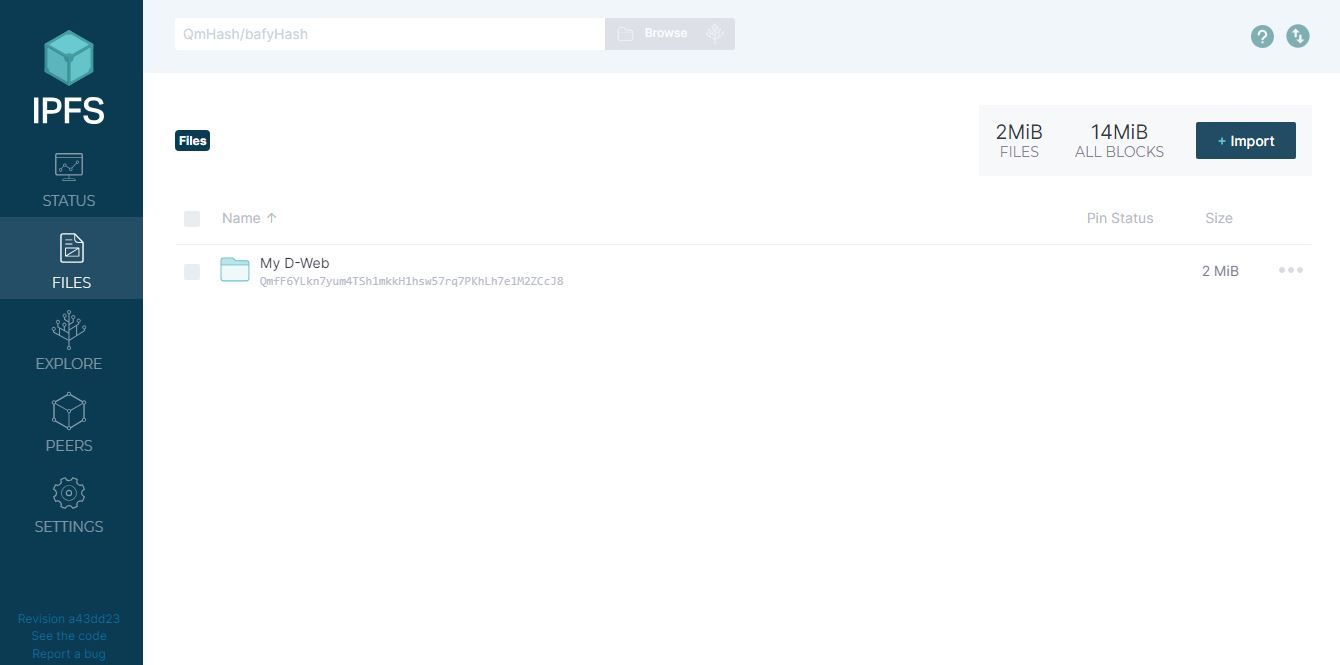
- Once you're already set up, open the IPFS dashboard, click Import, and upload your website folder.
- To check whether the website is live, click on the three dots on the right side of the file, select Share Link, copy, and open the IPFS link in a new tab in Brave. The site should load well if you set up Brave correctly.
Uploading to Fleek
Fleek allows users to upload websites to IPFS for free, while Piñata requires a premium package. Nonetheless, you'll need to deploy your website on GitHub first before you can use Fleek.
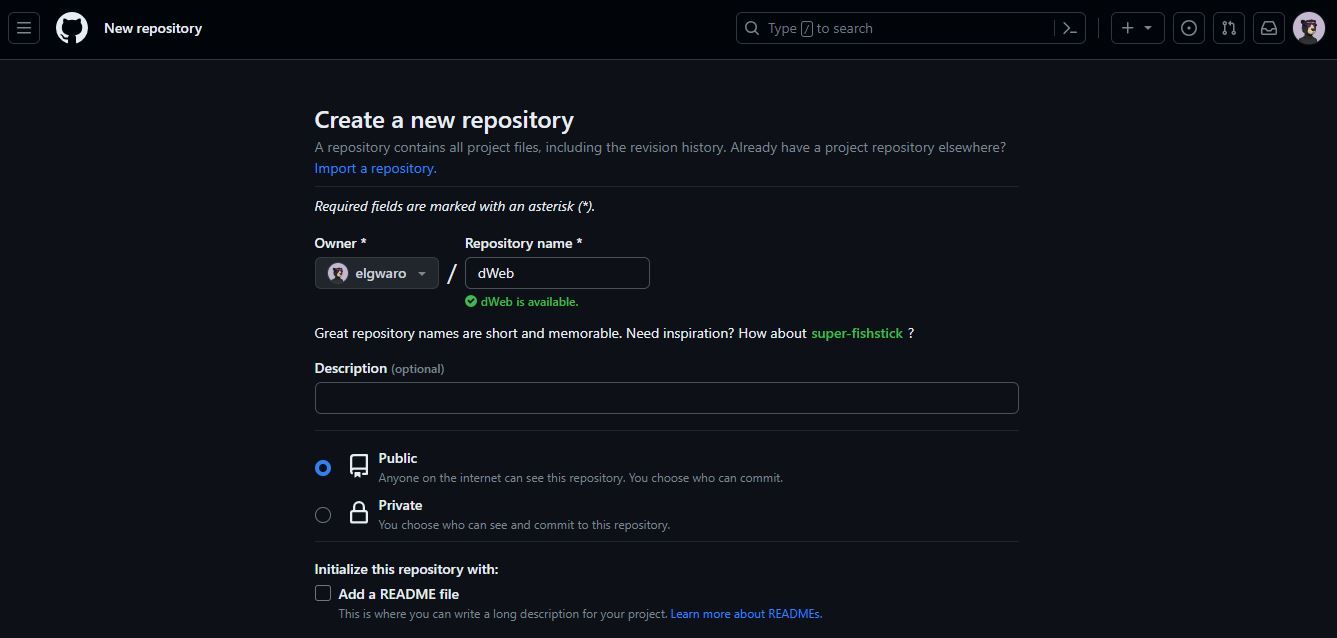
- Open your GitHub dashboard and create a new repository.Next, upload your website files to your GitHub repository using Git, a version control system well integrated with GitHub. For easy demonstration, first save your website file in a folder on your desktop called dWeb
- Visit Git-scm, download, and install the latest version of Git.
- Launch Git Bash from your PC Start Menu and type in:
cd desktop/dWeb - Then run the following commands one by one:
 git init
git add .
git commit -m "first commit"
git remote add origin [url].gitgit remote add origin https://github.com/elgwaro/dWeb.git
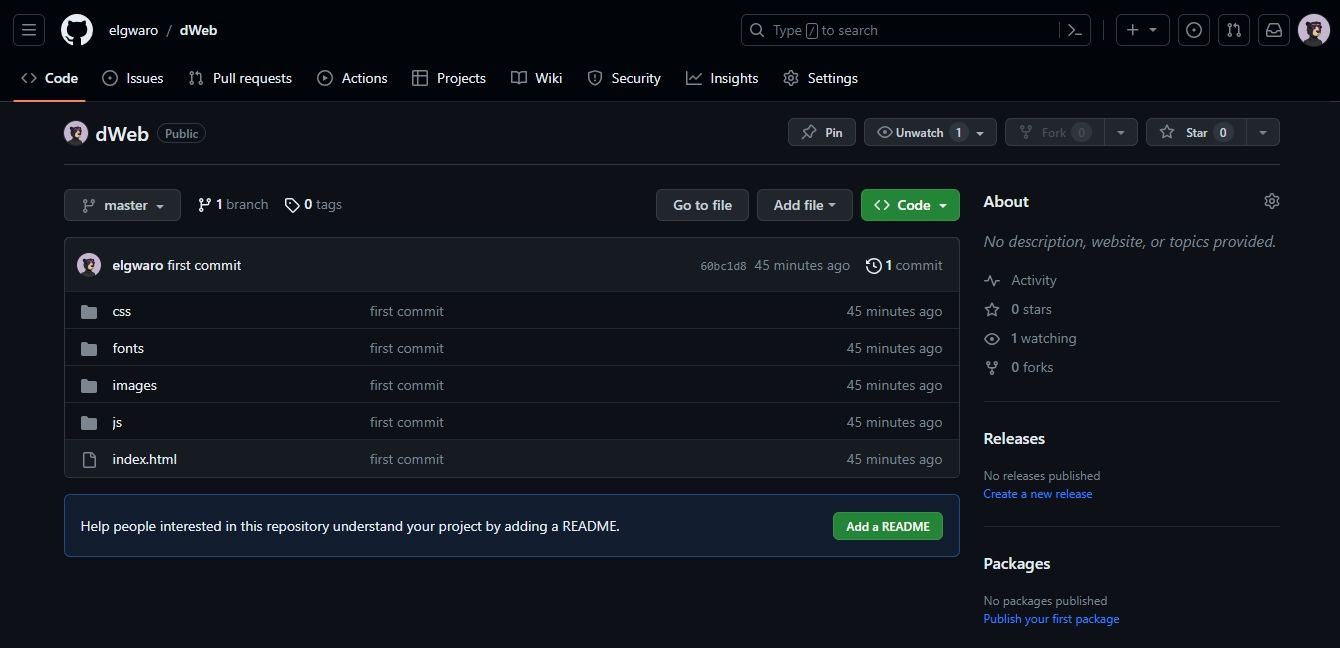
Running these commands initializes a hidden .git folder in your website folder, adds all your website files into the .git folder, commits them for upload, and eventually uploads the files onto your GitHub repository.
This is the most efficient way to upload multiple website files and folders onto a GitHub repository, which should look as shown above.
Linking Fleek to GitHub
Here's how to link a Fleek account with GitHub
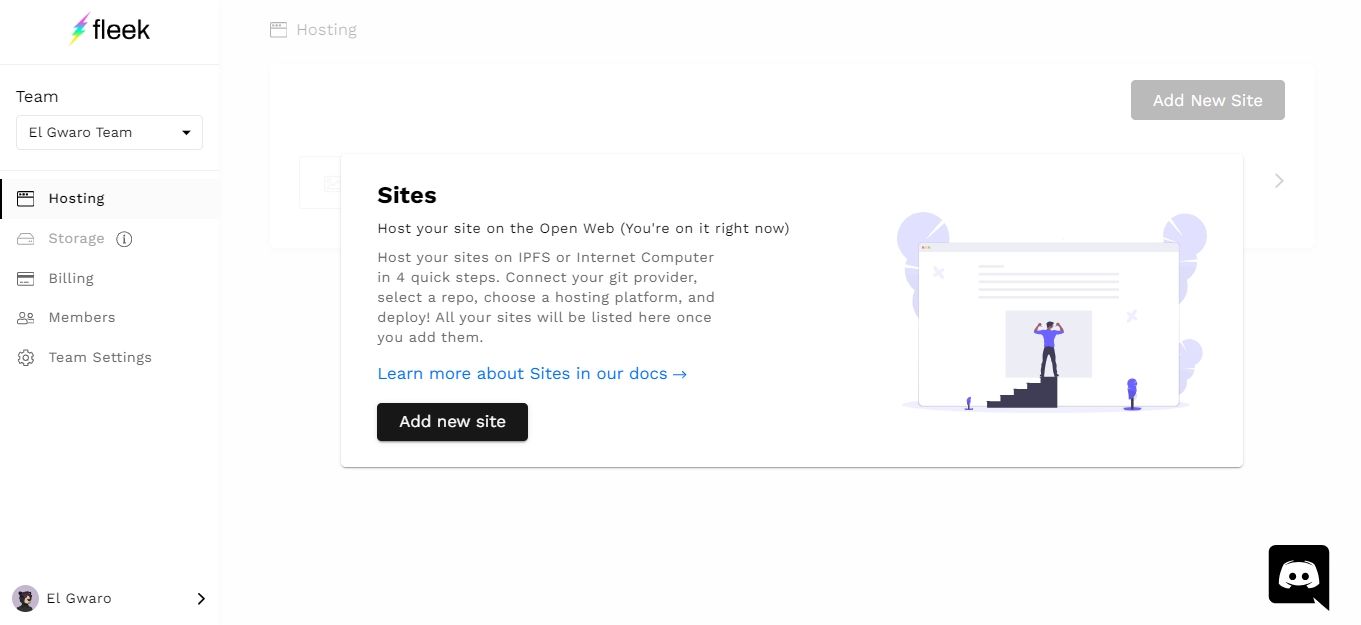
- Visit Fleek, sign into your account, and click on Add New Site
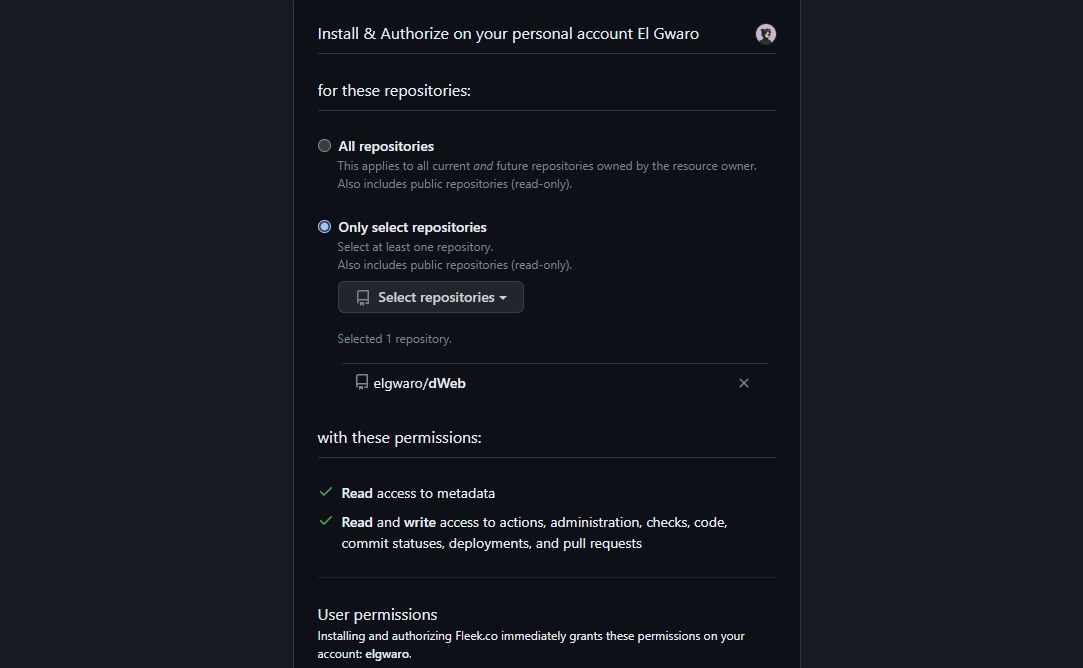
- Connect Fleek to GitHub and authorize access to the repository with your website files.
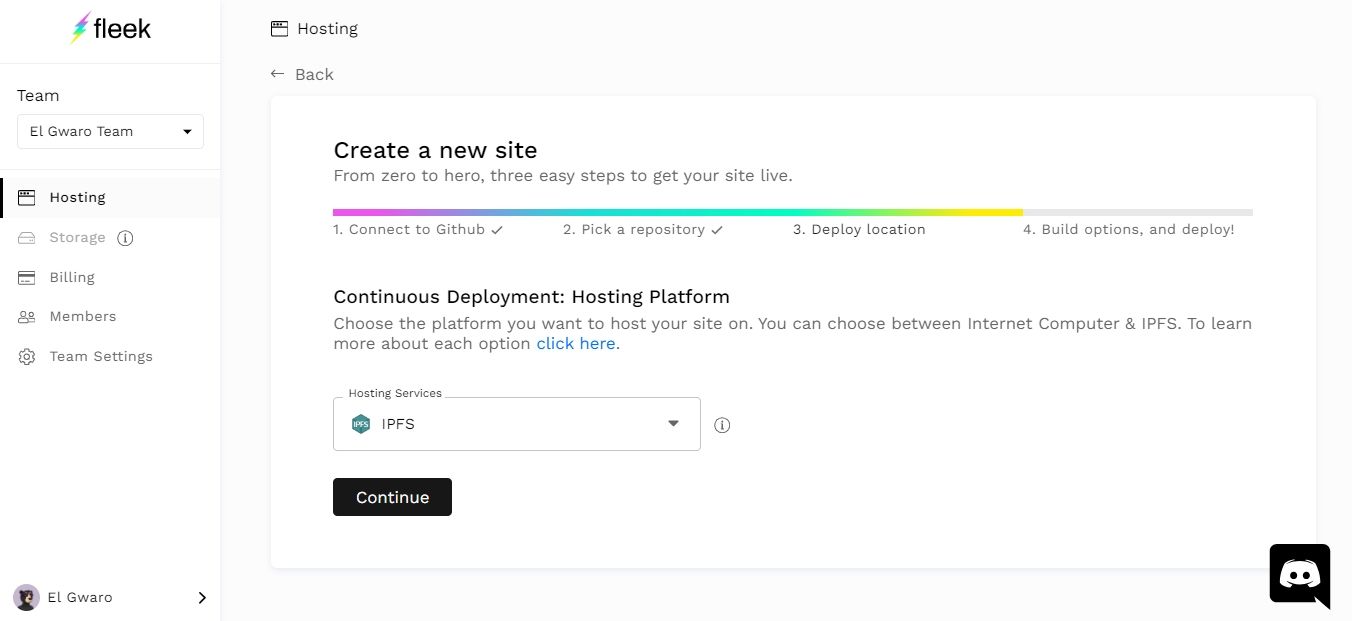
- Fleek will display your selected repository. Proceed to the Deploy Location tab, select IPFS, and click on Continue.
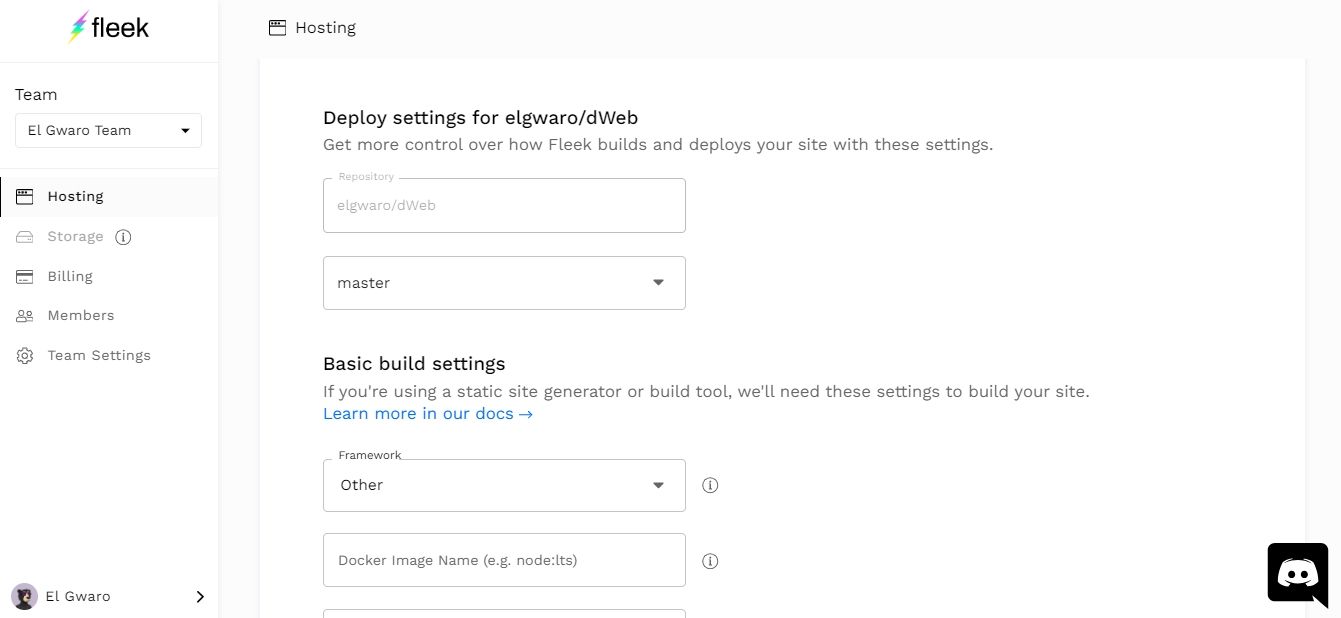
- Pick the framework (if not sure, leave it as Other) and deploy your site.
Your site will be deployed onto IPFS.
3. Connect Your Web3 Domain
Whether you are using a local IPFS node or an online platform such as Fleek, at this point you should have your site deployed to IPFS which means you have the site's IPFS hash.
So the next step is linking your site to your Web3 domain. You can buy one from any of the top Web3 registrars in the market. The cost of the domain will depend on the platform's terms, and for blockchain-based domain systems, you'll incur a network fee for the transaction to be recorded on the blockchain.
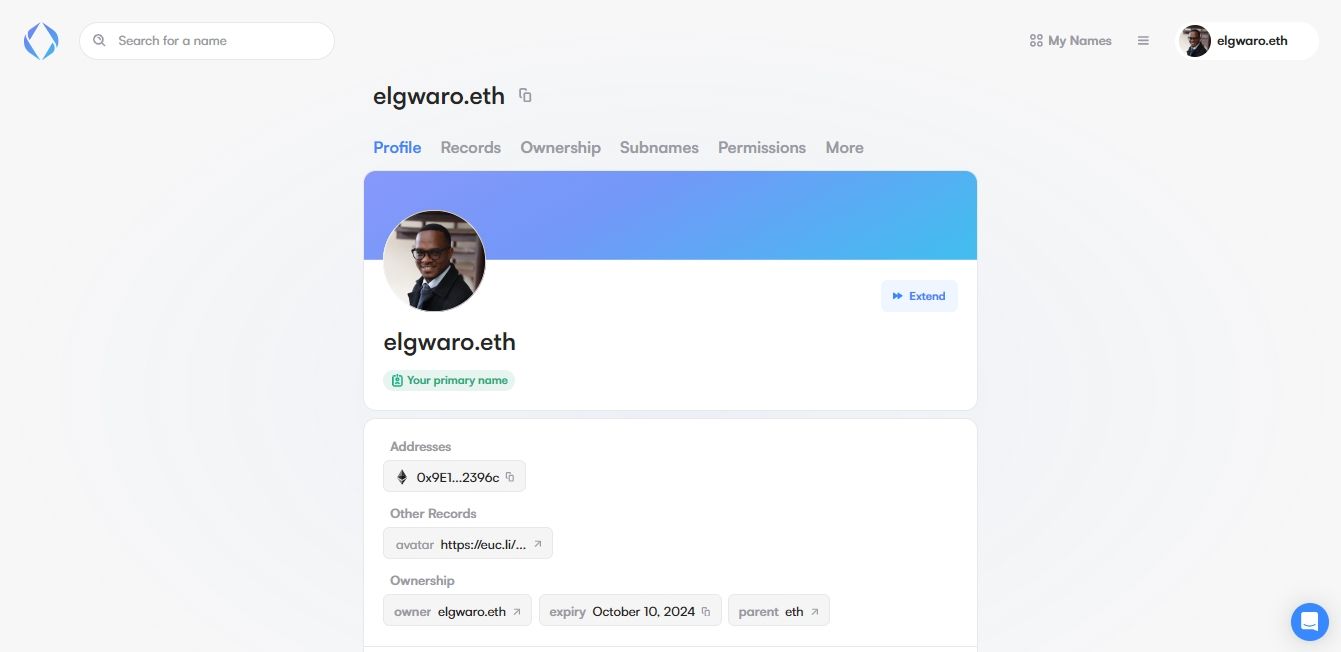
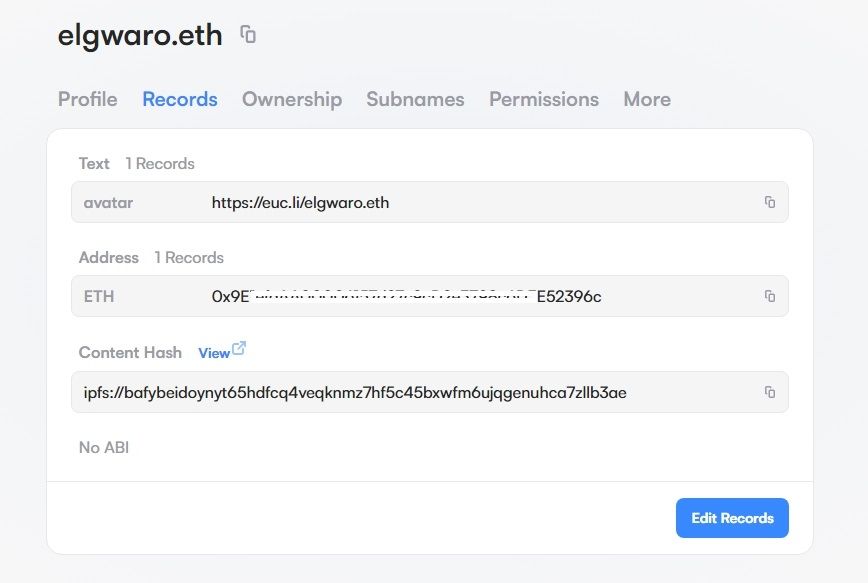
For the purpose of this demonstration, we've acquired elgwaro.eth domain on ENS.
Linking an ENS Domain to an IPFS Website
Here's how to link your ENS domain to an IPFS hosted site
- Open your ENS dashboard and access your domain name section.
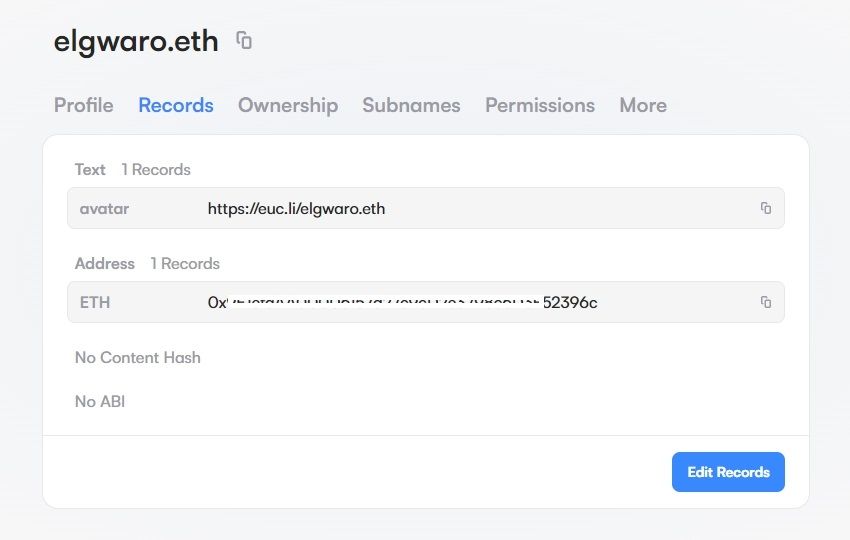
- Select the Records tab and click on Edit Records.
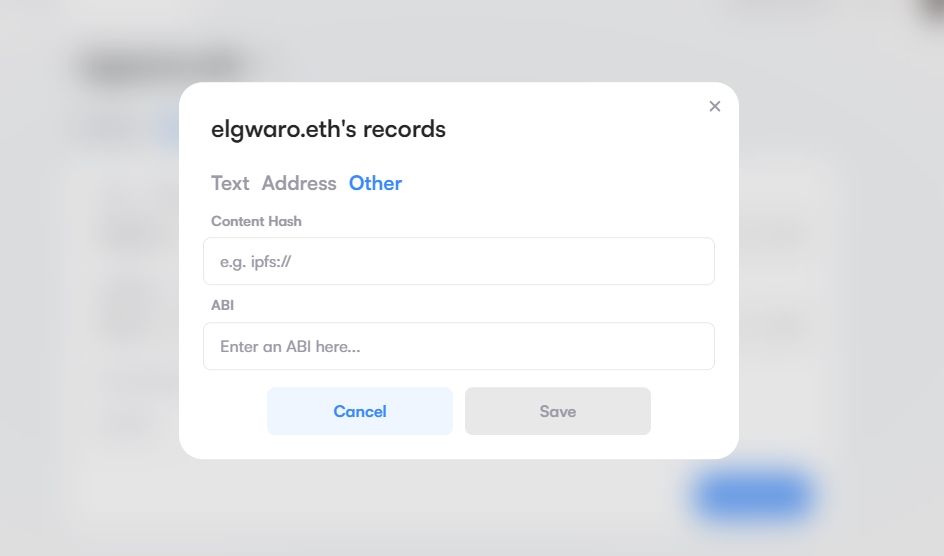
- Select Other, paste your independent IPFS website link, and click Save.
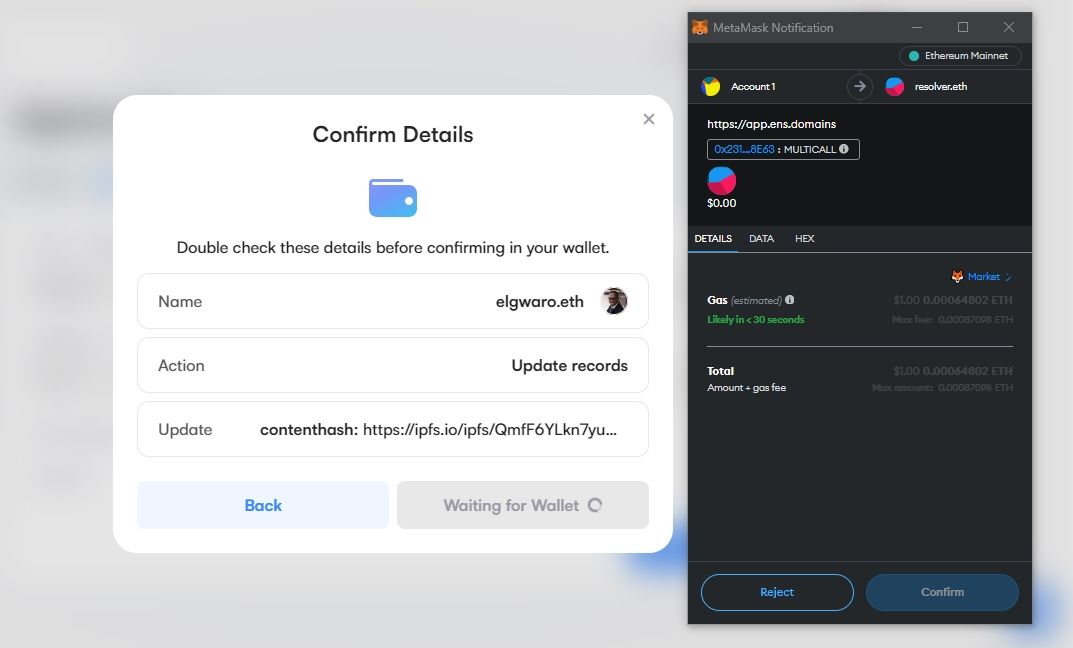
- You'll be prompted to connect your wallet to authorize the transaction, which will cost you a small fee depending on the network's activity.
- Once the transaction goes through, your Web3 domain will be linked to your decentralized website.
If you're using Fleek, you can connect your domain on the Fleek dashboard.
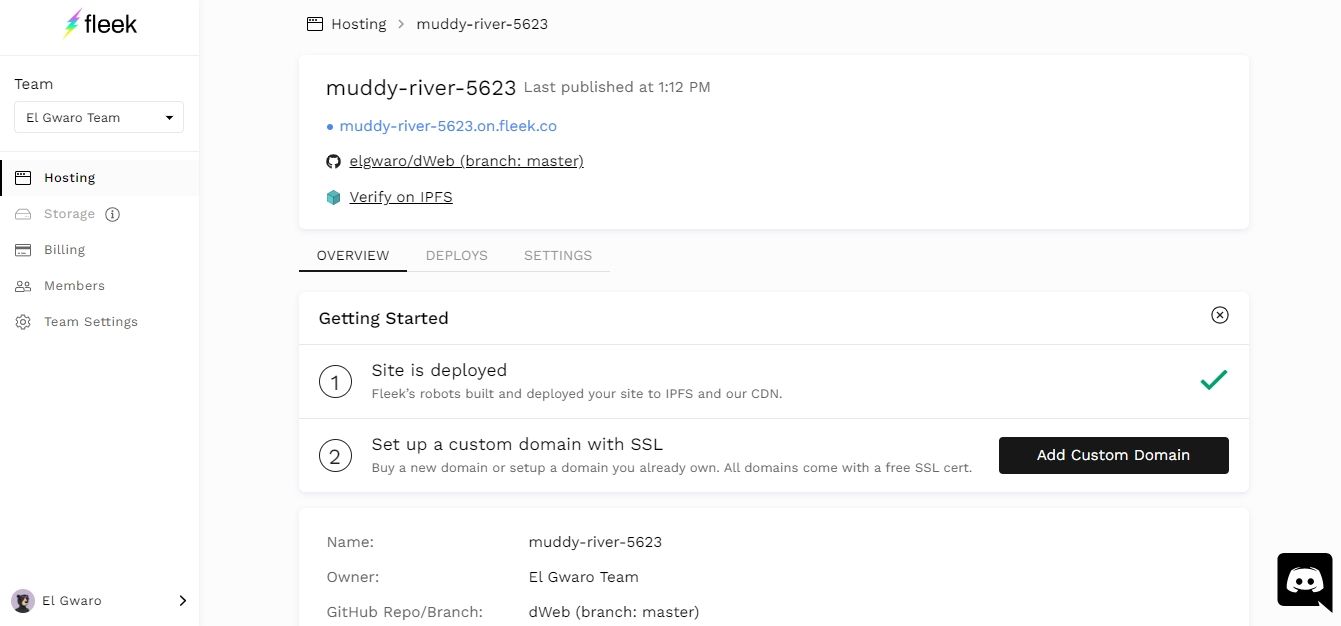
- Open your deployed website dashboard and click on Add Custom Domain.
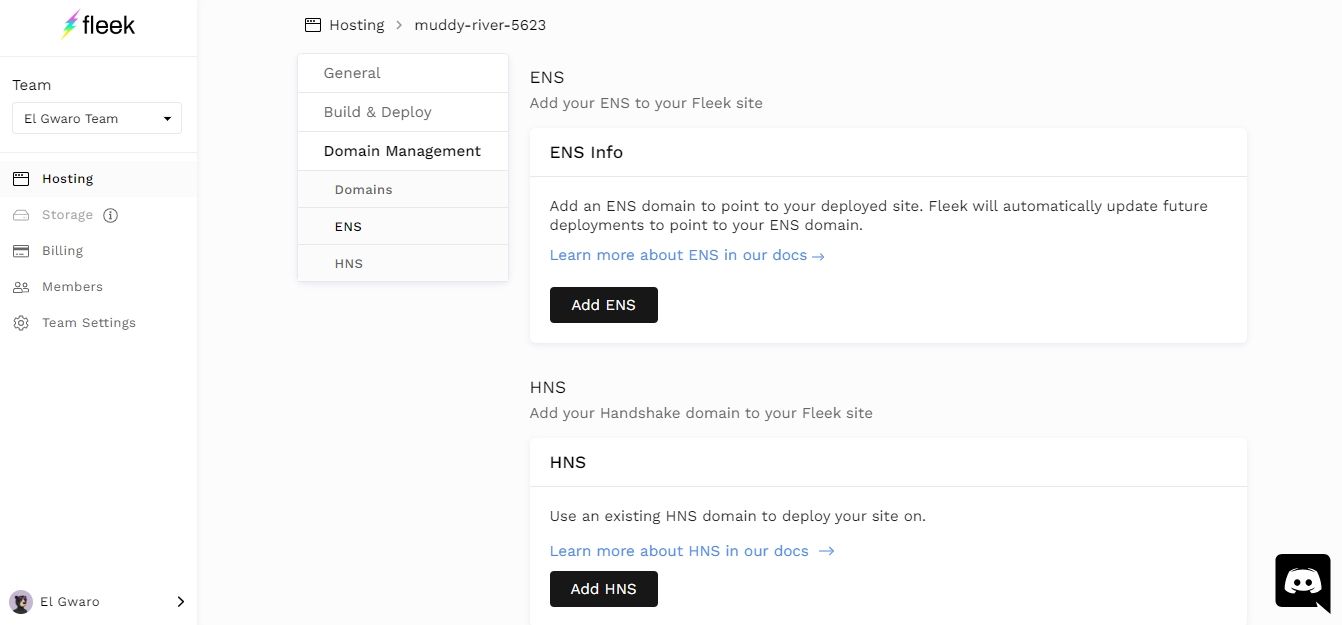
- Scroll down to ENS Info and Click on Add ENS.
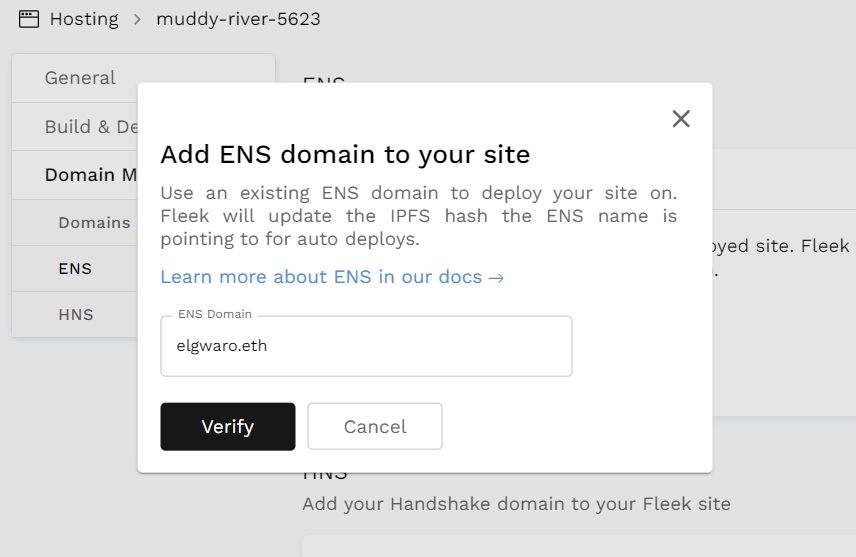
- Type in your ENS domain, click on Verify and then confirm.
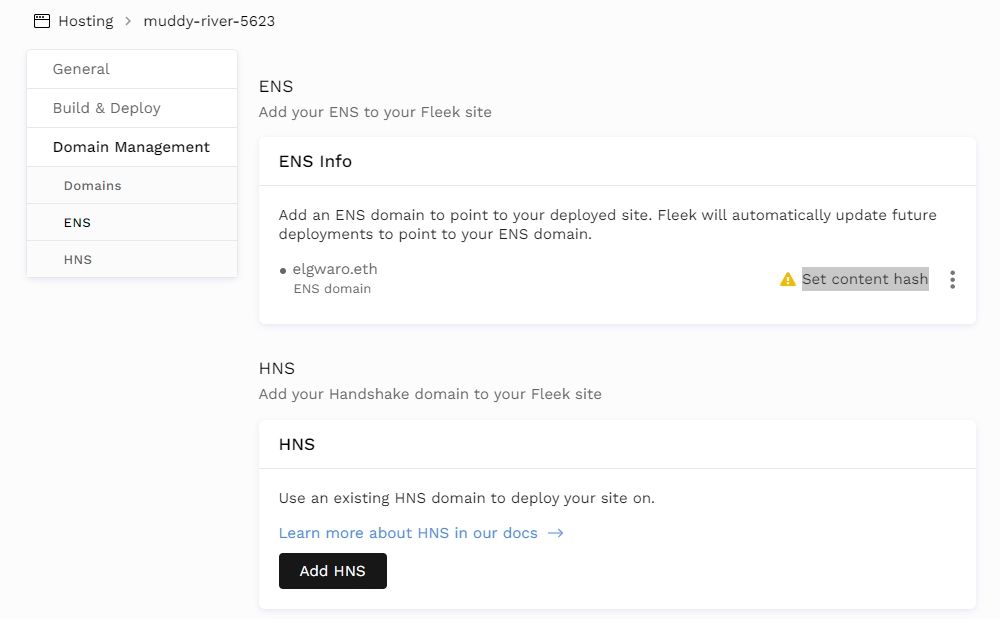
- Next, click on Set Content Hash. You'll be required to connect your wallet to authorize the transaction by paying a small fee based on the network's activity. To successfully set up the link, ensure the connected wallet account is the controller of the domain.
4. Access Your Website
Once you've successfully linked your Web3 domain to your decentralized website, your Web3 domain will be pointed to your decentralized website.
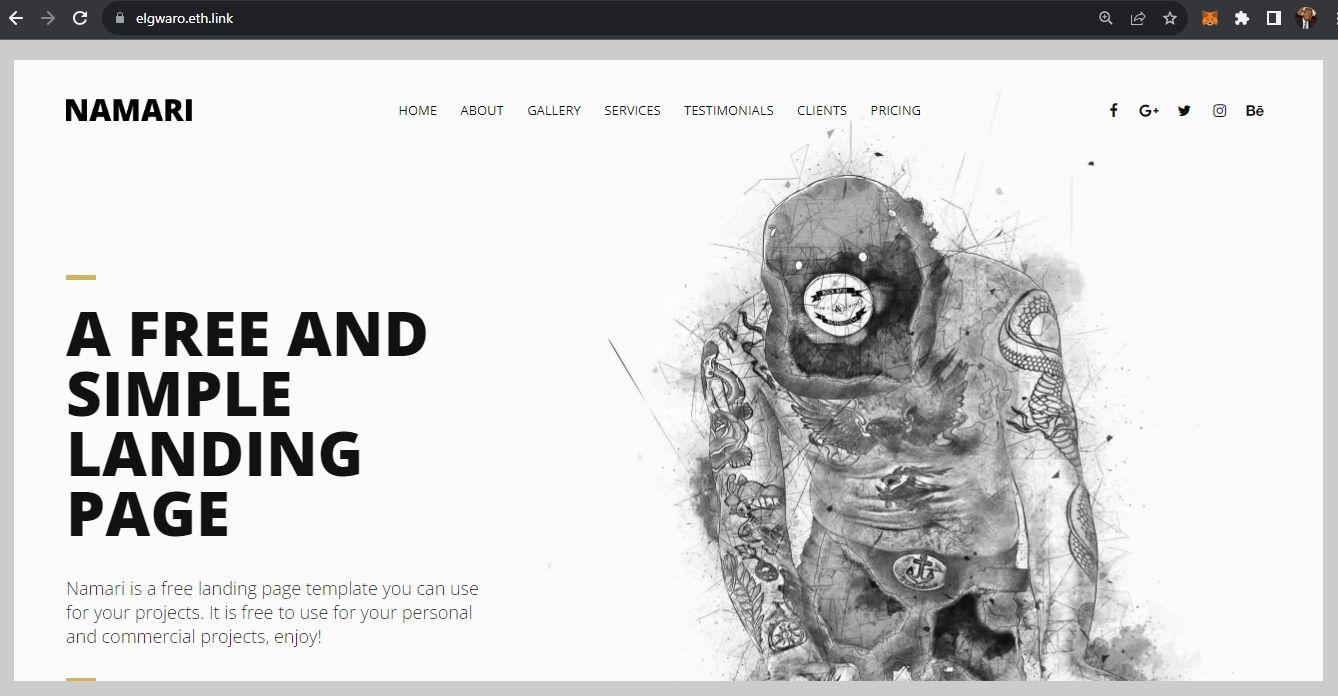
You can access it using your ENS domain +.link. For instance, in this case, it's elgwaro.eth.link. Nevertheless, when using an IPFS-enabled browser like Brave, you don't have to include .link at the end of your URL.
You've successfully created your decentralized website.
Moving Beyond Web2 Development
As the internet becomes more decentralized with time, the number of decentralized websites will probably exceed those hosted on centralized servers eventually. Luckily, transitioning from Web2 to Web3 website development is not as complex as it seems. Therefore, if you've thought of building a decentralized website that's resistant to censorship, this guide can give you a huge head start.


