Key Takeaways
- Be cautious when buying storage drives to avoid the multitude of problems that come with purchasing a fake drive, including slow data transfer speeds, reliability issues, and fake storage capacity.
- You can check the actual drive capacity on Windows by using the Disk Management tool to verify the size of the primary partition or by using Diskpart to delete and create a new primary partition.
- For Linux users, you can check drive capacity using terminal commands like "du" or "df" or by using the GParted tool, which is similar to Windows' Disk Management tool.
Modern storage drives are extremely reliable and fast; that's no news. However, if you're not careful when buying yours, the list of problems waiting for you is quite long, especially if you end up buying a fake drive. Apart from slow data transfer speeds and reliability issues, a fake drive can also fake its storage capacity.
This means that while the drive might be labeled as having 1 TB of storage, you might only get a fraction of that space. Fortunately, there are tons of ways to test drive capacity, regardless of the operating system you use.
How to Check Drive Capacity on Windows
Based on how the drive you're using might be displaying a fake capacity, you can either use the Disk Management tool to check the actual drive capacity or erase the primary partition and rewrite it to reveal the true capacity.
Detecting Drive Capacity Using Disk Management
For some drives, the actual capacity can show up in the Disk Management tool itself if it isn't partitioned properly.
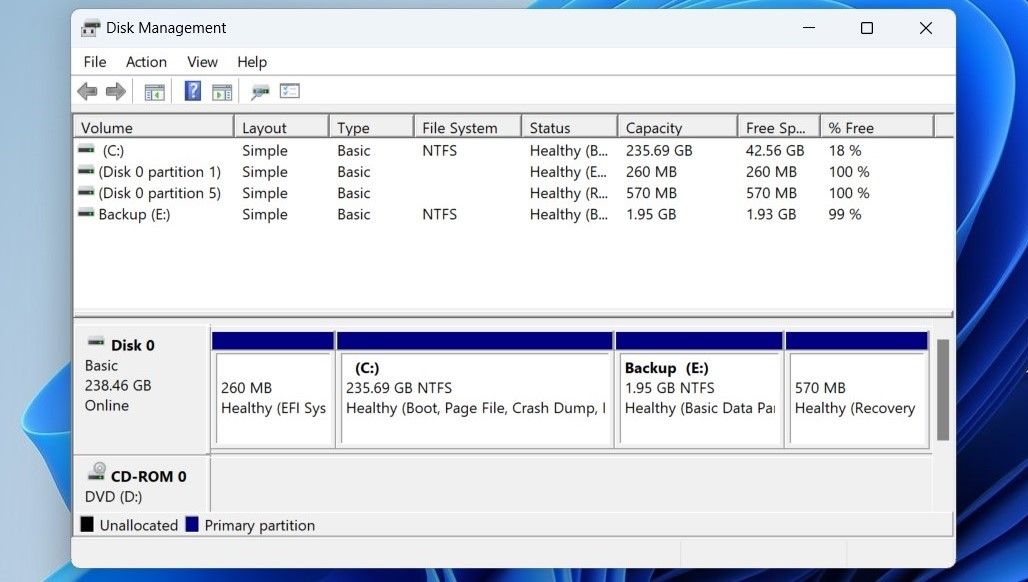
- Press Windows Key + X to open the quick action menu and select Disk Management.
- Select your drive from the list of volumes and make sure that the primary partition is the correct size. Additionally, if you see any unallocated spaces, you can extend the primary volume to gain back the unused capacity.
Detecting Drive Capacity Using Diskpart
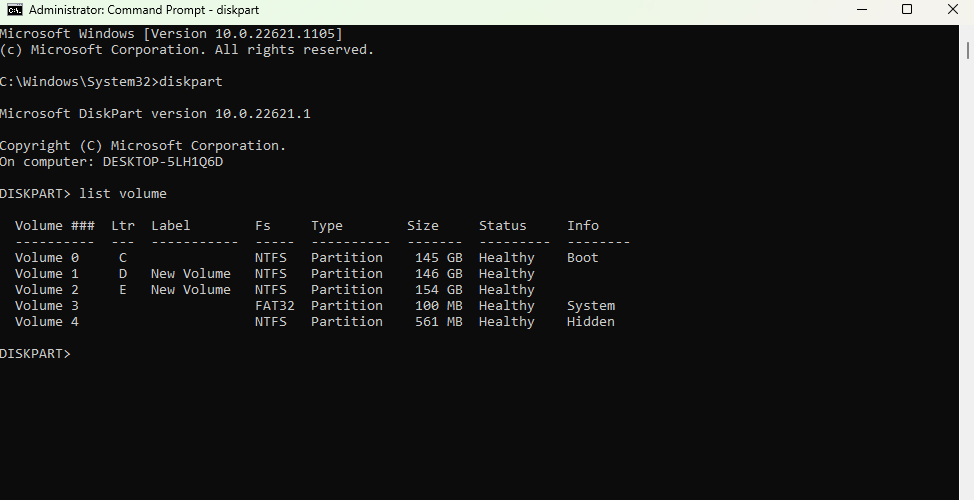
For a more comprehensive check, you can delete the drive's primary partition and rewrite a new one with Windows' Diskpart tool. Here's how.
- Press Windows key + R to open the Run prompt.
- Type diskpart and hit enter.
- Once the tool opens, type list disk and hit enter to show all connected drives.
- Select your drive by typing select disk followed by the number preceding the drive name.
- Type clean and hit enter to remove all partitions on the disk. Do keep in mind that this will delete all data on the drive.
- Type create partition primary to create a new primary partition.
Once you're done, check the drive capacity again in either Windows Explorer or using the Disk Management tool. Of course, sometimes, a well-made fake drive with a programmed controller may be able to sidestep these tests. In such situations, we recommend trying out the third-party tools mentioned below.
How to Check Drive Capacity on Linux
When working with Linux or Linux-based systems, you can use the df and du terminal commands to show the data blocks allocated to an entire file system or just the data blocks allocated to a particular file. Additionally, you can also use the GParted tool—the Linux equivalent to Windows' Disk Management tool.
Detecting Drive Capacity Using Terminal
If you're using the terminal, checking drive capacity is a rather easy task. Simply open a terminal and run the following command.
du -H
Keep in mind that the -H flag shows capacity in 1,000 bytes instead of 1,024 bytes. It's better to use this as SSD manufacturers, even fake ones, consider 1 kilobyte as 1,000 bytes instead of 1,024 bytes—the correct measure.
Alternatively, you can also use the df command as follows.
df -h
This will show all connected drives and their respective capacities, mounting points, and percentage of capacity used. Most drives with fake capacities will show disparities between the total capacity and the percentage of capacity used.
Detecting Drive Capacity Using GParted
Checking drive capacity using GParted is very similar to how you'd use the Disk Management Tool in Windows. If you don't have GParted installed, run the following command in a terminal window.
sudo apt install gparted
Once installed, open GParted by either running the gparted command in the terminal or via your Linux OS' app drawer, and you'll see a list of all attached drives, as well as their respective partitions and capacities.
Checking Drive Capacity on macOS
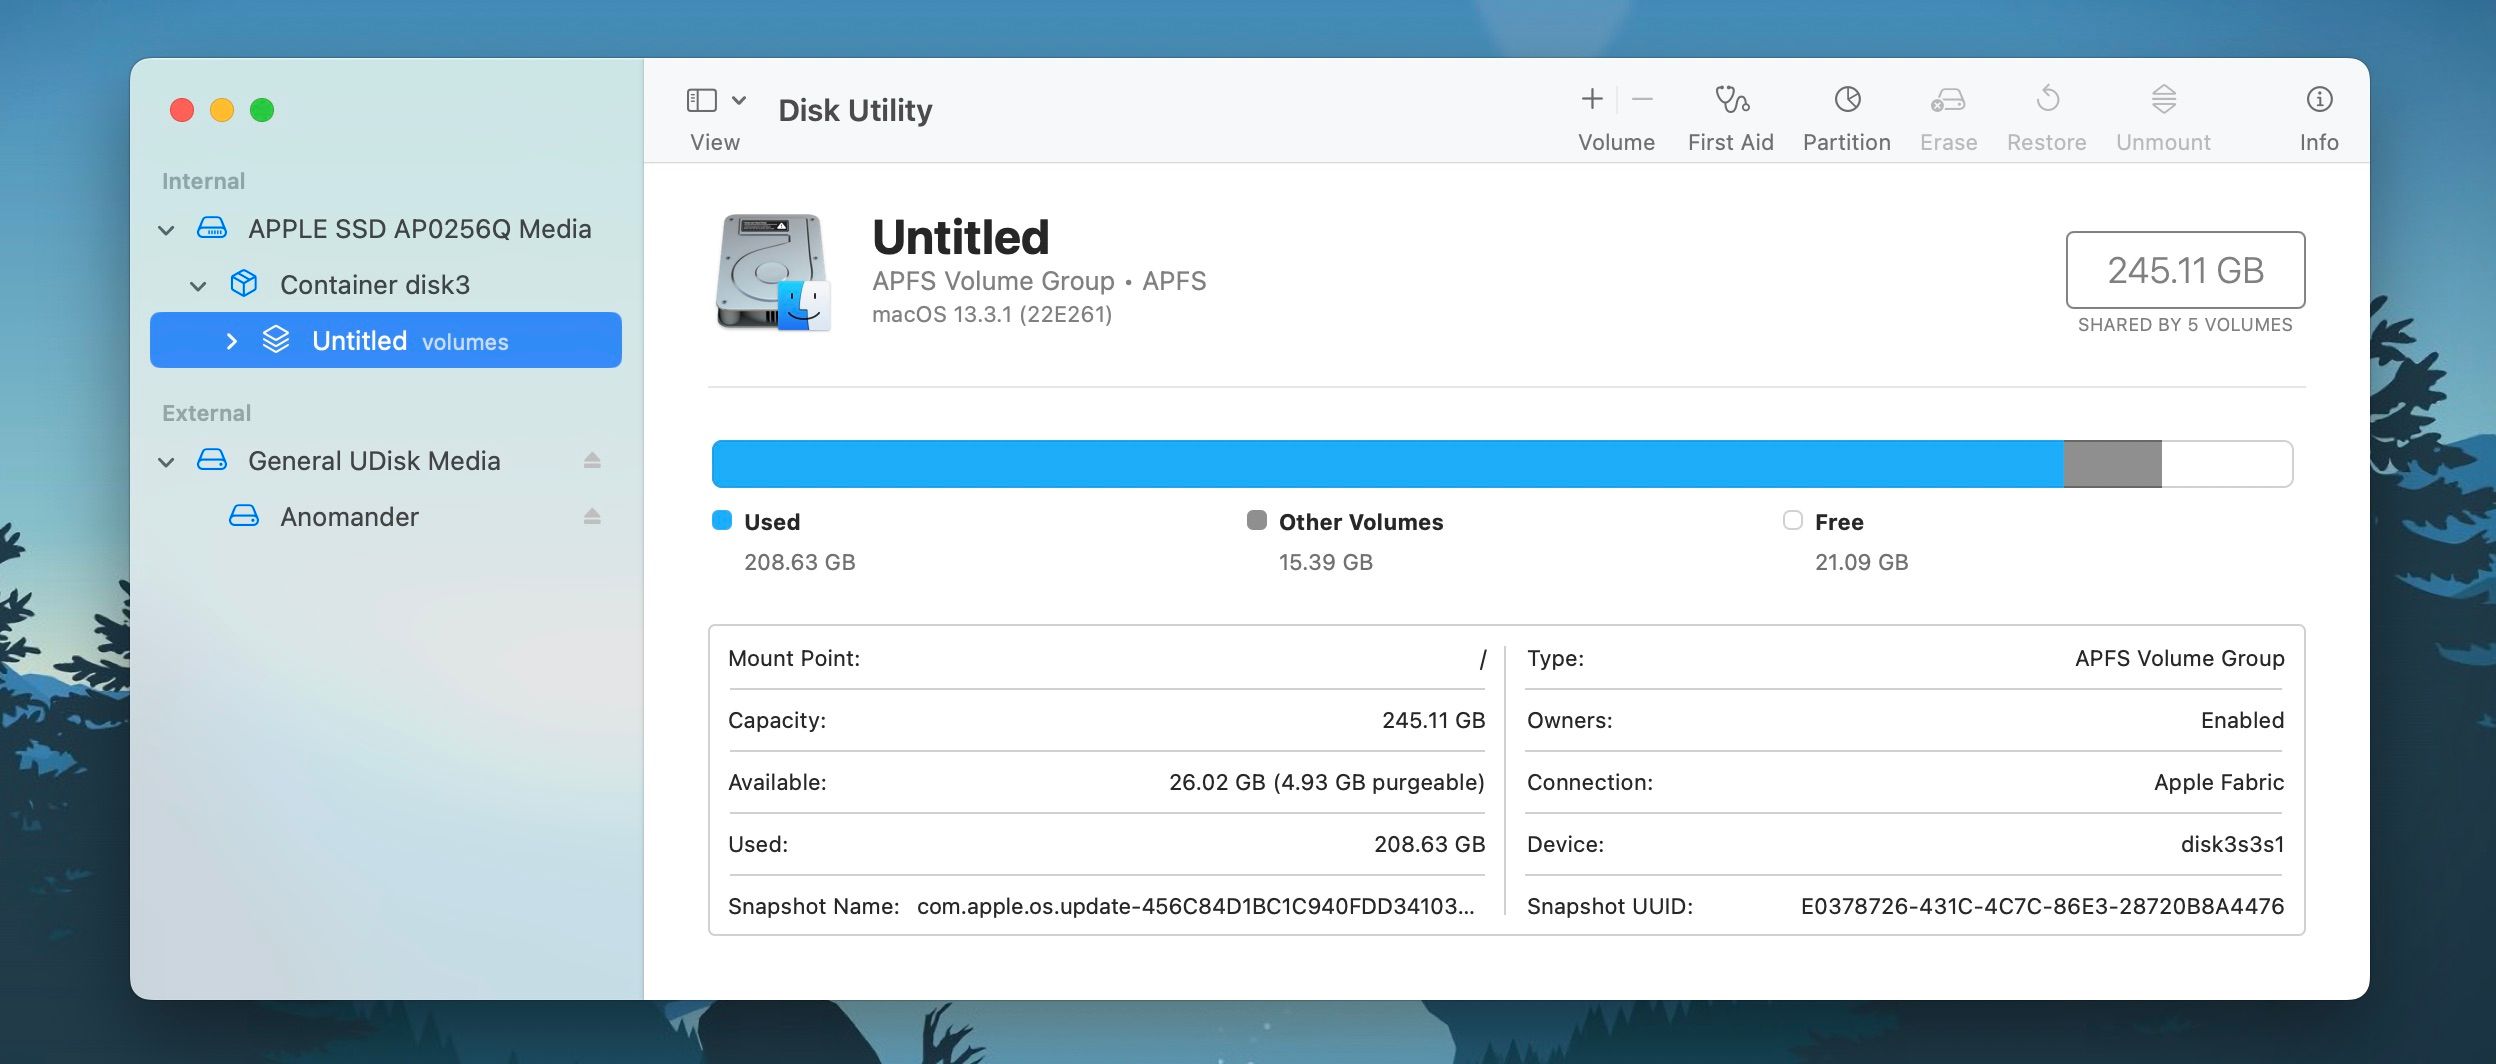
If you're using a Mac, the best built-in tool to check drive capacities is the Disk Utility, which comes with macOS. Follow these steps to open the Disk Utility and check your drive's capacity.
- Open the Finder app on your Mac.
- Click the Applications tab, followed by Utilities.
- Click Disk Utility to open the tool.
Once open, you'll be able to see available space on each drive as well as the name and manufacturer details of said drive. Any disparities here will clearly indicate whether or not the drive is fake. Alternatively, we have already covered six ways to check how much storage your Mac has in the past.
Third-Party Tools to Test Drive Capacity
Some fake drives have controllers that are programmed to show the device they're connected to a fake capacity. In such cases, you won't be able to detect whether a drive actually has the labeled capacity or not simply by clearing out partitions or looking up the drive structure in your OS' disk management tool.
Hence the need for third-party programs. These programs run benchmarks and capacity tests that involve filling the drive with data and then checking its validity to make sure that the drive has the labeled capacity and that it doesn't run into any other issues when reading or writing data. Other than external drives, these programs can also help you spot fake SSDs and prevent data loss.
1. ValiDrive (Windows)
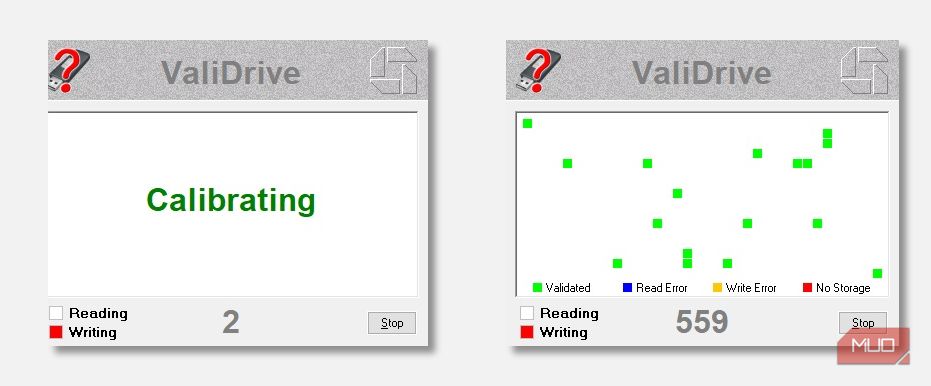
ValiDrive is a compact and lightweight app that can "spot-check any USB mass storage drive for fraudulently missing storage." This means that while you can't use the program to test internal drives, you can test USB drives or even internal drives connected over USB.
The program runs a data-preserving, 576-region spot check to test read/write capabilities as well as the true size of the connected drive. It's also available for free, meaning you won't have to worry about licenses or anything of the sort.
2. AIDA64 (Windows)
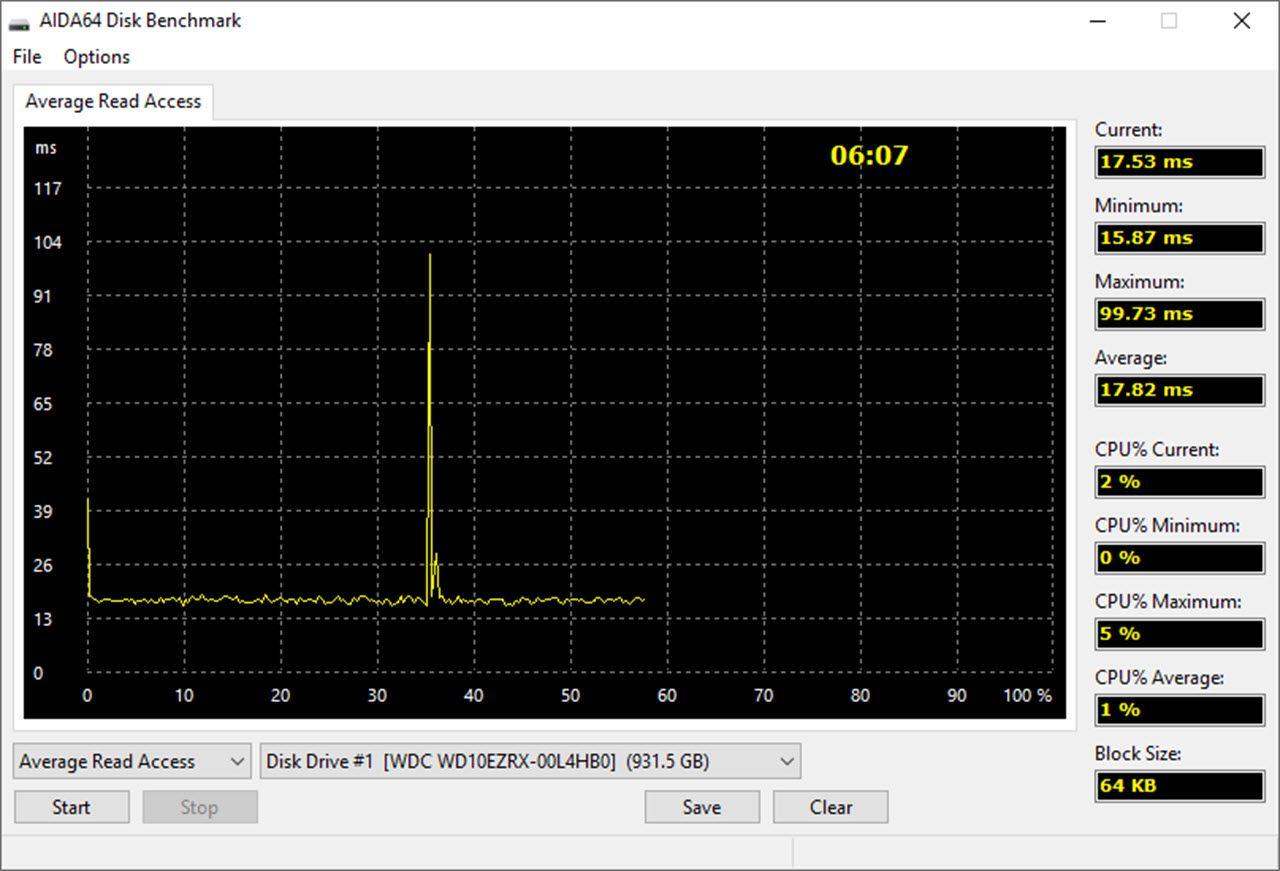
If you'd like to conduct more in-depth tests, AIDA64 is the way to go. Although this is a paid program that you can get for $59.95 for a yearly license (for AIDA64 Extreme), it lets you do a lot more than just test-drive capacities.
AIDA64's capabilities include multiple benchmark tests for just about every piece of hardware essential to running your Windows PC, as well as any installed programs. As for its drive testing capabilities, you can run read/write or linear verify tests to check a drive's read/write capabilities and true capacity, respectively.
3. DriveDx (macOS)
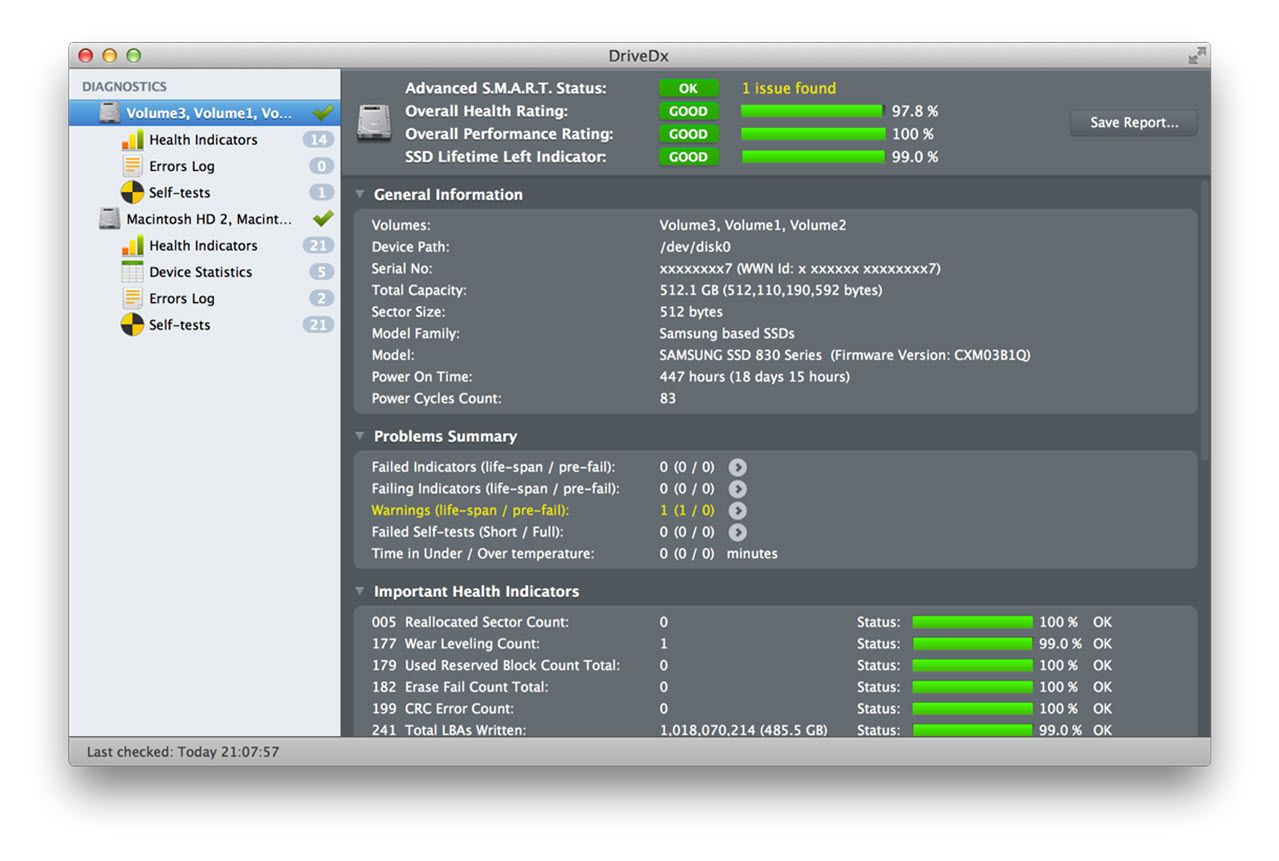
DriveDx is a macOS disk testing utility that can run advanced tests on your HDD and SSDs, including drive health diagnostics, drive failing detection, real-time health monitoring, and self-tests, and even has an early warning system that informs the user of a drive's deviation from its normal state of attributes.
You can try the program out for free, but a personal license will run you $19.99 and let you use the tool on three computers. A family license will cost you $39.99 and allows use on up to six computers. As for commercial licenses, prices start at $49.99 and go up to $9,999.99.
4. GSmartControl (Windows/Linux/macOS)
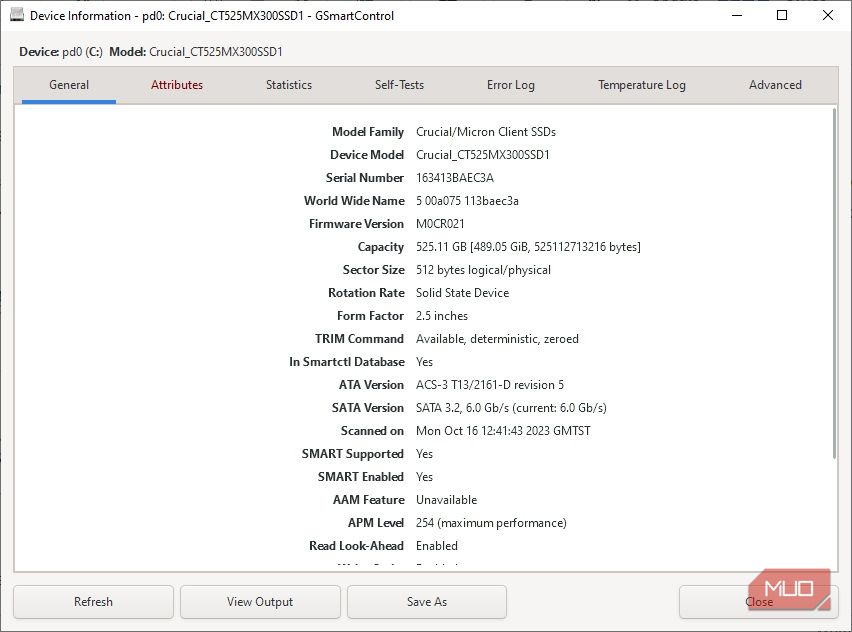
GSmartControl is an open-source drive health and reliability checking tool that can reveal a lot of information about your internal HDD or SSD. The program is available for Windows, Linux, and macOS alike and has a bunch of features, including automatic reports of any anomalies, SMART support with self-tests, and showing drive identity information, including attributes, device statistics, capabilities, and, of course, capacity.
Getting the Right Drive Is Crucial
Using the right drive is crucial to your computer's user experience. If you end up using fake drives, not only do you run the risk of data loss and reliability issues, but the fake drive capacity on a lot of these drives can trick unsuspecting users into relying on a drive that should ideally be headed for the trash can.
Luckily, Windows, Linux, and macOS all have built-in tools that can show basic information and capacities of drives, allowing users to detect fraudulent drives. If that's not enough, there are tons of third-party tools for every OS in the market that can help you determine a drive's real capacity.

