django-allauth is a Django package that lets you build an authentication system for your Django apps quickly and easily. It has built-in templates to let you focus on other important parts of your app.
Although the built-in templates are helpful, you will want to change them because they don’t have the best UI.
How to Install and Configure django-allauth
By following a few straightforward steps, you can seamlessly install django-allauth into your Django project.
- You can install django-allauth package by using the Pip package manager:
pip install django-allauth - In your project's settings file, add these apps to your installed apps:
 INSTALLED_APPS = [

    """
    Add your other apps here
    """

    # Djang-allauth configuration apps
    'django.contrib.sites',
    'allauth',
    'allauth.account',
    'allauth.socialaccount', # add this if you want to enable social authentication
] - Add authentication backends to your settings file:
 AUTHENTICATION_BACKENDS = [
    'django.contrib.auth.backends.ModelBackend',
    'allauth.account.auth_backends.AuthenticationBackend',
] - Add a site ID to your project:
SITE_ID = 1 - Configure the URLs for django-allauth:
 from django.urls import path, include

urlpatterns = [
    # Djang-allauth url pattern
    path('accounts/', include('allauth.urls')),
]
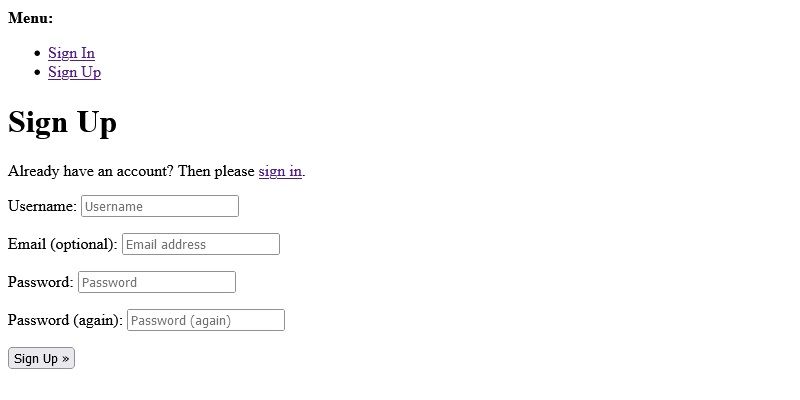
If you do the above configurations correctly, you should see a template like this when you navigate to http://127.0.0.1:8000/accounts/signup/:
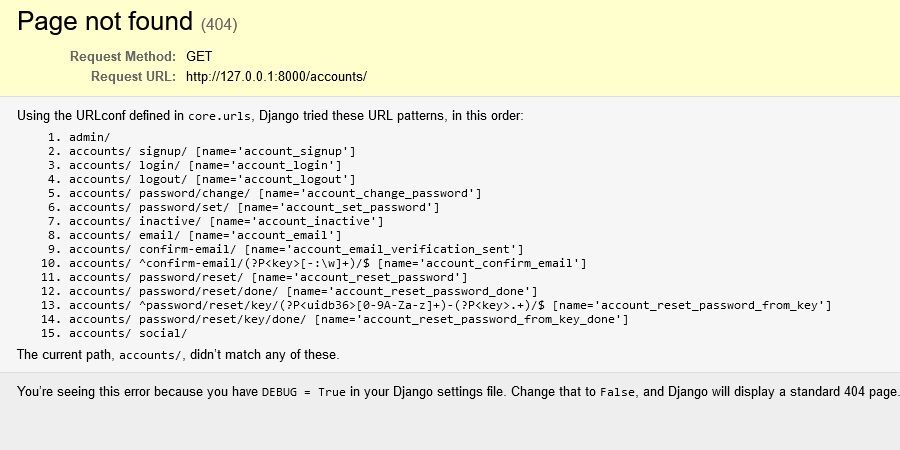
You can see the list of available URLs by navigating to http://127.0.0.1:8000/accounts/ with DEBUG=True in your settings file.
How to Override the Login Template in django-allauth
First, you need to configure your templates folder if you have not done so. Open your settings file and navigate to the TEMPLATES list. Inside it, locate the DIRS list, and modify it like this:
'DIRS': [BASE_DIR/'templates'],
Ensure you have a templates folder in the root directory of your project. You can override the default login template in django-allauth by following these next steps.
Step 1: Create Your Template Files
In your templates folder, create a new folder called account to hold the templates related to django-allauth.
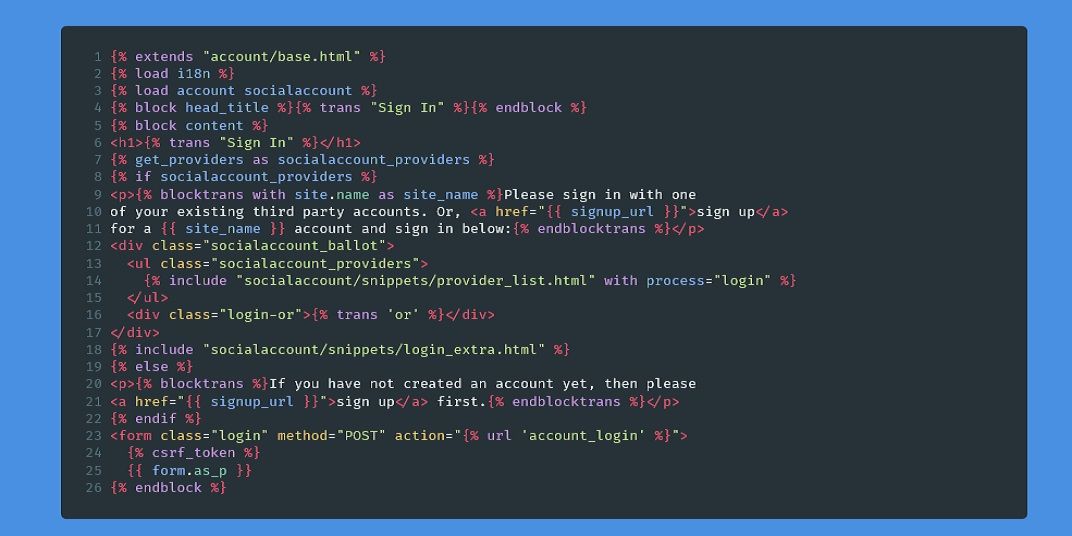
The registration and login templates should be signup.html and login.html respectively. You can determine the correct template name by opening your Python virtual environment and navigating to Lib > site-packages > allauth > templates > account folder to find the templates. You should go through the code to understand how the templates work. For instance, the login template has this code in it:
Step 2: Add HTML Code to Your Template Files
After creating your files, you should add the custom HTML code for your template. For instance, to override the login template above, you might want to copy everything from the {% else %} block, which contains the form and submission button, and add it to your custom template. Here's an example:
 {% extends 'base.html' %}
{% block content %}
<p>If you have not created an account yet, then please
    <a href="{{ signup_url }}">sign up</a> first.</p>

    <form class="login" method="POST" action="{% url 'account_login' %}">
      {% csrf_token %}
      {{ form.as_p }}
      {% if redirect_field_value %}
      <input type="hidden" name="{{ redirect_field_name }}" value="{{ redirect_field_value }}" />
      {% endif %}
      <a class="button secondaryAction" href="{% url 'account_reset_password' %}">Forgot password?</a>
      <button class="primaryAction" type="submit">SIgn in</button>
    </form>
    {% endblock content %}
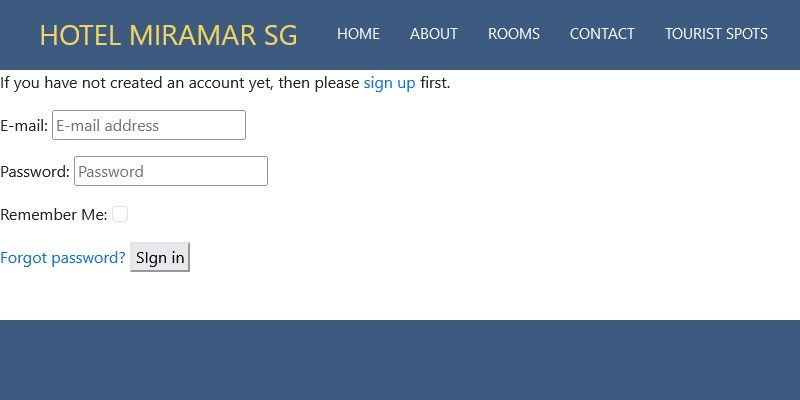
The code above uses Django's template inheritance to inherit features from the base.html template. Ensure you remove unnecessary tags such as the {% blocktrans %} tag. If you have done this, your login page should be similar to this:
The header and footer in the above image will be different from yours.
Step 3: Add Custom Styles to Your Form
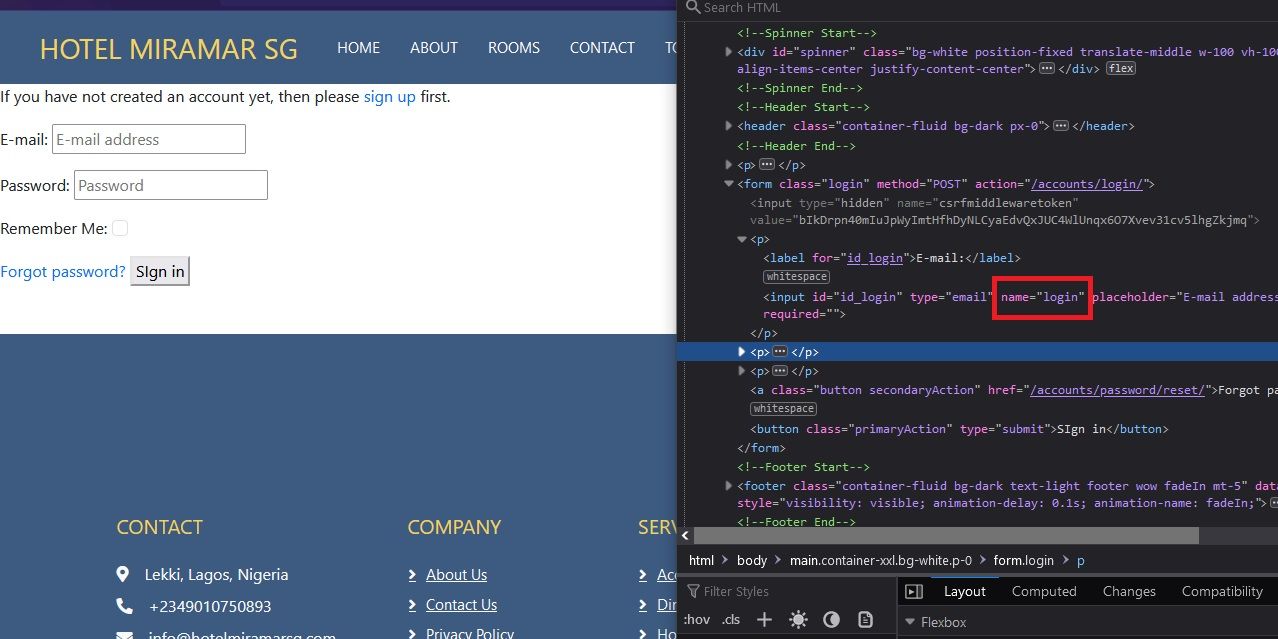
In the previous step, the login form is rendered as a paragraph using the {{ form.as_p }} tag. To add styles to your form, you need to know the value of the name attribute associated with each input field.
You can inspect your page to get the values you need.
The image above shows the name attribute associated with the email field of the form.
Now, you can add the form fields individually in your project. For instance, you can add the email field like this:
 {{ form.login }}
<label for="{{form.login.id_for_label}}">Email</label>
{{ form.login.errors|safe }}
You can use Bootstrap with your Django project to easily style your form. Here's an example:
 <div class="form-floating form-group">
 {{ form.login }}
 <label for="{{form.login.id_for_label}}">Email</label>
 {{ form.login.errors|safe }}
</div>
The above code adds Bootstrap form classes to the form. Now, you can add the other fields you need and style them to your preference. If you don't enjoy using Bootstrap for styling, django-crispy-forms is an alternative to styling your forms. The example below uses Bootstrap for styling.
 <div class="container d-flex justify-content-center align-items-center vh-100">
    <form method="post" class="login" id="signup_form" action="{% url 'account_login' %}">
        <div class="text-center mb-4">
            <h1 class="h3 mb-3 font-weight-normal">Sign in</h1>
        </div>
        {{ form.non_field_errors | safe }}
        {% csrf_token %}
        <div class="row g-3">
            <div class="col-12">
                <div class="form-floating form-group">
                    {{ form.login }}
                    <label for="{{form.login.id_for_label}}">Email</label>
                    {{ form.login.errors|safe }}
                </div>
            </div>
            <div class="col-12">
                <div class="form-floating form-group my-3">
                    {{ form.password }}
                    <label for="{{form.password.id_for_label}}">Password</label>
                    {{ form.password.errors|safe }}
                </div>
            </div>
            <div class="col-12">
                <div class="form-check">
                    <label for="{{form.remember.id_for_label}}" class="form-check-label">Remember me</label>
                    {{ form.remember }}
                </div>
            </div>
            <div class="col-6">
                {% if redirect_field_value %}
                <input type="hidden" name="{{ redirect_field_name }}" value="{{ redirect_field_value }}" />
                {% endif %}
                <button class="btn btn-primary w-100 py-3 bg-accent" type="submit">Sign in</button>
                <a class="button secondaryAction text-accent" href="{% url 'account_reset_password' %}">Forgot
                    Password?</a>
            </div>
        </div>
    </form>
</div>
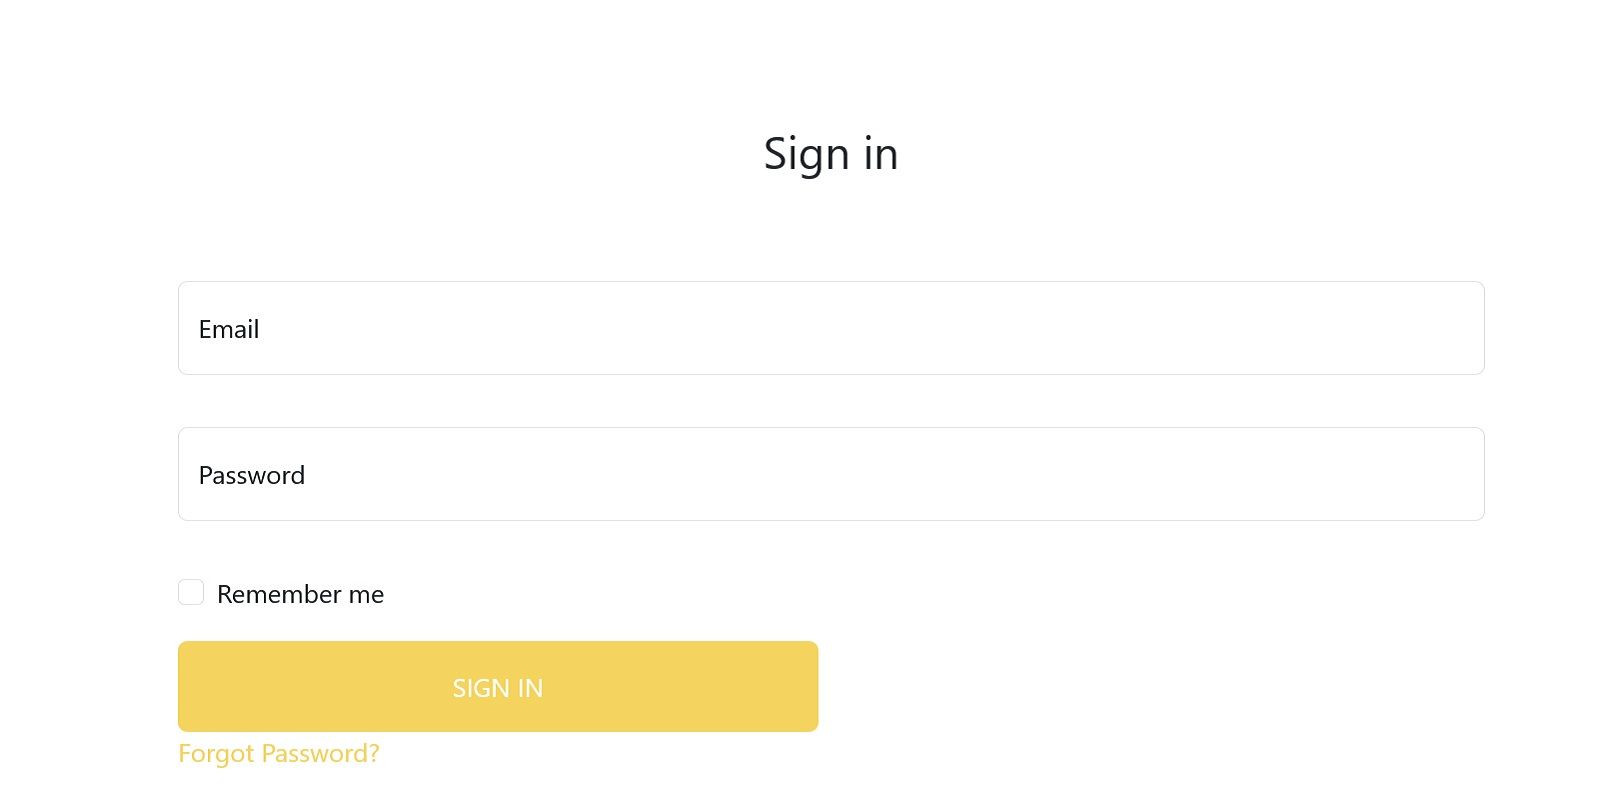
The code block above will produce output similar to the following image:
You can learn more about forms in django-allauth by reading the official documentation.
Override Any Template in django-allauth
django-allauth contains many default templates that you can override. With the steps in this guide, you can override any template in django-allauth. You should consider using this package to handle your authentication system, so you can focus on building the other important features of your application.


