When using a backend technology or framework like Django, Laravel, or Node.js to write REST APIs, you need to have an additional frontend skill using frameworks like React, Angular, and Vue to consume the API endpoints. But that's not always the case, you can consume the APIs in Django itself using Django templates.
Setting Up a Django Project and API Endpoints
The first step will be to create a project directory. Open your terminal and create a directory for your project.
 mkdir payment_wallet_project
cd payment_wallet_project
For this tutorial, you will build APIs for a payment wallet.
The full source code is available in a GitHub repository.
Start by creating a virtual environment. In this case, you will use the Pipenv library.
pipenv install django djangorestframework
This command installs the necessary libraries as well as creates a virtual environment.
Activate the virtual environment using the command below:
pipenv shell
Create a new Django project named PayApp.
django-admin startproject PayApp .
Using the full stop (.) at the end of the django-admin command ensures the project avoids creating a duplicate directory of the project directory.
Create a new Django app within the project directory.
python manage.py startapp wallet
Now, proceed to build your API application using the steps below.
Creating a Payment Wallet REST API
Open the wallet/models.py file and define the wallet and transaction models.
 from django.db import models

class Wallet(models.Model):
   user = models.CharField(max_length=100)
   balance = models.DecimalField(max_digits=10, decimal_places=2)
   date_created = models.DateTimeField(auto_now_add=True)
   date_modified = models.DateTimeField(auto_now=True)

   def __str__(self):
       return self.user

class Transaction(models.Model):
   wallet = models.ForeignKey(Wallet, on_delete=models.CASCADE)
   amount = models.DecimalField(max_digits=10, decimal_places=2)
   timestamp = models.DateTimeField(auto_now_add=True)
In the wallet directory, create a new file serializers.py, and write the wallet and transaction model serializers.
 from rest_framework import serializers
from .models import Wallet, Transaction

class WalletSerializer(serializers.ModelSerializer):
   class Meta:
       model = Wallet
       fields = '__all__'
class TransactionSerializer(serializers.ModelSerializer):
   class Meta:
       model = Transaction
       fields = '__all__'
The serializers consider all the fields in the wallet and transaction models.
In wallet/views.py, write the views for handling the logic of implementing the wallet functionality. This includes the deposit and withdrawal abilities.
 from rest_framework import generics, status
from rest_framework.response import Response
from rest_framework.decorators import action
from decimal import Decimal
from .models import Wallet, Transaction
from .serializers import WalletSerializer, TransactionSerializer

class WalletViewSet(viewsets.ModelViewSet):
   queryset = Wallet.objects.all()
   serializer_class = WalletSerializer

 @action(detail=True, methods=['post'])
   def deposit(self, request, pk=None):
       wallet = self.get_object()
       amount = Decimal(request.data['amount'])
       wallet.balance += amount
       wallet.save()
       serializer = WalletSerializer(wallet)
       return Response(serializer.data)


 @action(detail=True, methods=['post'])
   def withdraw(self, request, pk=None):
       wallet = self.get_object()
       amount = Decimal(request.data['amount'])
       if wallet.balance < amount:
           return Response({'error': 'Insufficient funds'},
                           status=status.HTTP_400_BAD_REQUEST)
       wallet.balance -= amount
       wallet.save()
       serializer = WalletSerializer(wallet)
       return Response(serializer.data)'

class TransactionViewSet(viewsets.ModelViewSet):
   queryset = Transaction.objects.all()
   Serializer_class = TransactionSerializer
Next, define the URL routing for the API by creating a wallet/urls.py file:
 from django.urls import path, include
from rest_framework.routers import DefaultRouter
from .views import WalletViewSet, TransactionViewSet, wallet_view

router = DefaultRouter()
router.register(r'wallets', WalletViewSet, basename='wallets')
router.register(r'transactions', TransactionViewSet, basename='transactions')

urlpatterns = [
   path('api/', include(router.urls)),
   path('wallets/<int:pk>/deposit/', WalletViewSet.as_view({'post': 'deposit'}),
        name='wallet-deposit'),
   path('wallets/<int:pk>/withdraw/', WalletViewSet.as_view({'post': 'withdraw'}),
        name='wallet-withdraw'),

]
In your project’s urls.py, include the app’s URLs:
 from django.contrib import admin
from django.urls import path, include

urlpatterns = [
   path('admin/', admin.site.urls),
   path('', include('wallet.urls')),
]
In the PayApp/settings.py file, add the wallet and rest_framwork apps to the INSTALLED_APPS list.
 INSTALLED_APPS = [

"django.contrib.admin",
"django.contrib.auth",
"django.contrib.contenttypes",
"django.contrib.sessions",
"django.contrib.messages",
"django.contrib.staticfiles",

"rest_framework", # new
"wallet", # new

]
This will register the wallet and rest_framework apps to the Django project application.
Consuming the API With Django Templates
Now, you'll use the Django templates to create a simple frontend for consuming the API. Create a wallet.html file in the wallet/templates/ directory and add the HTML code below.
 <!DOCTYPE html>
<html lang="en">
<head>
   <meta charset="UTF-8">
   <meta name="viewport" content="width=device-width, initial-scale=1">
   <title>Wallet</title>
   <link rel="stylesheet" href="https://stackpath.bootstrapcdn.com/bootstrap/4.3.1/
   css/bootstrap.min.css">
</head>
<body>
   <div class="container">
       <h1>Wallets</h1>
       <table class="table">
           <thead>
               <tr>
                   <th>User</th>
                   <th>Balance</th>
                   <th>Actions</th>
               </tr>
           </thead>
           <tbody>
               <tr>
                   <td>{{ wallet.user }}</td>
                   <td id="balance">{{ wallet.balance }}</td>
                   <td>
                       <div id="loading-indicator" class="d-none">
                           <div class="spinner-border text-primary" role="status">
                               <span class="sr-only">Loading...</span>
                           </div>
                           <p>Please wait while the deposit is being processed.</p>
                       </div>
                       <form id="deposit-form" method="post">
                           {% csrf_token %}
                           <input type="number" name="amount" step="0.01" min="0" required>
                           <button type="submit" class="btn btn-success">Deposit</button>
                       </form>
                       <form method="post" id="withdraw-form">
                           {% csrf_token %}
                           <input type="number" name="amount" step="0.01" min="0" required>
                           <button type="submit" class="btn btn-danger">Withdraw</button>
                       </form>
                   </td>
               </tr>
           </tbody>
       </table>
   </div>

</body>
</html>
The HTML file renders the deposit and withdrawal APIs in a beautiful user interface designed using Bootstrap.
User Interaction With Forms
In the HTML file, create a script tag and add the following code to the deposit form submission event listener.
 <script>
document.querySelector('#deposit-form').addEventListener('submit', function (event) {
           event.preventDefault();
           document.querySelector('#loading-indicator').classList.remove('d-none');
           const amount = parseFloat(document.querySelector("#deposit-form " +
               "input[name='amount']").value);
           fetch("{% url 'wallet-deposit' wallet.id %}", {
               method: "POST",
               headers: {
                   "Content-Type": "application/json",
                   "X-CSRFToken": getCookie("csrftoken")
               },
               body: JSON.stringify({ amount: amount })
           })
               .then(response => response.json())
               .then(data => {
                   console.log(data);
                   if (data.balance !== undefined) {
                       // Convert to number and format
                       const newBalance = parseFloat(data.balance).toFixed(2);
                       document.querySelector("#balance").textContent = newBalance;
                       document.querySelector('#loading-indicator').classList.
                       add('d-none');
                   }
               })
               .catch(error => {
                   console.error("Error:", error);
                   document.querySelector('#loading-indicator')
                       .classList.add('d-none');
               });
       });
</script>
Next, add the event listener for the withdrawal form submission using the code below:
 <script>
document.querySelector('#withdraw-form').addEventListener('submit', function (event) {
   event.preventDefault();
   document.querySelector('#loading-indicator').classList.remove('d-none');
   const amount = parseFloat(document.querySelector("#withdraw-form " +
       "input[name='amount']").value);
   fetch("{% url 'wallet-withdraw' wallet.id %}", {
       method: "POST",
       headers: {
           "Content-Type": "application/json",
           "X-CSRFToken": getCookie("csrftoken")
       },
       body: JSON.stringify({ amount: amount })
   })
       .then(response => response.json())
       .then(data => {
           console.log(data);
           if (data.balance !== undefined) { // Change to 'balance' for withdrawal
               const newBalance = parseFloat(data.balance).toFixed(2);
               document.querySelector("#balance").textContent = newBalance;
               document.querySelector('#loading-indicator').classList.add('d-none');
           }
       })
       .catch(error => {
           console.error("Error:", error);
           document.querySelector('#loading-indicator').classList.add('d-none');
       });
});
</script>
The event listener is responsible for handling the deposit and withdrawal (#deposit-form and #withdraw-form) form submissions.
The URL for the fetch request is for matching the URLs for deposit and withdrawal actions.
The JSON responses for the deposits and withdrawals are then parsed to get the updated balance (data.balance). They are then formatted and displayed on the page.
Next, in the wallet/views.py, add the following update to render the wallet.html page:
 from django.shortcuts import render

def wallet_view(request):
   # Retrieve the wallet to display
   wallet = Wallet.objects.first()
   return render(request, 'wallet.html', {'wallet': wallet})
In this example, you will use the first() query method to select a single user’s wallet for demonstration purposes.
Update the urls.py file by adding a path to the wallet_view as follows:
 from .views import wallet_view

urlpatterns = [
   ...
     path('home/', wallet_view, name='wallet-page'),
]
Access the wallet page from the URL: http://127.0.0.1:8000/home/.
With everything set up and working as expected, execute the makemigrations and migrate commands. Finally, run the application:
 python manage.py makemigrations
python manage.py migrate

python manage.py runserver
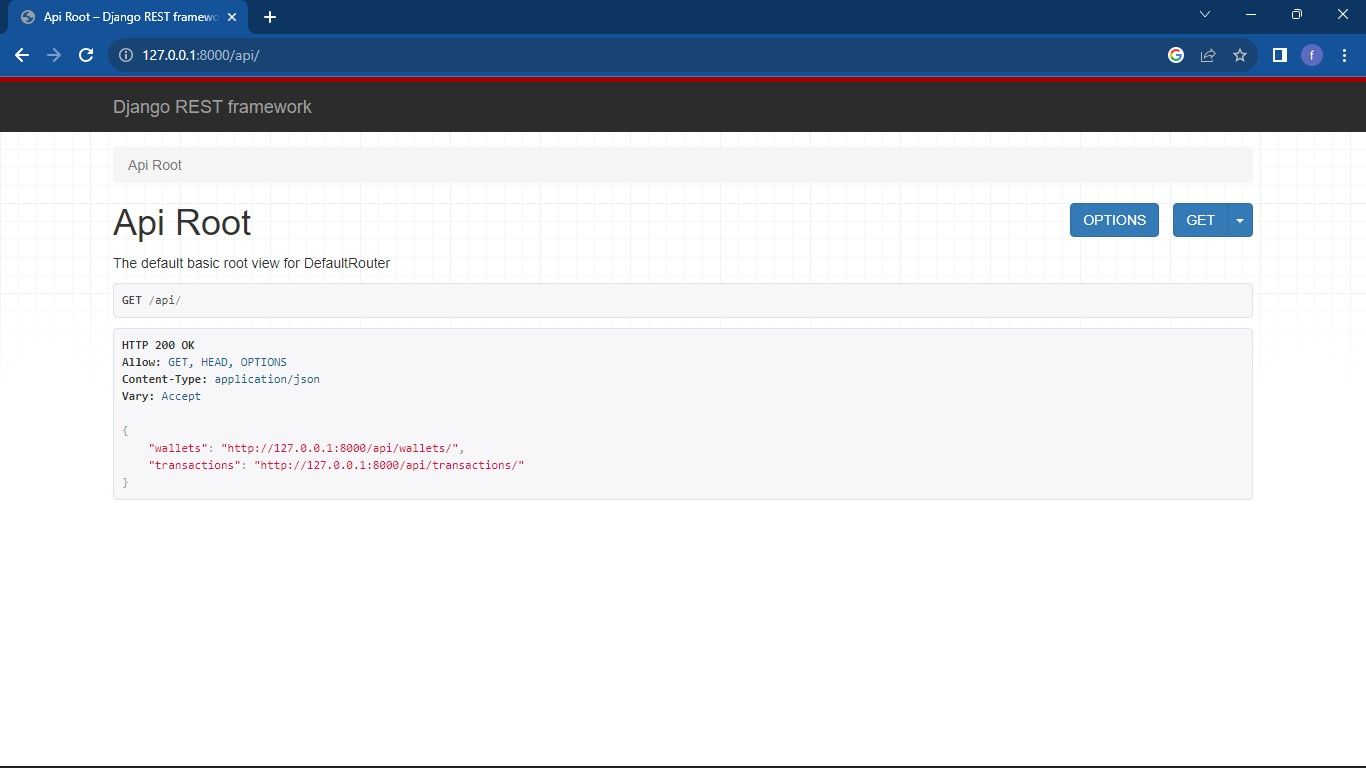
To access the API endpoints, navigate to http://127.0.0.1:8000/api/.
Expected output:
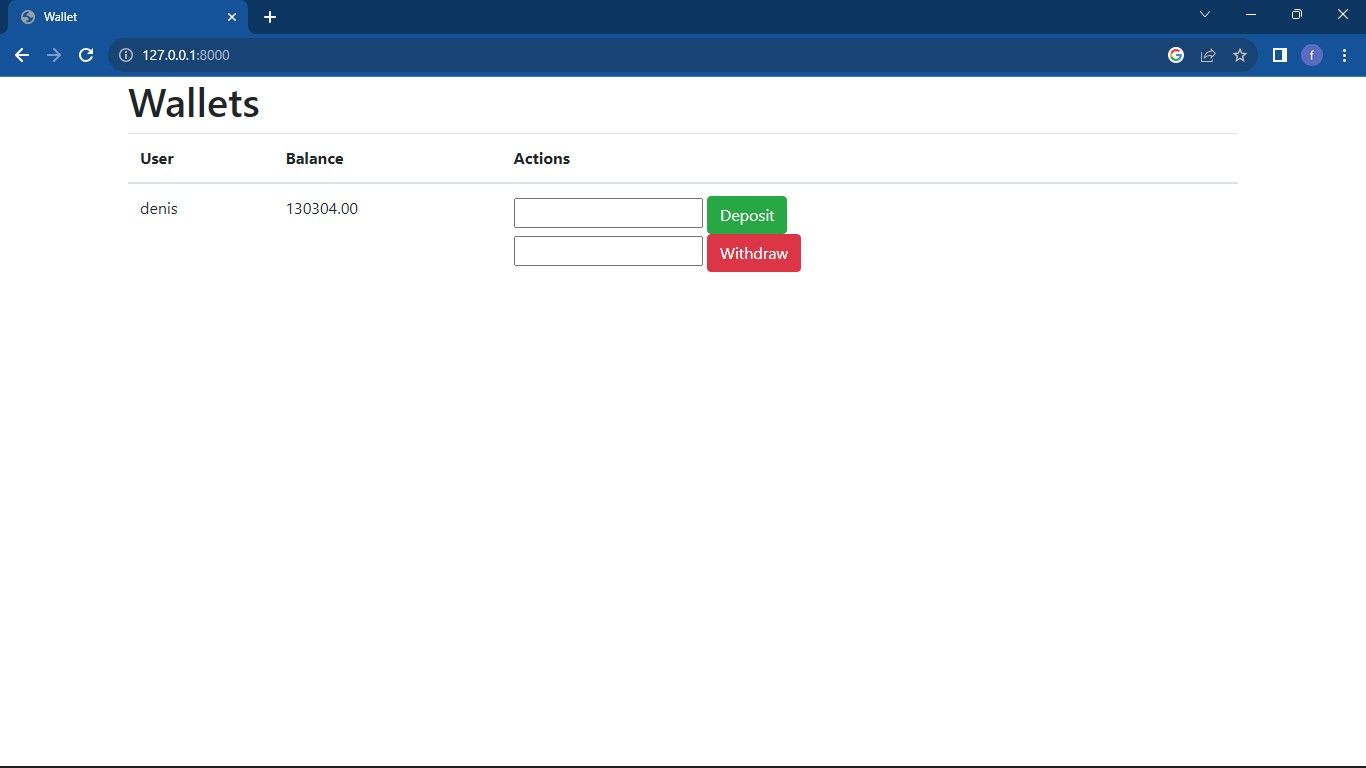
Navigate to the localhost to interact with the wallet.
Expected output:
The wallet shows the balance and gives you the option to either deposit or withdraw.
Understanding Django Templates and Their Role in API Consumption
Despite being excellent for presenting static content, Django templates have certain restrictions when using APIs:
- Limited flexibility: Django templates are less flexible than those created using Jinja2 or Twig since they are used for displaying specified structures. For instance, you would have to manually parse the JSON and insert the data into the template if you needed to consume an API that returned JSON data. This can be challenging, mainly if the API delivers intricate data structures.
- No support for asynchronous requests: Django templates natively lack the ability to handle asynchronous requests. Templates still need synchronous processing even though the async/await contemporary web frameworks like Flask and Django support syntax. This means you would have to wait for all the requests to finish before producing the template if you needed to acquire data from numerous sources before rendering a page.
- Limited error handling: Errors may occur regularly when using APIs. There are no built-in mechanisms for graceful error handling in Django templates. You would need to catch the exception and manage it within the template itself if an API call fails, which could result in clumsy and challenging-to-maintain code.
Build Scalable Applications
By providing a way to separate the presentation layer from the business logic, Django templates allow developers to focus on creating reusable and maintainable code. However, due to their limitations, Django templates may not be the best choice when consuming APIs at scale. Client frameworks like React are still useful in building scalable applications.


