Django Rest Framework (DRF) is a Django framework that offers support for building REST APIs. Like Django, DRF allows you to build your API views with function-based or class-based views.
Although class-based views can be difficult to work with at first, they offer benefits like better code structure, reusability, inheritance, and conciseness.
Create a Recipe Manager API With Django REST Framework
A recipe manager app is a great way to learn about class-based views in DRF. Features such as adding, deleting, and editing recipes will help you understand how to implement CRUD (Create, Read, Update, Delete) operations. The following steps will teach you how to create a CRUD API.
You can find the code for this guide on GitHub.
Step 1: Install Django REST Framework and Configure Your Project
- Create a virtual environment for your project and install the following dependencies:
pip install django djangorestframework - Create a Django project called core with the following command:
django-admin startproject core . - Create an app called recipe_manager:
python manage.py startapp recipe_manager - Open your core/settings.py file and navigate to the INSTALLED_APPS list to register your apps:
 INSTALLED_APPS = [
    # custom apps
    'rest_framework',
    'recipe_manager',
]
Step 2: Create a Model for Your Recipe App
- Open your recipe_manager/models.py file and create a model for your app. Here's a basic example of a recipe model:
 # models.py
from django.db import models

class Recipe(models.Model):
    recipe_name = models.CharField(max_length=255)
    ingredients = models.TextField()
instructions = models.TextField() - Create migrations and migrate your model into the database with this command:
python manage.py makemigrations && python manage.py migrate
Step 3: Create a Serializer for Your App
A serializer is a Django component that helps you convert complex data types, such as your query set, to a format that you can render, like JSON or XML, and vice versa.
To create a serializer, follow these steps:
- Create a file called recipe_manager/serializers.py.
- Import the serializers module as well as the model you want to serialize:
 # serializers.py
from rest_framework import serializers

from .models import Recipe # the model to serialize - In the same file, create a serializer class for your model and define the Meta class in it:
 # serializers.py
class RecipeSerializer(serializers.ModelSerializer):
    class Meta:
        model = Recipe
fields = ('recipe_name', 'ingredients', 'instructions')class Meta:
fields = "__all__"
Step 4: Write a View for the CREATE Operation
You can create class-based views for your app by importing the generic view available in Django. You can read about these views from Django's official documentation. To implement the CREATE operation of CRUD, you should import the CreateAPIView. You should also import your serializer and model:
 # views.py
from rest_framework.generics import CreateAPIView

from .models import Recipe
from .serializers import RecipeSerializer
To implement the CREATE operation, you only need to specify the serializer your view should use. Here's an example:
 # Create view
class RecipeCreateView(CreateAPIView):
    serializer_class = RecipeSerializer
With this setup, you can make POST requests to your app.
Step 5: Write a View for the READ Operation
- To implement the READ operation, import the ListAPIView to your views. This view helps you list out model objects:
 # views.py
from rest_framework.generics import CreateAPIView, ListAPIView - Create a class for your views and specify the serializer and query set to use:
 # List view
class RecipeListView(ListAPIView):
    serializer_class = RecipeSerializer
queryset = Recipe.objects.all() - Create a view to read a specific recipe. To do this, you need the RetrieveAPIView so add it to your list of imports:
 # views.py
from rest_framework.generics import CreateAPIView, ListAPIView, RetrieveAPIView# Retrieve view
class RecipeRetrieveView(RetrieveAPIView):
serializer_class = RecipeSerializer
queryset = Recipe.objects.all()
Step 6: Write Views for the UPDATE and DELETE Operations
To implement the UPDATE and DELETE operations, you need the UpdateAPIView and DestroyAPIView respectively, so import them:
 from rest_framework.generics import (
    ListAPIView,
    CreateAPIView,
    RetrieveAPIView,
    UpdateAPIView, # new
    DestroyAPIView, # new
)
Next, create the views, just as you did before. This time, your views will inherit from the UpdateAPIView and DestroyAPIView, respectively:
 # Update view
class RecipeUpdateView(UpdateAPIView):
    serializer_class = RecipeSerializer
    queryset = Recipe.objects.all()

# Delete view
class RecipeDeleteView(DestroyAPIView):
    serializer_class = RecipeSerializer
    queryset = Recipe.objects.all()
Step 7: Create URLs for Your App
- Add this code to core/urls.py to configure your URLS:
 from django.urls import path, include

urlpatterns = [
    path('api/', include('recipe_manager.urls'))
] - Add the following code to your recipe_manager/urls.py file:
 from django.urls import path
from . import views

urlpatterns = [
    # List view (Read all)
    path('recipes/', views.RecipeListView.as_view(), name='recipe-list'),

    # Create view
    path('recipes/create/', views.RecipeCreateView.as_view(), name='recipe-create'),

    # Retrieve view (Read one)
    path('recipes/<int:pk>/', views.RecipeRetrieveView.as_view(), name='recipe-retrieve'),

    # Update view
    path('recipes/<int:pk>/update/', views.RecipeUpdateView.as_view(), name='recipe-update'),

    # Delete view
    path('recipes/<int:pk>/delete/', views.RecipeDeleteView.as_view(), name='recipe-destroy'),
]
Step 8: Test Your API Endpoints
From your project directory, run the following:
python manage.py runserver
This should start your server, perform some checks, and print a URL you can access it via.
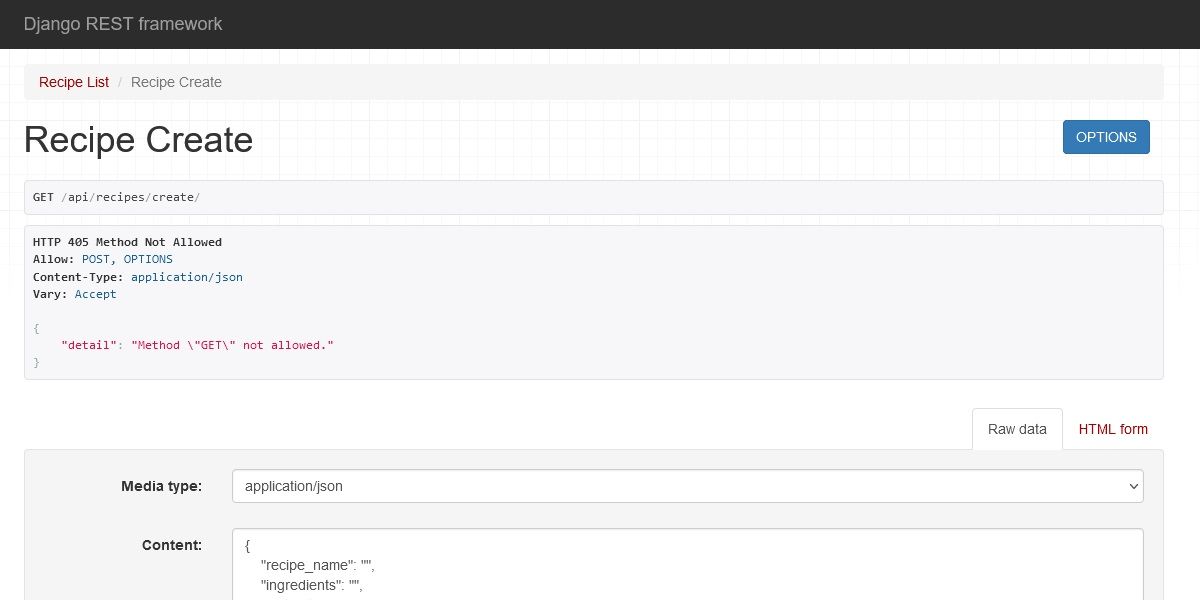
You can now test your API endpoints by navigating to the respective URLs (e.g., /api/recipes/) and sending HTTP request methods for CRUD operations. You should see a default interface like this:
Instead of using your browser, you can test your API with Postman.
Practicing DRY While Creating a CRUD API
DRY (Don't Repeat Yourself) is a programming principle you should adopt to improve the quality of your code.
Although the views written above work well, you can avoid a lot of repetition by using the ListCreateAPIView and the RetrieveUpdateDestroyAPIView generic views.
The ListCreateAPIView combines the ListAPIView and CreateAPIView, while the RetrieveUpdateDestroyAPIView combines the RetrieveAPIView, UpdateAPIView, and the DestroyAPIView.
You can modify your previous views to look like this:
 from rest_framework.generics import ListCreateAPIView, RetrieveUpdateDestroyAPIView

from .models import Recipe
from .serializers import RecipeSerializer

class RecipeListCreateAPIView(ListCreateAPIView):
    serializer_class = RecipeSerializer
    queryset = Recipe.objects.all()

class RecipeRetrieveUpdateDeleteAPIView(RetrieveUpdateDestroyAPIView):
    serializer_class = RecipeSerializer
    queryset = Recipe.objects.all()
This approach reduces the overall amount of code.
You can create URLs for the new views like this:
 from django.urls import path
from .views import RecipeListCreateAPIView, RecipeRetrieveUpdateDeleteAPIView

urlpatterns = [
    # List and Create view
    path('recipes/', RecipeListCreateAPIView.as_view(), name='recipe-list-create'),

    # Retrieve, Update, and Delete view
    path('recipes/<int:pk>/', RecipeRetrieveUpdateDeleteAPIView.as_view(), name='recipe-retrieve-update-destroy'),
]
You can test these endpoints with Postman or any API testing tool you prefer.
Generic Class-Based Views Make Your Work Easier
As seen above, generic class-based views can speed up the process of creating views. Now you only need to inherit the right APIView for your use case.
You should also ensure you adopt good programming practices, so you don't end up writing bad code.


